| (1) |
|
This paper describes how to write a linguistic document in XML using the XLingPaper approach. It is specifically for those who wish to also use the XMLmind XML Editor to key, edit, and process their paper. If you wish to create an XLingPaper document without using the XMLmind XML Editor, please see the regular user documentation. The choice of editor you use to key an XLingPaper document, of course, is up to you.
The XLingPaper package is designed to aid the linguist in writing linguistic documents such as papers, books, theses, and dissertations.
Linguists commonly face three obstacles in formatting papers. First, all examples are numbered in a paper. If during the writing process the author discovers a need to insert an example, then the numbering of all following examples and all references to those examples within the text need to be re-adjusted. This mechanical change can be both time-consuming and prone to error. Similarly, if the author decides to reorder some examples, then the numbering needs to be adjusted appropriately. XLingPaper provides an automatic way to facilitate such numbering and renumbering.
Secondly, linguists cite the work of other researchers using a standard citation format. This format functions essentially as an abbreviation or reference to the full citation entry which appears in the references section of the paper. The burden of maintaining consistency between citation and reference typically falls totally on the author. Many a reader has been disappointed to find a citation to a paper in the body of a paper for which there is no entry in the references section. XLingPaper provides an automatic means for a writer to maintain consistency; all citations in the text must have a corresponding entry in the references. Conversely, XLingPaper will include only those entries in the references section which are cited in the text. This latter characteristic implies that one can maintain one master list of references and merely include it in any given paper. Only those references actually cited in the given paper will appear in the references section.
Thirdly, linguists commonly use a set of abbreviations while glossing examples. They usually include either a list of the abbreviations and their definitions in a footnote, in a special front-matter page, or in a back-matter page. As for citations and references, the burden of maintaining consistency between the abbreviations used in the text and the abbreviations defined in the list typically falls totally on the author. Many a reader has been disappointed to find an abbreviation in a gloss for which there is no corresponding entry in the list of abbreviations. XLingPaper provides an automatic means for a writer to maintain consistency; the author can make it so all abbreviations in the text must have a corresponding entry in the list of abbreviations. Conversely, XLingPaper will include only those abbreviations in the list of abbreviations which are actually used in the text. This latter characteristic implies that one can maintain one master list of abbreviations and merely include it in any given paper. Only those abbreviations actually cited in the given paper will appear in the list of abbreviations. By the way, XLingPaper also creates a hyperlink between the abbreviation in the text and the abbreviation in the list of abbreviations. Thus, a reader can click on the abbreviation and see what it means.
In addition, in some formatting systems such as HTML, headers (i.e., h1, h2, etc.) are not automatically numbered. XLingPaper will automatically number all parts, chapters, and sections. Furthermore, one may create references to parts, chapters, or sections and these will display as hyperlinks to them, using the appropriate number.
Since XLingPaper is in XML, it also can serve as an archiving format.
XLingPaper has several major components:
The front matter contains items like the title, author, date, contents, and abstract.
The sections contain the main body of the paper. The main body can be as large as book parts which contain chapters (which in turn contain sections) or be a series of chapters or just a series of sections.
The back matter contains items like appendices, endnotes, and references.
This section provides an overview of how to use XLingPaper with the XMLmind XML Editor. There are two basic steps involved.
The first consists of entering the appropriate element tags into an XML document. That is, the writer needs to key the correct tags in the file(s) to enable XLingPaper to recognize them. This document describes how one can do this using the XMLmind XML Editor. See the regular user documentation for other ways one can do this.
The second step in using XLingPaper is to process the document file(s) to show the output in some form. Currently there are ways to produce these kinds of outputs:
The XMLmind XML Editor makes it easier to key the elements and also to produce these outputs.
The XMLmind XML Editor[1] is a freely downloadable editor that makes it quite easy to create not only XLingPaper documents, but also XHTML documents, among others. This editor is a structured editor and has at least the following very nice features:
There are two steps in getting the complete package. See http://software.sil.org/xlingpaper/resources/how-to-install/ for details and instructions on getting the package.
Since the XMLmind XML Editor is a structured editor, it is probably a bit different than other editors you have used. I recommend if at possible that you go to http://software.sil.org/xlingpaper/resources/demo-movies/ and download two of the movies: the second (“A tour of the XMLmind XML Editor that XLingPaper uses”) and the third (“How to type text in XLingPaper”). You can then watch them on your computer whenever needed. These will illustrate the key things that are different about using XLingPaper.
Once you have seen these two demo movies, then you can start creating an XLingPaper file. In XMLmind XML Editor, use File / New, find the XLingPaper section, and then select the kind of document you want to create. There are six complete document types, eight document component types, plus five publisher style sheet templates (see 11.25 or click here to see the documentation for publisher style sheets). Here are the most basic ones, listed alphabetically:
Choose the type of document you wish to create.
If you selected the Paper one, it will look something like this:
You can immediately start typing the content of the title element. Pressing the tab key or the right arrow key will move you
on to the author element. You can click on the plus sign inside a box  to open up what is inside the element. You can also press the Esc key followed by the / key to open up an element. This same sequence of keys will close an element.[2] If you double-click on the plus sign inside a box, it will open up that item plus all other items embedded within it.
When you have the red cursor on some text within an element, you can right click (or press the F12 key). It will give you a list of the elements which can be inserted before, within, or after where you are. The possible elements are shown in the Edit tool.[3]
For example, if you have begun a new paper and have keyed the title, gone on to the author line and keyed an author name, when you right-click in the author element, it will look like this:
If you select Insert After..., then it will look like this:
Notice the cursor is in the Edit tool[3] in the upper right hand corner. The list of elements shown (i.e., abstract, acknowledgements, affiliation, author, contents, etc.) are the only elements that can be added after where you currently are. You can type the name of the element you want to add. Suppose you want to add an affiliation element. Start to type the word affiliation and it should look like this:[4]
You can now press the Enter key and an affiliation element will be inserted after the author element. Like this:
You can now start typing the content of the affiliation field.
By right-clicking, you can add an element before or after where you are in this manner. When it is appropriate, you can also insert an element within the text. For example, if you were typing a section title and right-clicked after the word first, it might look like this:
Select Insert.... You will now get a different list of elements showing up in the Edit tool:[3]
When you type the name of one of these elements, it will appear within the text you are typing (the section title in this example). See below for more on these elements.
Please note that when you have a paragraph (p element), have typed some text in it and then insert after it something like one of the example element packages (see section 5) and typed in what you need in the example, you have to do something special to continue on with another paragraph. To get a following paragraph, you will need to select the entire example element and then do an Insert After command. You will then see that one of the options is a p element (for paragraph). Choose the p element and then you can start typing in it. The reason for this is that paragraph elements are allowed only after entire example elements.
When an element has some attributes that need to be set, one will see these in the Attributes tool. For example, suppose you have just entered a citation to a book (see section 8). It might look something like this:
Notice the Attributes tool in the lower right hand portion of the screen. This allows you to edit particular attributes of the citation element.
One of the things that can make using the XMLmind XML Editor a bit different from using other editors, is that when one enters such an element while typing a paragraph, say, one will find that the new element has been inserted as illustrated in (8), but one cannot seem to type beyond the recently inserted element. The trick to learn is to type the Insert key[5] while the newly inserted element is still outlined in red. When you do this, you will see a hashed box after the element and you can continue typing.
Armed with the knowledge that you can right-click and then insert before, within, or after the current position as well as the use of the Attributes tool, you are now on your way to creating your document.[6]
Besides the main text of the paper, one may also define the languages used within the paper. One can then tag individual data items as belonging to one of these languages. Each language definition has font-related information associated with it, so one can set the font, size, color, etc., for each language. When the paper is formatted, each data item tagged with a given language will consistently be shown in the specified way.
To add or edit languages, open up the Languages section near the bottom of the XMLmind XML Editor window by clicking on the  icon in front of Languages and then click on the word language in front of lVernacular. It should look something like this, as indicated by the large black arrow:
There are three predefined languages which come when you create a new XLingPaper document: one for your (default) vernacular language data; one for your (default) glossing language; and one for English
(used with abbreviations). You can set the font-related attributes by clicking on the  button. When you do, you will see a dialog box like this:
You can use it to set the font family, the style (i.e., bold and/or italic) and the font size. The “Use default” values indicate to use whatever family, style, or size is currently in effect. You override the default by specifying a particular value.
We recommend that you use a percentage for the font size. This way, if the language data item is in a section header, it will show at the correct size. If you use an absolute point size, then it may well be smaller than the surrounding words in the section header.
If you click on the  button, you can set the color for the language. When you do, you will see a dialog box like this:
You can click on the color you want in the boxed area. The Preview area will then show you what that color will look like. When you click on the OK button, the special color code number will show in the color attribute.[7]
In the Attributes tool on the right, you can click in an attribute field and type in the appropriate information (e.g., the language name). You can thus fill in the appropriate information for the language(s) you will be writing about.
The gloss language is there for use with glosses (in case you want the glosses to come out in a special color or font).
You may certainly have more than two languages defined. Merely add another language element as described earlier in this section above and key in the appropriate attributes.
The attributes of the language element are summarized in the table shown in (12).[13]
| (12) |
|
In the rest of this user documentation, the uses of the various elements will be discussed. It is organized first by the major components: front matter, sections, and then back matter. There also are sections on examples, on tables, charts, and trees, on lists, on citations, on interlinear text, and also on producing special effects. In addition, there are sections on how to do some common tasks and notes on being productive. Finally, there sections on several special issues: publishing information, framed units, content control, hanging indent paragraphs, and chapters in collection volumes. Appendix A contains a reference listing of all the elements that XLingPaper uses, with a brief description of each. Similarly, appendix B has a reference listing of all the elements that XLingPaper uses for publisher style sheets.
Examples of what elements to use to get a particular effect will be illustrated using the XMLmind XML Editor. See the regular user documentation for other (I think more difficult) ways to key the XML. The choice of editor you use to key an XLingPaper document, of course, is still up to you.
This section delineates the elements that can appear in the front matter of a paper. They are presented in the order in which they must occur.
The title element is required in a front matter. A title may include language data and endnotes, as well as other elements.[9]
The subtitle element is optional. Like a title element, it may include language data and endnotes, among other elements.
One or more author elements must be included.
The author element has an attribute of ORCID which can be used to enter the Open Researcher and Contributor ID. See https://info.orcid.org/what-is-orcid/.
You can insert an endnote element within the author element. By default, the endnote/footnote symbol used will be what is shown in example (13). Note that the symbol shown depends on how many author elements with an endnote element precede it.
| (13) |
|
If you need a different symbol to show, you can set the symbolOverride attribute of the endnote element to be the symbol you need.
One or more authorContactInfo elements may optionally be included. Each one refers to an authorContact element via its author attribute.
These are typically only used for some publications. You probably will only need to insert one when you are about to publish your XLingPaper document and your publisher requires it.
As soon as you insert an authorContactInfo element, if you immediately press the F11 key on your keyboard (or click on the black drop-down arrow or use menu items XLingPaper / Set Reference F11 or if you right-click on it and choose Set Reference), a dialog box will pop up that lists all the author contacts currently available. You can then choose the one you want. See also section 13.2.
Each author name may be followed by the affiliation of that author or the preceding authors, using an affiliation element. These are optional elements.
Each author name may be followed by an email address, using an emailAddress element. These are optional elements.
One may add this line in the front matter indicating that the paper had been presented at some conference. This is an optional element.
The date of the paper may also be included as a date element. This is an optional element.
The version element may be included to provide a version number for the document. It is also optional. You can type whatever you want in this element and it can be in whatever language you are writing in.[11]
The keywordsShownHere element may be included to provide a list of keywords for the document. It is also optional. When this element is present, it will show the list of keywords given in the publishingInfo element (see section 13.3). Use the label attribute to change the default “Keywords: ” label which will show immediately before the list of keywords (each keyword will be separated by a comma and a space.[12]) If you want the list of keywords to appear in the table of contents, set the showincontents attribute to yes.
One may optionally include a table of contents by merely including the contents element. Including this tag will instruct XLingPaper to automatically generate a table of contents.
The default situation is for the table of contents to include sections up to three levels deep (i.e., it will include the titles for all of the following: part, chapter, appendix, section1, section2, and section3). You can control how many section levels will be included in the table of contents by changing the value of the showLevel attribute. Its value can be any of the integer numbers between "1" and "6".[13] Please note that the number refers to the section level. If you have a book with chapter elements, then the depth shown in the contents will be the number you choose plus one (the section level plus the chapter). It can also be set to "0" (zero) if you do not want any sections to show in the table of contents such as you might in a book with chapters.
For the XeLaTeX way of producing PDF output, you can control the number of levels showing in the PDF bookmarks portion by setting the bookmarksShowLevel attribute. The number here indicates how many levels including chapter elements if any. Thus, it can be any integer number between “0” and “7”. When it is set to “0,” no bookmarks will be shown.
The table of contents will also include acknowledgements (if any), the abstract (if present), endnotes (if needed), any indexes and references.
XLingPaper will use a title of "Table of Contents" for the contents. If you wish to use some other title, set the label attribute to the title you want to use.[13]
Finally, if you use a publisher style sheet to have both a table of contents in the front matter and a (slightly) different one in the back matter,[14] then you can set the label for the one in the back matter by setting the backmatterlabel attribute. You also set the backmattershowLevel attribute to set the level depth for the table of contents that appears in the back matter.
Acknowledgements for the paper may be included by using the acknowledgements element. The content of the acknowledgements may be a sequence of any "chunk" elements.[15]
XLingPaper will use a title of "Acknowledgements" for the acknowledgements. If you wish to use some other title, set the label attribute to the title you want to use.[13] (Note that the more common spelling of this in North America is "Acknowledgments" so if you are in this area of the world, you may want to change it.)
Note that one may put an acknowledgements element either in the front matter or in the back matter. See section 4.1.
An abstract for the paper or book may be included by using the abstract element. The content of the abstract may be a sequence of any "chunk" elements. (See endnote [15] for what the "chunk" elements are.)
XLingPaper will use a title of "Abstract" for the abstract. If you wish to use some other title, set the label attribute to the title you want to use.[13]
It is possible to have more than one abstract element. This is intended to be for cases where one needs the same abstract to be in more than one language (e.g., for a conference paper where more than one presentation language is welcome).
A preface may be included by using the preface element. The content of the preface may be a sequence of any "chunk" elements. (See endnote [15] for what the "chunk" elements are.)
XLingPaper will use a title of "Preface" for the preface. If you wish to use some other title, set the label attribute to the title you want to use.[13] One can have multiple instances of preface elements and thus, by changing the label, you can create special front matter sections.
Here is an example of the front matter using most of the possibilities. If one keys the elements so they look like this:
Then it should come out looking like what is shown in example (15).
| (15) |
|
Sections may be nested up to six levels deep. Each level is an element tag consisting of the word "section" followed by the level number. For example, a third level section is section3.
Every section element has a required secTitle element which gives the section title. The title may contain language data and an endnote, if one so desires.[16]
When you insert a section, it looks like this:
The number (4 in example (16) above) will vary depending on the section level and the position of this section with respect to other sections. The black hashed box is where you type in the title of the section. The little s is where you should type in a unique name for this section so you can refer to it elsewhere in your paper.[17] The idea is to create a unique name that relates to the content of the section. For example, it could be an abbreviated form of the section title. I strongly recommend that you use letters and numbers, but no spaces.[18] You can use case to distinguish words. Here are some examples taken from this document:
| (17) |
|
Note that using only the section number for these is not a good idea because at some point down the road you may want to rearrange the section. That is why we recommend using a more explanatory description.
Sections may contain a sequence of any of the following elements:
When you use a block quote and try to control the indent via a publisher style sheet, if the quote contains anything other than plain text material (e.g., a citation element or an object element), then you will need to convert the text material into a p element (if you want the first line of the block quote to be indented) or into a pc element (if you do not want an indent on the first line). You can do this as follows:
As noted in section 3.1, you should give each section a unique identifier name (that begins with a lower case s). This is so you can refer to the section elsewhere in the paper.
To make such a reference to a section, you use the sectionRef element. While typing text (such as in a p (paragraph) element), insert an element[19] and choose sectionRef. You will see  . If you immediately press the F11 key on your keyboard (or click on the black drop-down arrow or use menu items XLingPaper / Set Reference F11 or if you right-click on it and choose Set Reference), a dialog box will pop up that lists all the section, chapter, and part titles in your paper along with their identifiers.
While writing this section, for example, I just did this and the dialog box looked like this:
. If you immediately press the F11 key on your keyboard (or click on the black drop-down arrow or use menu items XLingPaper / Set Reference F11 or if you right-click on it and choose Set Reference), a dialog box will pop up that lists all the section, chapter, and part titles in your paper along with their identifiers.
While writing this section, for example, I just did this and the dialog box looked like this:
You can type the section number you want in the text box or scroll down until you find the one you want.[20] Note that capitalization is significant when typing.
When your document is processed, a hyperlink is made between the reference and the section header.[21]
Note that if you wish to refer to an appendix, you should use the appendixRef element and set its content via the F11 key or click on the black drop-down arrow or right-click, Set Reference F11 as described above. This time the dialog box will only list the titles and identifiers for the appendices. See section 4.2 for more.
One can also control what text precedes a section reference, if one so chooses. Some people like to use a word such as “section,” whereas others prefer to not have anything. One challenge with actually keying or not keying such words is that some publishers may want the author to do it one way or the other. In fact, some publications want authors to use a special section symbol: §.
In an effort to minimize an author's effort in dealing with this situation, XLingPaper provides you with the option of never keying such words, but rather to have them be inserted automatically when the paper (or book) is formatted. That is, if you so choose, you can never key words such as “section” before a sectionRef element. Which word or symbol will appear before them, if any, is controlled by setting various attributes of the sectionRef element and the lingPaper element.[22] Please note that the default situation is for XLingPaper to not automatically insert these words; but if you wish, you can have XLingPaper insert them for you.
Example (19) lists the attributes of the lingPaper element that are relevant to this discussion. To modify them, click on “lingPaper” in the node path bar.[56] Then change them using the Attributes Tool.[13] Note that the key attribute is sectionRefDefault. The other four are there so you can change the default text to what you need. There are four cases for whether the text needs to be capitalized or not and for whether there is only one reference or several. The default is to use the English words “section,” “sections,” “Section,” and “Sections” as appropriate. The “label” attributes are there so if you are writing in a non-English language, you can use the appropriate terms for that language.
| (19) |
|
The attribute for controlling this text via a sectionRef element is given in example (20).
| (20) |
|
|||||||||||||||||||
It is also possible to show just the title or the short title of a section. One uses the showTitle attribute of the sectionRef element to control this as explained in example (21).
| (21) |
|
|||||||||||||||
Here is an example of some sections, including some section references. The section references use the simpler, default method, not what is discussed in 3.3.1. If you key what is shown in (22), it will come out looking like what is shown in (23).
| (23) |
|
Instead of starting a paper with a top level section, one may use chapters instead. Each chapter then may have up to six levels of sections and subsections.
That is, when you create a new document (by using menu items File / New), choose the option for “Book (chapter-oriented)”.
If one is working on a larger project and the paper has not only chapters, but also parts (each of which contains chapters), then one should use the part element as the first element after any front matter.
That is, when you create a new document (by using menu items File / New), choose the option for “Multi-part book (part-oriented) ”.
Sometimes you have a series of very short subsections in a document and you want to have them format differently than normal subsections do. In particular, you want just the section title in bold at the left edge; no number is needed. To get this effect, in the parent section level element, use the Attributes tool[13] and set the subsectionsAreShort attribute to yes.
By default, XLingPaper will not show these short subsections in the table of contents, even if their section level would normally appear in the contents. If you do want them to appear in the table of contents, then in the parent section level element, use the Attributes tool to set the excludeShortSubsectionsFromContents attribute to no.
Back matter consists of acknowledgements, appendices, glossary, abbreviations, endnotes, references, author contact information, keywords and indexes. All of these are optional.
Acknowledgements for the paper may be included by using the acknowledgements element. The content of the acknowledgements may be a sequence of any "chunk" elements.[15]
XLingPaper will use a title of "Acknowledgements" for the acknowledgements. If you wish to use some other title, set the label attribute to the title you want to use.[13] (Note that the more common spelling of this in North America is "Acknowledgments" so if you are in this area of the world, you may want to change it.)
Note that one may put an acknowledgements element either in the front matter or in the back matter. See section 2.12.
Appendices are similar to chapters. One merely adds an appendix element by clicking on “Endnotes” near the bottom and doing an Insert Before command.[19] It has its title and one may include sections and subsections. The appendix will automatically be given a letter. Its sections and subsections will be numbered like other sections, only they will begin with the appropriate appendix letter. See the example back matter section (4.11) below.
It is possible to have the appendix appear in landscape mode by setting the showinlandscapemode attribute to yes. The entire appendix will then show in landscape mode.[23]
Note that if you wish to refer to an appendix, you should use the appendixRef element and set its content via the F11 key or click on the black drop-down arrow or right-click, Set Reference F11 as described above. The dialog box will only list the letters, titles and identifiers for the appendices.
One can also control what text precedes an appendix reference, if one so chooses. Some people like to use a word such as “appendix,” whereas others prefer to not have anything. One challenge with actually keying or not keying such words is that some publishers may want the author to do it one way or the other.
In an effort to minimize an author's effort in dealing with this situation, XLingPaper provides you with the option of never keying such words, but rather to have them be inserted automatically when the paper (or book) is formatted. That is, if you so choose, you can never key words such as “appendix” before an appendixRef element. Which word or symbol will appear before them, if any, is controlled by setting various attributes of the appendixRef element and the lingPaper element. Please note that the default situation is for XLingPaper to not automatically insert these words; but if you wish, you can have XLingPaper insert them for you.
Example (24) lists the attributes of the lingPaper element that are relevant to this discussion. To modify them, click on “lingPaper” in the node path bar.[56] Then change them using the Attributes Tool.[13] Note that the key attribute is appendixRefDefault. The other four are there so you can change the default text to what you need. There are four cases for whether the text needs to be capitalized or not and for whether there is only one reference or several. The default is to use the English words “appendix,” “appendices,” “Appendix,” and “Appendices” as appropriate. The “label” attributes are there so if you are writing in a non-English language, you can use the appropriate terms for that language.
| (24) |
|
The attribute for controlling this text via a appendixRef element is given in example (25).
| (25) |
|
|||||||||||||||||||
It is also possible to show just the title or the short title of an appendix. One uses the showTitle attribute of the appendixRef element to control this as explained in example (26).
| (26) |
|
|||||||||||||||
A glossary for the paper may be included by using the glossary element. You can insert a glossary element by clicking on the last appendix element and doing an Insert After command or by clicking on “Endnotes" and doing an Insert Before command.[19] The content of the glossary may be a sequence of any "chunk" elements,[15] although including either a table or a definition list is the most likely.
XLingPaper will use a title of "Glossary" for the glossary. If you wish to use some other title, set the label attribute to the title you want to use. One can have multiple instances of glossary elements and thus, by changing the label, you can create special back matter sections.
HTML does not readily allow for footnotes, since the entire paper may be rendered on one HTML page. Therefore we use endnotes instead of footnotes. It is now possible for some outputs like PDF or Microsoft Word 2003 to use footnotes. Nonetheless, we still use endnote elements for this. That is, use an endnote element whether or not you plan to have endnotes or footnotes. The process that converts XLingPaper from XML to HTML or one of the other formats will take care of whether these elements show up as endnotes or as footnotes. If you are using a publisher style sheet (see section 11.25), then you can control whether the output uses endnotes or footnotes for non-web page outputs. See the useEndNotesLayout element in the XLingPaper Publisher Style Sheet User Documentation file.
When you do need endnotes to appear, XLingPaper will use a title of "Endnotes" for them. If you wish to use some other title, set the label attribute of the endnotes element to the title you want to use.[13] If you are creating a book, then each chapter containing an endnote will have the chapter number preceding the endnotes for that chapter. The default label for these chapters is “Chapter.” To change it to something else, click on the lingPaper element in the node path bar[56] and change the chapterLabel attribute to be what you need.
One keys an endnote in the text at the point where the reference to the endnote should go (i.e., the "endnote number", usually rendered in superscript). For example, suppose one wants to key an endnote where the vertical red cursor is in example (27).
One can right-click and choose Insert... and then type endnote. The result will look like this:
One can now give the endnote a unique id (which should begin with n; the id should also only contain letters and numbers; no spaces[18]). When you open up the endnote (click on the  ), it will look like this:
You can now start typing the content of the endnote. The content of the endnote normally begins with a paragraph tag p, although one may use a sequence of any "chunk" elements.[15]
Note that an endnotes element is required in the back matter section in order to get endnotes to come out properly.
Occasionally, one wants to refer to an endnote. One uses an endoteRef element for this. When you insert an endoteRef element, you will see  . If you immediately press the F11 key on your keyboard (or click on the black drop-down arrow or use menu items XLingPaper / Set Reference F11 or if you right-click on it and choose Set Reference), a dialog box will pop up that lists all the endnote identifiers in your paper. While writing this section, for example,
I just did this and the dialog box looked like this:
. If you immediately press the F11 key on your keyboard (or click on the black drop-down arrow or use menu items XLingPaper / Set Reference F11 or if you right-click on it and choose Set Reference), a dialog box will pop up that lists all the endnote identifiers in your paper. While writing this section, for example,
I just did this and the dialog box looked like this:
You can type in the name of the endnote or scroll down until you find the one you want. Note that capitalization is significant when typing. When your document is processed, a hyperlink is made between the reference and the endnote. In the web page output, the number of the endnote will be the same as the endnote it references. In the PDF output, the number used depends on whether the endnote reference was made within an endnote or not. If the endnote reference was made within another endnote, the number of the endnote will be the same as the endnote it references. Otherwise, it will be the number you would expect for a regular endnote. In this latter case, the text of the endnote will refer to the original endnote. If the attribute: showNumberOnly of the endnoteRef element is set to yes, just the referred to footnote number is output. Otherwise, the number is preceded by “See footnote ” and the number is followed by a period.
The references section begins by using the references element. Remember that unlike papers or books you may have produced before, when one uses XLingPaper the content of the references section will only show in the formatted output if there is at least one citation element somewhere in the paper referring to it. See section 8 for more on citations.
Within the references element, one creates a sequence of refAuthor elements. Note that XLingPaper has you group the references by author, not by work. Normally, the refAuthor elements should be ordered alphabetically by the author's last name. It is possible to have the authors sorted when the output is produced (see section 4.5.13). In addition, there is a way to quickly find an author/work as described in section 4.5.12.
Each refAuthor element has two required attributes: citename and name. The citename attribute is how you want the author's name to be shown in a citation within the body of the paper.[13] If you find that you need some custom formatting for the citation name, you can insert a citeName element, key the name, and use object elements to do the custom formatting. To insert a citeName element, click on the first refWork element of this author and then do an insert before operation. Please note that if you use a citeName element, then any automatic author rearranging XLingPaper might do will *not* be done. See the last paragraph in section 4.5.3.1.1 below.
The name attribute is how you want the author's name to appear in the references (usually last name first for single authors; see the examples below in section 4.11). You may also include a refAuthorInitials element for those cases where you need to use initials for the author(s) first, etc., names. To insert a refAuthorInitials element, click on the first refWork element of this author and then do an insert before operation. Note that you will need to key the full author name(s) with initials in the refAuthorInitials element just as it should appear in the output. You control which of these two forms of the name(s) of the author(s) shows in the XMLmind XML Editor by setting the authorformtoshowineditor attribute on the references element. See section 4.5.11 below for more on this.
Some publishers wish to format author's last names differently from first names (e.g., using small caps). Therefore, it is also possible to insert a refAuthorName element just before the first refWork element. One types the author name(s) in the refAuthorName element and one then selects an author's last name and uses the Convert command (via Edit / Convert, pressing Ctrl-T, or by clicking on the convert icon in the Edit tool[3]) to convert the last name into a refAuthorLastName element. Note that this only works with a publisher style sheet that has a refAuthorLastNameLayout element defined.
Within each refAuthor element, one lists one or more refWork elements, each of which describes a work by that author. They should be ordered by date, oldest first. Each refWork element has a required id attribute which can be referred to by citation elements within the body of the paper. You should create a unique name for this id element. The name should begin with an r and should consist of letters and numbers (no spaces).
Every refWork element has both a refDate element and a refTitle element. The refDate element contains the date (i.e., year) of the work. If there is more than one work by the same author within a given year, merely list the year for each such work. XLingPaper will automatically append a letter after the year as appropriate. If you want any citations to use a different date than what is in the refDate element, set the citedate attribute of the refDate element to that value. The refWork element may also optionally end with a url element (for indicating the address of a page on the World Wide Web if the work happens to be stored on the World Wide Web). In addition, the refWork element has a XeLaTeXSpecial attribute which you can set to pagebreak when you want to force a page break before this work in the output (and are using the default way of producing PDF).
The refTitle element contains the title of the work. The title should not include any formatting (such as surrounding quotes) as these will be added automatically by XLingPaper. The title may, however, include any "embedded" elements.[24] Do not use a plain single quote ' or a plain double quote ". Rather see section 11.12 for how to key ‘smart’ quotes for these. You may also include a refTitleLowerCase element for those cases where you need to use titles which are lower case (except for the first word and proper nouns). You control which of these two forms of the title shows in the XMLmind XML Editor by setting the titleformtoshowineditor attribute on the references element. See section 4.5.11 below for more on this.
There are cases where a work has no author and one may want to follow the convention of using the title as an author. One can do this, just be sure to leave the refTitle element empty and put the title in the refAuthor element.
Any refWork element may optionally contain a url element and a dateAccessed element. This allows you to provide the URL where the work is available online and the date when you accessed that URL, respectively.
In addition, any refWork element may have one or more iso639-3code elements. These indicate the ISO 639-3 code for the language(s) discussed in the work. Unless you are using a publisher style sheet, these codes will only appear in the output if you have set the showiso639-3codeininterlinear attribute of the lingPaper element to yes or if you have set the showiso639-3codes attribute of the refWork elements to yes. Set this latter attribute for those works for which you want the ISO 639-3 codes to show. If you are using a publisher style sheet, then you control whether or not these codes appear via the style sheet. See the documentation here.
The rest of the information about the citation depends on the type of citation it is. XLingPaper allows the types given in the following sections:
This is for an article published in a journal. Besides the date and the title, an article also has jTitle, jVol, optional jIssueNumber, and either jPages or jArticleNumber elements (for the journal title, the journal volume number, the journal issue number, and either the page numbers of the article in the journal or the article number; the latter two are optional). It may also have optional reprintInfo, location, publisher, url, dateAccessed, iso639-3code, and doi elements.
This is for a book. Besides the date and the title, a book also has
This is for a paper included in a volume or collection of papers. Besides the date and the title, a collection paper also has:
The collEd element also has a plural attribute to indicate whether there is more than one editor. Use the value of yes if there are more than one editor; otherwise, use the value of no.[13]
Section 4.5.3.1 shows an alternative way of handling papers in collections.
This section describes another way to handle collection information which some publishers prefer to use.
Consider the following portion of a references section (taken from http://assets.cambridge.org/IPA/IPA_ifc.pdf accessed on 10 November 2010). Only those entries which are collections are shown.
Notice that for Bauer & Warren (2004) and for Sampson (1987), the reference entry itself contains the information about the collection volume (i.e., the book) the paper occurs in. For Barry (1992) and Browman & Goldstein (1992), however, the reference entry refers to another reference entry for the collection: Docherty & Ladd (1992).
Why should some collection entries have the full information about the collection volume while others merely refer to the collection volume which is a distinct entry itself? The key difference is that when two or more papers from the same collection volume are cited, then for those papers, we need to refer to the collection volume itself instead of spelling out the collection volume information.
It is possible within XLingPaper to have both of these methods occur automatically. That is, one can add reference entries for the collection volume itself and then use a special collCitation element to refer to the collection volume (which will use a book element). If a given XLingPaper document has two[26] or more papers cited from the same collection volume, those papers will use the special citation format (like for Barry (1992) and Browman & Goldstein (1992) in example (31) above). In addition, the collection volume entry (which uses a book element) is also given (Docherty & Ladd (1992) in example (31) above). If only one paper from a given collection volume occurs in the document, then even though the collection element has a collCitation element, XLingPaper will put the information for the collection volume within the reference entry (like for Bauer & Warren (2004) and Sampson (1987) in example (31) above).
For example, suppose you had reference entries for the items given in (31) keyed as shown in (32). Notice that the collCitation elements look rather like citation elements (see section 8). This is because they act quite a bit like a citation.
Further suppose that in this document, the following items are cited: Barry (1992), Bauer & Warren (2004), Browman & Goldstein (1992), and Sampson (1987). Then the references section in the web page output might look this:
| (33) |
|
If on the other hand, in a different document only Bauer & Warren (2004), Browman & Goldstein (1992), and Sampson (1987) are cited, then the output would look like this:
| (34) |
|
Notice that while every collection entry in (32) has just a collCitation element in it, whether the collection volume information is included in the collection entry depends on how many other papers are cited for the collection volume. XLingPaper figures out what to do in each case.
One other thing to observe is that whenever XLingPaper inserts the collection volume information into a collection entry output, it assumes that the collection volume editor(s) will be listed with the first editor's last name, comma, and then the first editor's first name. For example, in (32), the Docherty & Ladd entry has the author name as “Docherty, Gerald J. & D. Robert Ladd.” In example (34) where XLingPaper inserted the collection volume information for Browman & Goldstein (1992), XLingPaper converted “Docherty, Gerald J. & D. Robert Ladd” to “Gerald J. Docherty & D. Robert Ladd.” If there are three or more authors, you may separate them by either a comma or a semi-colon. XLingPaper will do this kind of rearranging of the authors' names whenever their names contain any of the sequences in example (35).
| (35) |
|
Suppose you already have a number of collection entries in your XLingPaper references and you wish to use this collection citation method now. Here is what needs to be done:
 If you immediately press the F11 key on your keyboard (or click on the black drop-down arrow or use menu items XLingPaper / Set Reference F11 or if you right-click on it and choose Set Reference), a dialog box will pop up that lists all the book entries in your references. Select the one that is correct for this paper
in a collection. See below for a possibly easier way.
If you immediately press the F11 key on your keyboard (or click on the black drop-down arrow or use menu items XLingPaper / Set Reference F11 or if you right-click on it and choose Set Reference), a dialog box will pop up that lists all the book entries in your references. Select the one that is correct for this paper
in a collection. See below for a possibly easier way.
Since the collCitation element replaces a sequence of elements within a collection element, it is not possible to merely replace the collEd, collTitle, etc., elements with a collCitation element. There is, however, a menu option that will attempt to both create the needed book element and replace the collEd, collTitle, etc., elements with a collCitation element. It is not perfect and you will almost certainly need to do some editing by hand.
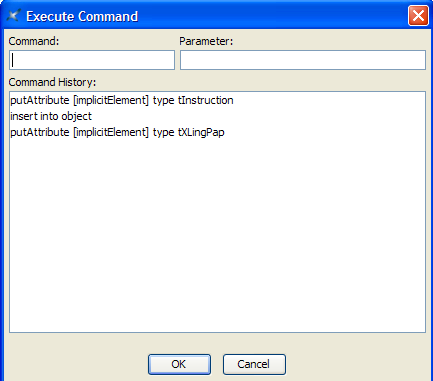
That menu item is XLingPaper / Reference (Bibliography) Related / Convert collection information to a collCitation element. You must be within a collection element in order to use this menu item. Here is an example.
The user has clicked within the collection element of Rensch (1973). When the user uses menu item XLingPaper / Reference (Bibliography) Related / Convert collection information to a collCitation element, the conversion process asks for an ID for the new book refWork element it will create. For example (36), it might look like this:
After keying in a valid ID, it might then look like this:
Notice several things:
As you do this conversion process, you may find duplicate refAuthor elements. You will need to merge the contents of them yourself.
This is for a Ph.D. dissertation. Besides the date and the title, a dissertation also has an optional location element, a required institution element, an optional reprintInfo element, and an optional published element. The latter is for the case where the dissertation has also been published. A published element consists of recommended location and publisher elements, and a required pubDate element. It can also have optional url, dateAccessed, iso639-3code, and/or doi elements.
When XLingPaper produces output, the default label for a dissertation is ‘Ph.D. dissertation’. You can override this default by setting the content of the labelDissertation attribute of the references element. To do so, click on the references element and then use the Attributes Tool[13] to change its value. If you have one or more individual dissertation elements that need to use a different label from the default, you can override the default for these by setting the content of the labelDissertation attribute of the individual dissertation elements.
This is for unpublished field note materials. Besides the date and the title, field notes also have an optional location element and a required institution element. It can also have optional url, dateAccessed, iso639-3code, and doi elements.
This is for an unpublished manuscript. Besides the date and the title, a manuscript also has one of the following:
It may also have optional url, dateAccessed, iso639-3code, and/or doi elements.
This is for a paper presented at a conference. Besides the date and the title, a paper also has a required conference element and an optional location element. It may also have optional url, dateAccessed, iso639-3code, and/or doi elements.
When XLingPaper produces output, the default label for a paper is ‘Paper presented at the ’. You can override this default by setting the content of the labelPaper attribute of the references element. To do so, click on the references element and then use the Attributes Tool[13] to change its value. If you have one or more individual paper elements that need to use a different label from the default, you can override the default for these by setting the content of the labelPaper attribute of the individual paper elements.
This is for a paper included in a conference proceedings volume. Besides the date and the title, a proceedings paper also has:
The procEd element also has a plural attribute to indicate whether there is more than one editor. Use the value of yes if there are more than one editor; otherwise, use the value of no.[13]
Recall from section 4.5.3 that collections have another possible way to record and format papers in a collection volume. XLingPaper can do the same kind of thing for papers in a proceedings volume. See section 4.5.3.1 above, substituting “proceedings” for “collection”. It works the same way for proceedings as for collections, except that rather than using collCitation elements, one uses procCitation elements. In addition, the menu item mentioned in section 4.5.3.1.2 is XLingPaper / Reference (Bibliography) Related / Convert proceedings information to a procCitation element. You must be within a proceedings element in order to use this menu item.
This is for an M.A. thesis. Besides the date and the title, a thesis also has an optional location element, a required institution element, an optional reprintInfo element, and an optional published element. The latter is for the case where the thesis has also been published. A published element consists of recommended location and publisher elements, and a required pubDate element. It may also have optional url, dateAccessed, iso639-3code, and/or doi elements.
When XLingPaper produces output, the default label for a thesis is ‘M.A. thesis’. You can override this default by setting the content of the labelThesis attribute of the references element. To do so, click on the references element and then use the Attributes Tool[13] to change its value. If you have one or more individual thesis elements that need to use a different label from the default, you can override the default for these by setting the content of the labelThesis attribute of the individual thesis elements.
This is for a paper that has been posted on the World Wide Web. Besides the date and the title, a web paper also has:
The url element is, of course, the address of the page on the World Wide Web. In the output, the URL will contain a link to it, so you should be able to click on it within the program you use to view the output and open it in a web browser.
The attributes on the references element are summarized in (39).[13]
| (39) |
|
Often while writing a document, you find a need to add a new reference to your list of references. XLingPaper provides a special command that makes this easier.
From just about any place in your document, you can invoke menu item XLingPaper / Reference (Bibliography) Related / Jump to Work in References (Bibliography) Ctrl+Shift+F11.[28] This brings up the same basic dialog you see when setting a citation element (see section 8.1) which sorts by the citename attribute of the refAuthor element, the date of the refWork element, and the refTitle element of the refWork element. In one XLingPaper document, it looks like this:
You type in the author name or you scroll down to find the work you are looking for. Select the one you want by typing enough so that it is shown in the top text box or by clicking on it. XLingPaper will remember the location of where you are working right now and then jump you to the references section of your document and will select the refWork that you indicated. In my experience, once in a while the selected work does not show in the window. You have to scroll up or down a bit before you can see it.
In the XLingPaper document used to produce example (40), if we were to choose Butler (2000), the result would be as shown in (41).
If you are indeed adding a new reference, you can still use this command to find a work that is close to where you need to add your new reference.
One other thing to keep in mind with this particular dialog is that the sort order used is a computerish one. It may well not be the order that your references will appear in, especially if you set things up to sort per a particular language as discussed in section 4.5.13.
Select the work you want to see or edit (or add a new work before or after).
After you do whatever it is you need to do in the references, you can return to where you were when you jumped to the references
section. You return by using the XMLmind XML Editor's Select / Navigation / Go Back menu item command or you can click on the  toolbar icon (on the far right).
It is now possible in XLingPaper to have the cited authors sorted when you produce any kind of output. The works of a given author will also be sorted by date and when two or more works have the same date, they will be sorted by title. The default situation is to not do this dynamic sorting - the cited authors will appear in the same order they occur in the references element and their works will also appear in the order in which they occur.
To use sorting by author names, you must set the sortRefsAbbrsByDocumentLanguage attribute of the main lingPaper element. To do so, click anywhere in the document (except in any part of an associated publisher style sheet). In the node path bar,[56] click on lingPaper. Then use the Attributes Tool[13] to set the sortRefsAbbrsByDocumentLanguage attribute to a value of yes.
The sorting algorithm used depends on the language code of the document. The default is ‘en’ (for English). You set the language code of the document in the xml:lang attribute of the lingPaper element (see above for how to do this). Some of the known language codes to use are shown in example (42).[29]
| (42) |
|
|||||||||||||||||||||||||||||||||||||||||
There are certain situations when you may find that you want more than just the cited references to appear. Some possible scenarios include an abstract that is to be submitted for a conference and proposals for theses and dissertations. The references in such situations are often referred to as “Selected References” or "Selected Bibliography.”
XLingPaper allows you to do this via a selectedBibliography element. It can appear immediately after a references element. It contains one or more citation elements which indicate the additional or “selected” references you want to have appear in your references. Any references cited in the document will appear just like they usually do.
Whenever you use a selectedBibliography element, the default label for the references section becomes “Selected Bibliography.” To change it to something else, use the label attribute of the selectedBibliography element.
Please note that the output will either have a “References” section or a “Selected Bibliography” section, but not both.
It is possible to take an existing Zotero[30] library and convert it to an XLingPaper reference file. Do the following:
XLingPaper will produce a file called “ZoteroMODSReferences.xml” in the same directory where your XLingPaper document is and then it will load it into the XMLmind XML Editor.
Note that you will probably need to do some hand editing of the result as this conversion process is not 100% accurate (due to differences of detail used by Zotero and XLingPaper).
It is possible to take an existing Endnote[31] XML file and convert it to an XLingPaper reference file. Do the following:
XLingPaper will produce a file called “EndnoteXMLReferences.xml” in the same directory where your XLingPaper document is and then it will load it into the XMLmind XML Editor.
Note that you will probably need to do some hand editing of the result as this conversion process is not 100% accurate (due to differences of detail used by Endnote and XLingPaper).
You can create a list of keywords that classify a reference work. At the end of the refWork element (or at the end of any of the work type elements), insert a keywords element. Inside of this you can have one or more keyword elements.
This is for information only. XLingPaper never outputs or processes the content of these keyword elements within a reference entry.
Sometimes you might want to create an annotated bilbliography. There are three steps to do so:
The set of annotated bibliography types define the kinds of annotations you have. Some possibilities include:[32]
To create annotated bibliography types, in the references section, go to the last author. Select its refAuthor element and do an Insert After command. Choose annotatedBibliographyTypes. Open it up and for each type you need, insert an annotatedBibliographyType element. Set the id to a unique value. We suggest beginning the id with “at” and use letters and numbers, but no spaces.[18] Also type in the name or description of the type.
For each work you want to add an annotation to, select the last item in it. Do an Insert After command and choose annotations. Open it up. For each annotation, set the id to a unique value. We suggest beginning the id with “an” and use letters and numbers, but no spaces.[18] In addition, set the annotated bibliography type of this annotation. The easiest way to do that is to press the F11 key (or use XLingPaper menu item / Set Reference). Also type in the content of the annotation. XLingPaper assumes that the content will appear in a single paragraph.
Now create a new XLingPaper document for the annotated bibliography or create a chapter, appendix, section or sub-section for it.
For each referenced work to be annotated, insert an annotationRef element and then press the F11 key (or use XLingPaper menu item / Set Reference). This will first show a dialog box where you select the referenced work. If this work has an annotation, it will then show a dialog box where you choose the annotation you want to appear in this context. If the referenced work does not have an annotation, there will be a message saying that this work does not have any annotations. Either choose a different work, go add annotations to the work, or leave it without an annotation if that work is not supposed to have an annotation. You can also add more than one annotation by manually adding additional annotations to the annotation attribute using the Attributes tool. The easiest way to do this is to right-click on “annotation” in the Attributes tool and choose “Edit.” This will bring up a tool that lets you choose the correct annotations by ID.
As an example, suppose you add the annotationRef elements to your document as shown in example (43).
Note that only the first 50 characters of the annotation content is shown here. The full content will be in the output.
When formatted as a web page, this might come out as shown in example (44).
| (44) |
|
Notice that each referenced work is shown as it would be if it were in the references section and that the content of the chosen annotation element is formatted as a paragraph after it.
If you wish, you can create a list of abbreviations that are used in glossing text. Just like references and citations, the idea here is that while the list of abbreviations can be large, XLingPaper will only show those that are actually used in glossing somewhere within the document. You can thus maintain a file that is just the list of abbreviations (and their definitions), include it in your document, and then, while glossing in an example, make a reference to an abbreviation in the list. Besides only including abbreviations actually used somewhere in the document, XLingPaper will also create a hyperlink between the gloss abbreviation in the example and the actual abbreviation in the list of abbreviations. Of course, the list will also include the definition of the abbreviation.
This master list of abbreviations can also be in multiple glossing languages. So if you typically write your papers in either English or Spanish, say, you can maintain the list of abbreviations in both languages. For a given paper, you indicate which language to use by setting the abbreviationlang attribute of the main lingPaper element. To find this attribute, click on lingPaper in the node path bar,[56] and then use the Attributes Tool[13] to find and edit the abbreviationlang attribute. You will need to key in the id of one of the language elements in your document (e.g., en for English, es for Spanish, or fr for French). If you do not set this attribute, then the first abbreviation item found will be used. Also, if you inadvertently do not have an abbreviation for the language you selected, but you do have one for another language, then the first abbreviation found will be used, too. See section 4.6.1.1 for more on creating master lists with two or more languages. Also see section 4.6.4 for information on sorting the output list of abbreviations.
One makes a reference to an abbreviation by inserting an abbrRef element and then setting its reference to one of the abbreviations in the master list. The easiest way to do this is described in section 4.6.2.
Further, you can choose where you want this list of abbreviations to appear. While one keys the list of abbreviations in the abbreviations element under the backMatter element, you can elect to have the list appear within any of the following elements:
To get the list of abbreviations to appear, one inserts an abbreviationsShownHere element at the appropriate place in one of these elements. For all but in an endnote, XLingPaper will create a table showing the abbreviations that have been used. For an endnote, XLingPaper will show the abbreviations that have been used in a comma separated list.
The following sections explain how all of this can be done in more detail.
The easiest way to start a master list of abbreviations is to use one of the two pre-packaged ones. Both packages use the list of abbreviations found at http://www.eva.mpg.de/lingua/resources/glossing-rules.php on October 1, 2008. The only difference between them is whether the abbreviations are in all capital letters or all lower case letters. If you plan to use small caps for your abbreviations, then use the one with lower case letters. To start such a list, do this:
You will then get something like this:
Notice that each abbreviation has an ID that begins with the letter “v”,[17] then comes the abbreviation, an equals sign, and the definition. You can insert new abbreviations by clicking on an abbreviation element (e.g., by clicking on the ID) and using the usual insert before or insert after commands.[19] Note that you need to maintain the alphabetical order by hand. That is, the list of abbreviations will be shown in the order you have them here.
If you want to have your abbreviations appear as small caps, then you need to do three things:
You can save the file to a location that is convenient for you. Next, click on the word “Endnotes” in the back-matter section, do an insert-before operation,[19] and choose “abbreviations". Then follow the instructions in 11.8, (except use “abbreviations” and your abbreviations master file instead of the references ones mentioned there).
Another thing that you may need to do is to add a language element whose ID is “en” (for English). If you write the prose of your documents in some other language such as Spanish or French, then you will need to also add alanguage element for each such language.
Finally, there are some cases where you need to ignore the normal font family for a (small) subset of abbreviations. To do so, set the ignoreabbreviationsfontfamily attribute on these abbreviation elements to yes. The default value is no.
If you are making a master list that contains two or more languages, you will need to keep a couple of things in mind.
First, when a given abbreviation is spelled differently in the various languages, you should insert separate abbreviation elements for each one and place them in the correct alphabetical order in the master list. For example, you could have one (English) abbreviation for FOC (focus) and one (Spanish) abbreviation for ENF (énfasis o enfático):
The lang attribute of the abbrInLang element of the vFOC abbreviation element will need to be en for English and the lang attribute of the abbrInLang element of the vENF abbreviation element will need to be es for Spanish.[33] Naturally, when you refer to an abbreviation for focus in your document, you'll want to use 'enf' in Spanish and 'foc' in English. Then, when you mark a given document's abbreviationlang attribute (in the lingPaper element) to be en for English, XLingPaper will use the English abbreviation for those abbreviations with two or more abbrInLang elements. If you mark the document to be es for Spanish, then XLingPaper will use the Spanish abbrInLang information. For those abbreviations that have only one abbrInLang element, that abbrInLang information will be used.
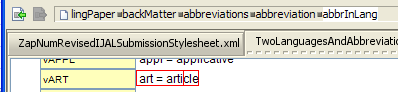
Second, when both languages share the same abbreviation, but the definitions are different (since they are in different languages), you will need to add a new abbrInLang element for the new language. For example, suppose you have an abbreviation for “article” in English and want to add a similar abbreviation for “artículo” in Spanish. Here is a way to do this:


There are two ways to create references to abbreviations: by hand and automated.
The first way to create references to abbreviations is to do it by hand. Perform an insert operation[19] and select abbrRef. Then press the F11 key to bring up the chooser for abbreviations. (An easier way is to press the Shift and F11 keys together.) In one document it looked like this:
You then type the abbreviation you need or scroll down to find it. In the example, the C = completive was the correct choice. The result looked like this:
The second way to create references to abbreviations is probably much more convenient. When you are entering abbreviations in a gloss element,[34] there is a potentially easier way to insert these abbrRef elements. Key the gloss material, including any abbreviations. While the cursor is within the gloss element, use the “Convert any abbreviations in gloss to abbrRefs” command (by using menu item XLingPaper / Convert any abbreviations in gloss to abbrRefs Ctrl+Shift+F10).[35] This will automatically convert any abbreviations to their respective abbrRef element. Example (49) indicates the punctuation symbols it uses in the content of the gloss element to separate potential abbreviation labels.[36] (It also uses the space and non-breaking space characters.) Note that the abbreviation labels need to be identical to what they are in the abbreviation element, including lower or upper case (unless you are using smallcaps for your abbreviations[55] in which case either lower case or upper case will do). There is an exception to this: if you have abbreviations for person using 1, 2, or 3 to indicate the person, then it will also find combinations such as 3sg or 2pl (as long as you also have sg and pl as abbreviations).[37]
| (49) |
|
Please note that since this method uses the punctuation symbols listed in example (49) to separate potential abbreviation labels, if you have any abbreviations which contain any of these symbols, this method will not find those abbreviations. That is, this method (and from what I can tell, the Leipzig glossing conventions) assume that your list of abbreviations will not have combinations like this. Rather, you list just the component pieces. For example, rather than having a single abbreviation entry like “dat.pl”, you will have two entries: one for “dat” and one for “pl”. You can, of course, still have a combination abbreviation, but you will need to create the abbrRef element for it by hand (as mentioned in section 4.6.2.1). You cannot use this short-cut method.[38]
In addition, this method cannot recognize any word or abbreviation that contains an apostrophe character ( ' ). If you have an abbreviation that uses an apostrophe, you will need to create the abbrRef element by hand.
Further, note that if your master list of abbreviations include abbreviations for more than one language and if you have set the abbreviationlang attribute of the lingPaper element to a particular language code (see section 4.6.1.1), then this easier method will only find abbreviations which are overtly marked to be for that language code.
In addition, please be aware that it is important to make use of the wrd elements when using this short-cut method with interlinear examples (see section 5.3.1.2). If you just use the plain text approach as described in section 5.3.1.1, the example will probably not line up properly.
For example, one XLingPaper document included this:
which formatted like this in a web page:
and like this in a PDF file:
In (52), the abbreviated items are actually hyperlinks. They just are not underlined.
Sometimes you may find that you want to convert many abbreviations within a number of gloss elements in a portion of a document.
If you find that you need to do this, follow these steps while running the XMLmind XML Editor.
This command will find every gloss element in the selected portion and convert any abbreviations into their respective abbrRef elements.
As mentioned above, one can have the list of abbreviations appear in various places.
Please note that unless you overtly tell XLingPaper to show the list of abbreviations, no such list will appear in the formatted output.
We'll illustrate how to show the list of abbreviations in an endnote first and then in a glossary.
To show the list in an endnote, first insert the endnote element (see section 4.4 for how to do this). Type any text you want and then insert the special abbreviationsShownHere element. This is how it looked in one XLingPaper paper:
In this paper, it was formatted as follows in the web page output:
| (54) |
|
Turning now to showing the abbreviations in a glossary, one needs to insert a glossary element in the back matter. One does this by clicking on the abbreviations element in the back matter area and then doing an insert before operation. The result might look something like this:
One can then open up the glossary element and type any prefatory material one might want (of course, one does not have to type anything). One then inserts the special abbreviationsShownHere element. Note that since this will be formatted as a table, it needs to go after or before a paragraph (p element); it will not work to put it within a paragraph.
One should also change the label attribute of the glossary element to something like “Abbreviations” so the title of this section does not say “Glossary.” It might look like this:
When formatted in a web page, it might look like this:
When the list of abbreviations is formatted as a table, you can control the width of the abbreviation column, the equals sign column, and/or the definition column via attributes on the abbreviationsShownHere element. See example (58).
| (58) |
|
If your document is not written in English or if your master list of abbreviations contains abbreviations in multiple languages, you may well want to have the list of abbreviations that XLingPaper outputs be sorted by a particular language. Note that the default behavior is for XLingPaper to not do any special sorting: the list of abbreviations will occur in the same order they are given within the abbreviations element.
To get XLingPaper to sort the list of abbreviations in the output, you must set the sortRefsAbbrsByDocumentLanguage attribute of the main lingPaper element. To do so, click anywhere in the document (except in any part of an associated publisher style sheet). In the node path bar,[56] click on lingPaper. Then use the Attributes Tool[13] to set the sortRefsAbbrsByDocumentLanguage attribute to a value of yes.
The sorting algorithm used depends on the language code you have indicated, if any. The default is ‘en’ (for English). If you have set the abbreviationlang attribute of the main lingPaper element of the document, then XLingPaper will use that code. If the abbreviationlang attribute is not set, XLingPaper will use the xml:lang attribute of the lingPaper element, if it is set. Some of the known language codes to use are shown in example (42).
Sometimes, you may want to see a list of all the abbreviations you have defined. There is a special command you can use to produce first a list of the abbreviations sorted by the abbreviation and then a list of the abbreviations sorted by definition. The two lists are combined into one web page output file. This web page will be displayed in your web browser.
To do so, follow these steps:
If you wish, you can create a list of glossary terms used throughout your document. Just like references and citations, the idea here is that while the list of glossary terms can be large, XLingPaper will only show those that are actually used somewhere within the document.[40] You can thus maintain a file that is just the list of glossary terms (and their definitions), include it in your document, and then, while writing, make a reference to a glossary term in the list. Besides only including glossary terms actually used somewhere in the document, XLingPaper will also create a hyperlink between the glossary term in the text and the actual glossary term in the list of glossary terms. Of course, the list will also include the definition of the glossary term.
This master list of glossary terms can also be in multiple languages. So if you typically write your papers in either English or Spanish, say, you can maintain the list of glossary terms in both languages. For a given paper, you indicate which language to use by setting the glossarytermlang attribute of the main lingPaper element. To find this attribute, click on lingPaper in the node path bar,[56] and then use the Attributes Tool[13] to find and edit the glossarytermlang attribute. You will need to key in the id of one of the language elements in your document (e.g., en for English, es for Spanish, or fr for French). If you do not set this attribute, then the first glossary term item found will be used. Also, if you inadvertently do not have a glossary term for the language you selected, but you do have one for another language, then the first glossary term found will be used, too. See section 4.7.1.1 for more on creating master lists with two or more languages. Also see section 4.7.4 for information on sorting the output list of glossary terms.
One makes a reference to a glossary term by inserting a glossaryTermRef element and then setting its reference to one of the glossary terms in the master list.
Further, you can choose where you want this list of glossary terms to appear. While one keys the list of glossary terms in the glossaryTerms element under the backMatter element, you can elect to have the table of glossary terms appear within any of the following elements:
To get the list of glossary terms to appear, one inserts a glossaryTermsShownHere element at the appropriate place in one of these elements. XLingPaper will create a table showing the glossary terms that have been used at that spot.
The following sections explain how all of this can be done in more detail.
To create a master list of glossary terms, click on the word “Endnotes” in the back-matter section, do an insert-before operation,[19] and choose “glossaryTerms(glossaryTerms)". This will produce what is shown in (59):
Open it up (by clicking on the plus sign inside the small box). This gives you the following:
Like abbreviations, there are three parts: a unique identifier (which goes in the pink part and by convention begins with “gt”[17]), the glossary term itself (which can be more than one word if needed), and its definition. Note that within a definition you can insert references to other glossary terms if you so choose. See section 4.7.2 for how to do that.
Here is a screen shot of one short set of glossary terms:
Another thing that you may need to do is to add a language element whose ID is “en” (for English). If you write the prose of your documents in some other language such as Spanish or French, then you will need to also add alanguage element for each such language.
You can control how glossary terms are rendered in your document by setting the format-related attributes on the glossaryTerms element.
If you are making a master list that contains two or more languages, you will need to keep a couple of things in mind.
First, when a given glossary term is spelled differently in the various languages, you should insert separate glossaryTerm elements for each one and place them in the correct alphabetical order in the master list. For example, you could have one (English) glossary term for phrase and one (Spanish) glossary term for frase:
The lang attribute of the glossaryTermInLang element of the gtPhrase glossaryTerm element will need to be en for English and the lang attribute of the glossaryTermInLang element of the gtFrase glossaryTerm element will need to be es for Spanish.[41] Naturally, when you refer to a glossary term for phrase in your document, you'll want to use 'frase' in Spanish and 'phrase' in English. Then, when you mark a given document's glossarytermlang attribute (in the lingPaper element) to be en for English, XLingPaper will use the English glossary term for those glossary terms with two or more glossaryTermInLang elements. If you mark the document to be es for Spanish, then XLingPaper will use the Spanish glossaryTermInLang information. For those glossary terms that have only one glossaryTermInLang element, that glossaryTermInLang information will be used.
Second, when both languages share the same glossary term, but the definitions are different (since they are in different languages), you will need to add a new glossaryTermInLang element for the new language and key its term and definition in the new language. This probably rarely happens.
To create references to glossary terms, perform an insert operation[19] and select glossaryTermRef. Then press the F11 key to bring up the chooser for glossary terms. (An easier way is to press the Shift and F11 keys together.) In one document it looked like this:
You then type the glossary term you need or scroll down to find it. In the example, the “consonant = Sound that impedes the air flow partially or totally when pronounced.” was the correct choice. The result looked like this:
Notice that we actually need the word “consonant” to be plural in the context. This illustrates the need that, unlike abbreviations, glossary terms often need to be inflected and/or capitalized in the context in which they appear. Each glossaryTermRef element has a capitalize attribute you can set to capitalize it. In order to inflect it, however, you will need to type in the inflected form within the pink hashed box. In this case, we need “consonants” and after typing that in the hashed box, it looks like this:
As soon as we leave the glossaryTermRef element (by using the Insert key, e.g.), it becomes this:
As mentioned above, one can have the list of glossary terms appear in various places.
Please note that unless you overtly tell XLingPaper to show the list of glossary terms, no such list will appear in the formatted output.
We'll illustrate how to show the list of glossary terms in a glossary.
To show the list in a glossary, one needs to insert a glossary element in the back matter. One does this by clicking on the glossaryTerms element in the back matter area and then doing an insert before operation. (Note that if you have an abbreviations element, then you will need to click on it and then do an insert before operation.) The result might look something like this:
One can then open up the glossary element and type any prefatory material one might want (of course, one does not have to type anything). One then inserts either the special glossaryTermsShownHere element (to show the list as a table) or the special glossaryTermsShownHereAsDefinitionList element (to show the list as a series of hanging indent paragraphs). Note that since the glossary terms will be formatted either as a table or as a sequence of paragraphs, it needs to go after or before a paragraph (p element); it will not work to put it within a paragraph.
One can also change the label attribute of the glossary element if “Glossary” is not the correct title you need. It might look like this:
When formatted in a web page, it might look like this:
| (69) |
|
When the list of glossary terms is formatted as a table, you can control the width of the glossary term column, the equals sign column, and/or the definition column via attributes on the glossaryTermsShownHere element. See example (70).
| (70) |
|
If your document is not written in English or if your master list of glossary terms contains glossary terms in multiple languages, you may well want to have the list of glossary terms that XLingPaper outputs be sorted by a particular language. Note that the default behavior is for XLingPaper to not do any special sorting: the list of glossary terms will occur in the same order they are given within the glossaryTerms element.
To get XLingPaper to sort the list of glossary terms in the output, you must set the sortRefsAbbrsByDocumentLanguage attribute of the main lingPaper element. To do so, click anywhere in the document (except in any part of an associated publisher style sheet). In the node path bar,[56] click on lingPaper. Then use the Attributes Tool[13] to set the sortRefsAbbrsByDocumentLanguage attribute to a value of yes.
The sorting algorithm used depends on the language code you have indicated, if any. The default is ‘en’ (for English). If you have set the glossarytermlang attribute of the main lingPaper element of the document, then XLingPaper will use that code. If the glossarytermlang attribute is not set, XLingPaper will use the xml:lang attribute of the lingPaper element, if it is set. Some of the known language codes to use are shown in example (42).
See section 2.4 for this. If you insert an authorContactInfo element in the back matter, then the contact information will appear in the back matter of your document.
The keywordsShownHere element may be included to provide a list of keywords for the document. It is also optional. When this element is present, it will show the list of keywords given in the publishingInfo element (see section 13.3). Use the label attribute to change the default “Keywords: ” label which will show on a line by itself mmediately before the list of keywords (each keyword will be separated by a comma and a space.[42]) If you want the list of keywords to appear in the table of contents, set the showincontents attribute to yes.
One may add one or more indexes to an XLingPaper document. There are four basic kinds of indexes allowed:
That is, one normally either has a single, common index or one has two to three specialized indexes.
To get an idea of what is involved in producing an index with XLingPaper, consider the following portion of an index taken from the output of an XLingPaper document:
| (71) |
|
Notice several things:
This implies that building an index in an XLingPaper document involves three steps:
The following sections outline each of these steps in more detail.
The set of index terms is the potential content of the index(es). You may want to nest certain terms under other terms, if they are related. With XLingPaper, there is no enforced limit to the depth of nesting. In addition, you may want to include terms which then refer to another term elsewhere in the index. This, of course, is because a reader may look under some similar topic than the main one you have chosen.
There are three main elements used in describing the set of index terms:
As implied in the last point, it is possible to create some kind of a master set of index terms and then use that master set in more than one XLingPaper document.
The top-level indexTerms element goes as one of the last top-level elements in the file. In the XMLmind XML Editor, this means you should select the types element at the bottom as shown in (72) (if you have already inserted “Framed Types” as per section 14, then select "Framed Types”).
You can then right-click and choose Insert After... and then type indexTerms. The result will look like this:
You may have more than one of them (in order to include the master set and any document-specific ones). XLingPaper will sort them appropriately when producing the output.[43]
XLingPaper will only output those index terms which are actually tagged within the document. So one may define more index terms than are actually used in a given document. This is similar to how XLingPaper handles the references section.
The indexTerms elements have one attribute: version. It is used to indicate the version of the set of index terms. For example, one might create one set of terms and call them Master while another might be Syntax or Morphology.
When you open up the indexTerms element, it looks like this:
This shows two indexTerm elements. Only the id attribute is required. It is shown as  . Give it a unique id attribute value (please use just a-z/A-Z letters and numbers; in particular, using an underscore may cause the page number
to not appear in the default PDF output).[17] Then type the name of the term.
. Give it a unique id attribute value (please use just a-z/A-Z letters and numbers; in particular, using an underscore may cause the page number
to not appear in the default PDF output).[17] Then type the name of the term.
An indexTerm element may have up to three attributes as shown in (75).
| (75) |
|
A term element has an optional lang attribute which refers to a language element. This is a way to tag the term as being for a particular language (e.g., English or Spanish or French). The index element also has a lang attribute one can use to indicate which term elements to use.
As mentioned in section 4.10, you can nest sub-levels of index terms within a term. Suppose you have something like what is shown in (76).
You can nest a sub-level of index terms under "Category" by clicking on “term” in the node path bar, right-clicking and selecting Insert After..., and then typing indexTerms. You'll get something like this:
You can now fill in the terms, add additional terms, etc.
If you have an index for a language other than English or if your index contains terms in multiple languages, then you should also insert a seeDefinitions element as the first element within the indexTerms element. The seeDefinitions element contains one or more definitions of how the ‘See’ and ‘See also’ words should appear for a given language. For example, consider the following possibility.
This has definitions for English (language code ‘en’) and Spanish (language code ‘es’). There are lines for saying how to represent the ‘See’ case as well as the ‘See also` case. It is possible to type in words before the link as well as words after the link. For example, the ‘See also’ case for Spanish in this example uses the word ‘Véase’ before the link and the word ‘también’ after the link.[44]
After setting up the set of index terms, the second step in producing an index is to tag the places in the document that correspond to index terms. Recall from example (71) that there are two main kinds of index references: singleton and a range. You use the indexedItem element to tag a singleton reference. For a range, you use two elements: indexedRangeBegin to mark the beginning of the range and indexedRangeEnd to mark the end of the range.
To mark a singleton index item, put the cursor at the place in the text where the indexed item should go, right-click, select
Insert..., and type indexedItem. You will get something like this:  . If you immediately press the F11 key on your keyboard (or click on the black drop-down arrow or use menu items XLingPaper / Set Reference F11 or if you right-click on it and choose Set Reference), a dialog box will pop up that lists all the index terms in sorted order. Select the index term that is appropriate for
this place in the document. You have now tagged this point in the document with the index term. XLingPaper will create a hyperlink to this location from the index term in the index.
. If you immediately press the F11 key on your keyboard (or click on the black drop-down arrow or use menu items XLingPaper / Set Reference F11 or if you right-click on it and choose Set Reference), a dialog box will pop up that lists all the index terms in sorted order. Select the index term that is appropriate for
this place in the document. You have now tagged this point in the document with the index term. XLingPaper will create a hyperlink to this location from the index term in the index.
To mark a range, put the cursor at the place in the text where the indexed item should go, right-click, select Insert..., and type indexedRangeBegin. You will get something like this:  . If you immediately press the F11 key on your keyboard (or click on the black drop-down arrow or use menu items XLingPaper / Set Reference F11 or if you right-click on it and choose Set Reference), a dialog box will pop up that lists all the index terms in sorted order. Select the appropriate one. This will set the
index term. Then create a unique name for this range as its id attribute (where the little b is). You can then refer to it when you add the end range indexed item, which is the next step in marking a range.
. If you immediately press the F11 key on your keyboard (or click on the black drop-down arrow or use menu items XLingPaper / Set Reference F11 or if you right-click on it and choose Set Reference), a dialog box will pop up that lists all the index terms in sorted order. Select the appropriate one. This will set the
index term. Then create a unique name for this range as its id attribute (where the little b is). You can then refer to it when you add the end range indexed item, which is the next step in marking a range.
To mark the end of the range, put the cursor at the ending position. Then right-click, select Insert..., and type indexedRangeEnd. You will get something like this:  . If you immediately press the F11 key on your keyboard (or click on the black drop-down arrow or use menu items XLingPaper / Set Reference F11 or if you right-click on it and choose Set Reference), a dialog box will pop up that lists all the id attributes for the indexedRangeBegin elements in your document. Select the one you want.
When you set the begin and end range indexed items this way, XLingPaper will create a hyperlink to both the begin location and the end location for the index term referred to in the term attribute of the indexRangeBegin element.[45]
Please note that you should not put an indexedRangeBegin (or indexedRangeEnd) element in a secTitle element. Doing so may cause the default PDF to not have the correct page number in the index output. Also there will be a warning message about this in the Validity tool. Rather than putting these elements in the secTitle element, put the indexedRangeBegin element at the beginning of the first paragraph of the chapter or section or appendix that the secTitle element is a part of.
The indexedItem element has the attributes shown in (79). Only the term attribute is required.
| (79) |
|
The indexRangeBegin element has the attributes shown in (80). Both the id and term attributes are required.
| (80) |
|
The indexRangeEnd element has one required attribute: begin. It refers to an id attribute of its matching indexRangeBegin element.
Whenever the main attribute of either an indexedItem or an indexRangeBegin element is set to yes, the hyperlink created in the output will be in bold. The exception to this is if there is only one instance in the entire document of either an indexedItem or an indexRangeBegin element that refers to this index term. In such a case, there will only be one hyperlink associated with the term, so it will not be output in bold.
You may find that after you have tagged a document for an index, that all of those index tags “get in the way” of being able to read the content of the document. This may be especially the case when you go to revise a previously indexed document. You may well wish for some way to hide the indexedItem, indexedRangeBegin, and indexedRangeEnd elements until you are done revising.
To hide these index tagging elements, perform these steps:
As soon as you have changed this attribute, the XMLmind XML Editor will in effect reload the document, this time not showing any of the indexedItem, indexedRangeBegin, and indexedRangeEnd elements. Those elements will still be there. You just will not see them.
When you want to see these elements again, do the steps in (81), only instead of setting the showindexeditemsineditor attribute to no, set it to yes.
Be aware that if you have a large document, it may take the XMLmind XML Editor many seconds to make this display change. It will also collapse any opened chapter or section elements, so you will have to reopen them again.
The third step in producing an index is to create one or more index elements as the last element within the backMatter element. If you have a references element, you can click on it, right-click, select Insert After..., and type index.
It is possible to have some prefatory text before the actual index material. This is so you could include some explanations if so desired. Such prefatory material is not required. If you wish to include some beginning text, you use a sequence of any "chunk" elements.[15]
The index element has three optional attributes as shown in (82).
| (82) |
|
The kind attribute indicates one of four kinds of indexes. If you wish to have only one, common, index for your paper, then set the value to common. All index terms referred to in the document will then be included in this one index, regardless of the values of the kind attribute of any indexTerm elements. This allows you to have a master set of index terms which are tagged according to kind, but still have them all appear when you want a common index.
If you wish to have two or three indexes, then create two or three separate index elements and set the kind attribute to the appropriate value for each index. XLingPaper will produce a separate index for each one. Only those index terms which match the kind of the index will be included in each index.
The table in example (83) shows the default titles that XLingPaper will use.
| (83) |
|
If you wish to use some other title, set the label attribute of the index element to the title you want to use.
Finally, the lang attribute may be used to indicate which of several term elements to use for indexTerm elements (see 4.10.1). The default is to use the first term element.
If your document is not written in English or if your index contains terms in multiple languages, you may well want to have the index that XLingPaper outputs be sorted by a particular language.
The sorting algorithm used depends on the language code you have indicated, if any. The default is ‘en’ (for English). If you have set the indexlang attribute of the main lingPaper element of the document, then XLingPaper will use that code. Some of the known language codes to use are shown in example (42).
This section provides several examples of back matter items. First to be shown are appendices. If one keys the following
Then it should come out looking like what is shown in example (85) (assuming that the referenced example is the fourth example in the paper).
| (85) |
|
Next are references. If one keys references something like what is shown partially in example (86) and if one cites them in the text somewhere, then the results might look like what is shown in example (87).
| (87) |
|
Notice what happens here for Dixon. While there are actually three works for Dixon for 1977, only two are actually cited in the paper: the second and third ones. Notice how XLingPaper automatically assigns the correct letter for these as they occur in this paper.
XLingPaper has several types of examples. All types will be automatically numbered. If you are going to refer to an example, then you will need to specify the num attribute of the example element tag and also give it a unique value.
The various types are illustrated in the following sections. Each section shows what to type and how it would appear. Recall from section 1.2.3 that you click in the text and then you can right-click and choose Insert Before... or Insert After..., depending on whether you want the example to appear before or after where you are. Having done this, when you start to type example, you will see various possibilities of examples show up in the Edit tool, as indicated by the large black arrow.
Notice that most of these are in italics. That is because they are “templates” which define a set of elements appropriate to a given type of example. The non-italic “example” one produces a table. Whenever you select one of these example templates, you will see the appropriate elements for that variety.
In each case, you will see  . This indicates that this is an example. The little x is where you should type in a unique name for this example so you can refer to it elsewhere in your paper.[17] You will actually see this name when you create any references to examples (see section 5.10). The idea is to create a unique name that relates to the example itself. It could be a short description of what the example
is illustrating or some key reminder of the content. I strongly recommend that you use letters and numbers, but no spaces.[18] You can use case to distinguish words. Here are some examples taken from one of my XLingPaper documents:
. This indicates that this is an example. The little x is where you should type in a unique name for this example so you can refer to it elsewhere in your paper.[17] You will actually see this name when you create any references to examples (see section 5.10). The idea is to create a unique name that relates to the example itself. It could be a short description of what the example
is illustrating or some key reminder of the content. I strongly recommend that you use letters and numbers, but no spaces.[18] You can use case to distinguish words. Here are some examples taken from one of my XLingPaper documents:
| (89) |
|
Note that using just a number is not a good idea because at some point down the road you may want to move the example or there may be other examples that need to be inserted before it.
In the following sections, I will refer to the appropriate template name.
Word examples consist of one or more words, usually with their glosses. They come in two varieties: single and lists. (See section 5 for how to insert an example.)
Single word examples consist of a single word and its gloss, usually. A single word example is given below. If you choose the example(word_with_gloss) template, you should see something like what is shown in (90) (as indicted by the large black arrow).
If you then type in the blue (language data) area and green (gloss) areas[46] as shown in (91), you'll get the result in (92) (assuming that this is the second example in the paper).
If instead of choosing example(word_with_gloss), you choose example(word_without_gloss), you will only see the blue language data element, not the green gloss element.[46]
In some cases, you may want to add another line of data after the first line. This could be because the data are all related. You can do this by inserting another word element after the last element in the word element (which will be either a langData or gloss element). You can then fill in the langData and any gloss elements in it. As an example,[47] if you key what is shown in (93), then you'll get the result in (94) (assuming that this is the first example in the paper).
| (94) |
|
The second kind of word example is a list of words. These consist of a list of words and their glosses, usually. A list of words example is given below. If you choose example(listWord_with_glosses), you'll get what is shown in (95), as indicated by the large black arrow.
Notice that there is one example item for the entire example and that there are two example items for two words, each with its own gloss. This is so you can refer to either the whole example or to an individual line within that example. See section 5.10. As with the plain word example in (90) above, the blue patches are for language data and the green ones are for glosses.[46]
If you need more lines, click in one and then click on the listWord that shows in the node path bar as indicated by the big black arrow in (96).
When you now insert another element after the selected item (see section 1.2.3), you can choose listWord(with_gloss) and it will add a new line for you.
If you then type in the values as shown in (97), you'll get the result shown in (98) (assuming that this is the third example in the paper).
Notice that one uses the num attribute of the example element for these. In addition, one uses the letter attribute of the listWord element. One does not need to label these letter attributes in any particular order. XLingPaper will correctly assign the letters.[48]
Just like with word examples, you may sometimes want to add another line of data after the first line. This could be because the data are all related. You can do this by inserting another word element after the last element in the listWord element (which will be either a langData or gloss element). You can then fill in the langData and any gloss elements in it. As an example,[49] if you key what is shown in (99), then you'll get the result in (100) (assuming that this is the eleventh example in the paper).
| (100) |
|
Line examples consist of but one line. There is no gloss (one would use an interlinear to include glosses). There are two varieties of line examples: single and list. (See section 5 for how to insert an example.)
Single line examples consist of but one line. If you choose the example(single) template, you should see something like what is shown in (101) (as indicted by the large black arrow).
If you then type what is shown in (102), you'll get the result in (103) (assuming that this is the fourth example in the paper).
One can include an indication of the source for the line by inserting an interlinearSource element after the langData element (note that you will need to click on “langData” in the node path bar[56] and then do an “Insert After” command).
A list of single line examples consist of but one line each. The key difference between just a single example and a list of single examples is that the latter are indented and each line is prefixed by an alphabetic letter. A list of single line example is given below. If you choose example(listSingle), you'll get what is shown in (104), as indicated by the large black arrow.
Notice that there is one example item for the entire example and that there are two example items for two single lines. This is so you can refer to either the whole example or to an individual line within that example. See section 5.10.
If you need more lines, click in one and then click on the listSingle that shows in the node path bar as indicated by the big black arrow in (105).
When you now insert another element after the selected item (see section 1.2.3), you can choose listSingle and it will add a new line for you.
If you then type in the values as shown in (106), you'll get the result shown in (107) (assuming that this is the fifth example in the paper).
Notice that one uses the num attribute of the example element for these. In addition, one uses the letter attribute of the listSingle element. One does not need to label these letter attributes in any particular order. XLingPaper will correctly assign the letters.[48]
One can include an indication of the source for the line by inserting an interlinearSource element after the langData element (note that you will need to click on “langData” in the node path bar[56] and then do an “Insert After” command).
Interlinear examples consist of several lines of aligned text, usually along with one or more lines of an unaligned free translation. Like word and line examples, there are two varieties of interlinear: single and list. In addition, a given interlinear example may be created in one of three ways. Any one of these three may be included in a single interlinear or in any interlinear example included in a list of interlinear examples. These three ways are described in sections 5.3.1.1, 5.3.1.2, and 5.3.1.3. (See section 5 for how to insert an example.)
Please note that within the XMLmind XML Editor, interlinears will often not be aligned properly. This is fine. Remember that the XMLmind XML Editor is not a “What You See Is What You Get” editor. The output (whether web page, PDF, Word or Open Office) will be aligned.
Beginning with version 2.17 of XLingPaper, it is possible to have the XeLaTeX way of producing PDF automatically wrap long interlinears. To make this automatic wrapping happen, you click on lingPaper in the node path bar[56] and then set the automaticallywrapinterlinears attribute to yes via the Attributes Tool. Beginning with version 3.18 of XLingPaper, this setting will also enable web page output to automatically wrap; note, however, that if you are using a style sheet with your document, the web output will only wrap if you also have the ignorePageWidthForWebPageOutput attribute of the pageLayout element set to yes.
Single interlinear examples contain only one interlinear example. The following sub-sections delineate the three ways one may key an interlinear example. The first two align the words in the interlinear. The third also aligns the morphemes.
The easiest way to key an interlinear example is to merely type a space between each of the words in the interlinear. You do this for both the language data itself and also for the glosses.
Note, however, that this only works for plain text data within a single langData element or a single gloss element on each line. If you insert any other field (e.g., to emphasize or highlight some portion of the interlinear line and/or if you want to use the special abbreviation capability of XLingPaper[50]), then you will need to use the method outlined in section 5.3.1.2.
If you choose the interlinear_l_l_g_free template, you should see something like what is shown in (108) (as indicted by the large black arrow).
If you then type in the blue (language data), green (gloss), and black (free translation) areas[46] as shown in (108), you'll get the result in (110) (assuming that this is the sixth example in the paper).
| (110) |
|
||||||||||||||||||||||||||||||||||||||||||||||||||
Notice how the line elements are grouped together under a lineGroup element.
Also note that XLingPaper does all that is needed to do the aligning. It will only automatically wrap long lines for the XeLaTeX way of producing PDF[51] and web page (and EPUB) outputs;[52] for the other kinds of output, you will need to break long lines manually; see 5.3.3 below.
You have probably noticed that there are many types of interlinear examples listed in the Edit tool.[3] The following table lists the ones that use a space between words to align the words:
| (111) |
|
The method given in section 5.3.1.1 only works on plain text in a single field, with words separated only by spaces. If you want the words to align, but you also want to, say, emphasize a certain word or some morpheme or if you want a gloss to show in small caps or if you want to use the abbreviation capability of XLingPaper,[50] or even if you want to insert an endnote element, then you need to use this second method for keying interlinear examples.
If you find that you have already entered, say, an object element and then remember you need to use this method, you can manually select the content of the line (by selecting the line using the mouse), use Edit menu item / Copy as Text, and then do a Paste command.
Note, however, that there is a special command that will let you convert interlinear created using spaces to this "wrd" format. Put the cursor at the beginning of the first line of the interlinear you want to convert and then use menu item XLingPaper / Convert interlinear line to wrd elements Shift+F10.[53] You will need to do this for each interlinear line you wish to convert. To be more specific, here are the recommended steps for doing this conversion:
For these "wrd" interlinear examples, if you do not want to use the special convert command mentioned above, you should use the example templates that begin example(interlinear_wrd_...). These produce an example that has five wrd elements which you can fill in for language and gloss data. You can also insert object elements within these as needed to provide the emphasis or whatever you are seeking to do.
For example, if you choose the example(interlinear_wrd_l_g_free) type, you'll see:
The blue patches are for language data, the green are for glosses, and the black is for the free translation.[46] Each section is a word that will be aligned in the interlinear output. If you need more than five words, click in the last one in the line, click on wrd in the node path bar,[56] and insert another element.[19] Choose wrd(langData) or wrd(gloss) depending on whether you want another instance of a language data item or a gloss item.
The following is an example from Lachixio Zapotec/Spanish. If you type what is shown in (113), you'll get the result in (114) (assuming that this is the fourth example in the paper).
| (114) |
|
||||||||||||||||||||||||||||||||||||||||||||||||||||||
Notice the use of type attributes to tag the grammatical categories (which are to be shown as small caps) and to tag the emphasized words in the example. See section 10.1 for more on this.
Also note that XLingPaper does all that is needed to do the aligning. It will only automatically wrap long lines for the XeLaTeX way of producing PDF[51] and web page (and EPUB) outputs;[52] for the other kinds of output, you will need to break long lines manually; see 5.3.3 below.
If you are using the SIL FieldWorks Language Explorer program to interlinearize texts, you can create a text that consists of several examples you want to include in your XLingPaper document and then export that text from SIL FieldWorks Language Explorer. Use the “XLingPaper as examples, align words” option. Open the exported file into the XMLmind XML Editor and copy and paste the examples to where you want them to go in your XLingPaper document. You will also probably need to copy and paste the language elements from the exported file into your document. Most likely you will need to do this one by one. See http://fieldworks.sil.org/flex/ for more on the SIL FieldWorks Language Explorer program.
You have probably noticed that there are many types of interlinear examples listed in the Edit tool.[3] The following table lists the ones that allow you to mark some words specially:
| (115) |
|
If you want to have not only the words align, but also the morphemes within the words to align, you will need to key the interlinear examples in a special, more complicated way.[57] Please note, however, that this style of interlinear only works with the web page output and the default XeLaTeX way of producing PDF. All of the other outputs will not show this correctly. Also, please note that this style is not recommended by the Leipzig Glossing Rules (http://www.eva.mpg.de/lingua/resources/glossing-rules.php). Some interlinearizing programs may automatically produce this kind of format. The SIL FieldWorks Language Explorer program is one that allows one to automatically generate this kind of interlinear. One can then merely copy and paste the results into an XLingPaper file. See http://fieldworks.sil.org/flex/.
Besides aligning the morphemes within words, this kind will also automatically wrap long interlinear examples when viewed in a web page. It will not automatically wrap in PDF or Microsoft Word 2003 format, though.[58]
The following is an example from Orizaba Nahuatl/English. If you used the SIL FieldWorks Language Explorer tool to produce the interlinear, it might look like what is shown in (116). This will come out as shown in (117) (assuming that this is the first example in the paper).
| (117) |
|
If you are producing such an interlinear example by hand, you may want to read Hughes, Bird, and Bow (2003) which is available online at http://eprints.unimelb.edu.au/archive/00000455/.
Besides single interlinear examples, one may also produce a list of interlinear examples. Such a list consists of individual interlinear examples. The key difference between just a single interlinear example and a list of interlinear examples is that the latter are indented and each interlinear unit is prefixed by an alphabetic letter. You may use any of the three kinds of interlinear examples shown in sections 5.3.1.1, 5.3.1.2, and 5.3.1.3 above. I will illustrate using the first method for simplicity's sake.
If you choose example(listInterlinear_l_l_g_free) , you'll get what is shown in (118).
Notice that there is one example item for the entire example and that there are two example items for two words, each with its own gloss. This is so you can refer to either the whole example or to an individual line within that example. See section 5.10. The blue patches are for language data, the green patches are for glosses and the black is for the free translations.[46]
If you need more lines, click in one and then click on the listInterlinear that shows in the node path bar.[56]
When you now insert another element after the selected item (see section 1.2.3), you can choose one of the listInterlinear options and it will add a new set of interlinear elements for you.
As an example from Orizaba Nahuatl/English, if you then type in the blue (language data), green (gloss), and black (free translation) areas as shown in (119), you'll get the result in (120) (assuming that this is the seventh example in the paper).
If you are using the SIL FieldWorks Language Explorer program to interlinearize texts, you can create a text that consists of a single example containing the text segments you want to include in this example in your XLingPaper document and then export that text from SIL FieldWorks Language Explorer. Use the “XLingPaper, as a single example, align words” option. There will be one example containing listInterlinear elements, one for each text segment. Open the exported file into the XMLmind XML Editor and copy and paste the example to where you want it to go in your XLingPaper document. You will also probably need to copy and paste the language elements from the exported file into your document. Most likely you will need to do this one by one. See http://fieldworks.sil.org/flex/ for more on the SIL FieldWorks Language Explorer program.
You have probably noticed that there are many types of list interlinear examples listed in the Edit tool.[3] The following table lists the ones that use a space between words to align the words:
| (121) |
|
The following table lists out the kinds of list interlinear examples that allow you to mark some words specially
| (122) |
|
As mentioned in sections 5.3.1.1, 5.3.1.2, and 5.3.1.3 above, XLingPaper does not automatically break lengthy (i.e., wide) interlinear examples with two exceptions:
Unless either of these two are the case, you have to break long lines yourself. This is not necessarily a negative thing. By breaking the interlinear examples by hand, you are able to control where the break occurs. For example, you may choose to only have an interlinear example break at a phrase boundary.
You insert these manual breaks by embedding an interlinear element within either another interlinear element or within a listInterlinear element.
To illustrate how you can do this, suppose you have what I showed in example (109) above, the interlinear portion of which is repeated here in (123).
The basic process is as follows:
The result is given in (128) (assuming this is the fifth example in the document).
| (128) |
|
||||||||||||||||||||||||||||||||||||||||||||||||
Another characteristic of interlinear examples is that they may be taken from an interlinear text. In such cases, one may well want to indicate the text and line number from where the interlinear was taken. One convention is to include an abbreviated name of the text, a colon, and the line number. XLingPaper provides two ways to do this, depending on whether the source interlinear text is included within the XLingPaper document or not.
If the source interlinear text is included in the XLingPaper document (most likely as an interlinear-text element within an appendix; see section 9 or else as a referenced interlinear text; see section 9.4), then you can create an interlinear example that will refer to the appropriate portion of the interlinear text. You can do so in either of two ways.
The simplest is to merely make a reference to the portion. Do this by following these steps:
XLingPaper will insert the content of the referenced interlinear in the formatted output. Starting with version 3.5.3, if the referred to interlinear contains any endnote elements, those endnotes will not appear in the output for the example containing an interlinearRef element (they will, however, appear in the interlinear text output itself). If you want those endnote elements to appear in the output within the example, then follow the second way mentioned next.
The second way is to make a copy of the portion. The advantage of making a copy is that then you can highlight individual words or morphemes that you are discussing in the context. To make the copy, follow these steps:
For example, suppose you have the text shown in (225) described in section 9.2, but included here as (129) for your convenience.
If you copy the second portion as described above, then it might look like this:
This will come out as shown in (135) (assuming this is the second example in the document).
Please note several things:
If the source interlinear text is not included in the XLingPaper document, then you can use the interlinearSource element to type in a reference to the text. For example, suppose you have just created the interlinear shown in (132).
If you have the cursor at the end of the free translation line and then perform an insert after command (e.g., press Ctrl+j or right-click and choose Insert After...), then you can select the interlinearSource element in the Edit Tool.[3]
It will then look like this:
You can then type in an indication of the source of the interlinear as in (134):
This will come out as shown in (135) (assuming this is the second example in the document).
Please note several things:
As noted in section 1.3, it is possible to tag a given language with an ISO 639-3 code for that language. XLingPaper makes it possible to show these codes in interlinear, word, and single examples. It does so by looking at the ISO 639-3 code of the language element referred to by the first langData element in the interlinear example.
In order for XLingPaper to show these codes throughout your document, you must set the showiso639-3codeininterlinear attribute of the main lingPaper element. To do so, click anywhere in the document (except in any part of an associated publisher style sheet). In the node path bar,[56] click on lingPaper. Then use the Attributes Tool[13] to set the showiso639-3codeininterlinear attribute to a value of yes.
If, on the other hand, you want to show the ISO 639-3 codes for only certain examples, set the showiso639-3codes attribute of those example elements to yes.
Here is a sample output from one XLingPaper document that had this attribute set and where the ISO 639-3 code was ‘zaw’.
As mentioned above, interlinear examples usually include a free translation. Sometimes they also include a literal translation (and, more rarely, use a literal translation instead of a free translation). XLingPaper provides a literal element you can use for a literal translation.
Unlike for free translations, there are no interlinear templates which provide a literal translation element. There are at least two ways to insert a literal element:
A literal element has the same set of attributes as a free element. Its output is also the same except that by default, XLingPaper inserts “Lit. ” at the beginning of a literal element. If you wish to use some other label, then you will need to change the literalLabel attribute of the lingPaper element. To set the literalLabel attribute, click on “lingPaper” in the node path bar.[56] Then use the Attribute tool[13] to find and change the literalLabel attribute.
If you are using a publisher style sheet, that style sheet can provide the label to be used. If so, what is in the style sheet will be used even if you have set the literalLabel attribute of the lingPaper element. (For more on publisher style sheets, see section 11.25 or click here to see the documenation on publisher style sheets.)
Sometimes one wants to insert bracketed constituents around items in an interlinear line. XLingPaper has a way to do this rather conveniently. One must, however, have already converted the interlinear to use the approach discussed in section 5.3.1.2.
Once that is done, there are two ways to insert a bracketed constituent.
The first may be the easiest: select the text material that is to be in the constituent you are inserting. The text material should then have a reddish background color to it. Then press the Shift and F12 keys on your keyboard at the same time (or use XLingPaper menu item / Convert selected text to bracketed constituent). Next you will be asked to key the label you want for this bracketed constituent. After keying it and pressing either the Enter key or the OK button, XLingPaper will insert an object element at the beginning of the selection and two object elements at the end of the selection. These elements will have the type attributes shown in example (137).
| (137) |
|
These three types will be added automatically by XLingPaper if you do not already have them. By default, tBracketOpen has a “[” in its before attribute. tBracketClose has a “]” in its after attribute. tBracketLabel uses subscript formatting. Feel free to edit these type elements to format however you want. For example, you might want the label one to use a small caps font.
Further, if you are using abbreviations (see section 4.6), then XLingPaper will try and convert the label into any matching abbreviation.
The second way involves selecting one or more wrd elements. One way to do this is to click on “wrd” in the node path bar and then use Select menu item / Extend Selection to Following Sibling repeatedly until you have the portion you want. If you want to select the entire content of the line, you can click on “line” in the node path bar and then use Select menu item / Select All Children. Once you have done this, you can press the Shift and F12 keys on your keyboard at the same time (or use XLingPaper menu item / Convert selected text to bracketed constituent) as noted above. The rest is the same as above.
Sometimes when aligning words in an interlinear, you need to combine more than one word into an aligned unit. How does one do that?
What you want to do is to use the non-breaking space character instead of a regular space whenever you have two or more words that need to be kept together in an alignment unit/cell. See section 11.13 for one way to key a non-breaking space. This method sometimes does not work if you are using Keyman; if you are using Keyman, try turning Keyman off temporarily. If that still does not work, you can use the Character Tool (see section 11.37, at the end). You will want to use character code 0x00a0 which is in the 0x0080 (Latin-1 Supplement) section relatively near the top (it looks like a blank just before the upside-down exclamation mark). When you have a non-breaking space, it will look like a very small raised period (and not like a regular blank).
Note that if you are using the word-aligned, marking certain words or morphemes approach as discussed in section 5.3.1.2, then you will want to insert the non-breaking spaces before converting the lines into wrd elements.
Table examples consist of a table (of course). When creating an example, one can select example(table). (One will also be created if you merely choose example.) A table embedded within an example will be created. See section 6.1 for more on dealing with tables. (See section 5 for how to insert an example.)
Chart examples consist of a chart (of course). See section 6.2 for more on this. (See section 5 for how to insert an example.)
Tree examples consist of a tree diagram or image (of course). See section 6.3 for more on this. (See section 5 for how to insert an example.)
Definition examples merely consist of a definition, optionally including its key term. They come in two varieties: single and lists. (See section 5 for how to insert an example.)
If you choose the example(definition) template when you insert an example (see section 5 for how to insert an example), you should see something like what is shown in (138).
If you then type what is shown in (139), you'll get the result in (140) (assuming that this is the second example in the paper). Note that the word ‘referential,’ which is the key notion in this definition, has been keyed within a keyTerm element. In this example, the keyTerm element shows in italics by default. You can control how an individual keyTerm element displays by setting its font-related attributes using the Attributes tool.[13] You can also define a type element that is just for key terms and then use the Attributes tool to associate the keyTerm element with this type. The keyTerm will then display according to the font attributes of that type element with the exception that any font-related attributes specified in the keyTerm element will override any of the same font-related attributes of the type element.
| (140) |
|
The second kind of definition example is a list of definitions. A list of definitions example is given below. If you choose example(listDefinition), you'll get what is shown in (141).
Notice that there is one example item for the entire example and that there are two example items for two definitions. This is so you can refer to either the whole example or to an individual line within that example. See section 5.10. As with the single definition example in (138) above, the patches are for keying your definitions.
If you need more definitions, click in one and then click on the listDefinition that shows in the node path bar.[56] When you now insert another element after the selected item (see section 1.2.3), you can choose listDefinition and it will add a new line for you.
As an example, if you type in the values as shown in (142), you'll get the result shown in (143) (assuming that this is the third example in the paper).
| (143) |
|
Notice that one uses the num attribute of the example element for these. In addition, one uses the letter attribute of the listDefinition element. One does not need to label these letter attributes in any particular order. XLingPaper will correctly assign the letters.[48]
Annotation examples consist of one or more annotationRef elements. (See section 5 for how to insert an example.)
Sometimes one wishes to tag an example with a title or heading or label. One uses the exampleHeading element for this. Insert an exampleHeading element within the example element, just before the first element of the example. One may also put an exampleHeading element within a listInterlinear element before a lineGroup element. This way, you can label or tag each interlinear within the list as needed.
Currently, there are no example types (see section 5) that include an example heading. You will need to create the kind of example you want (e.g., interlinear or list interlinear), click on the element as described in the previous paragraph in the node path bar[56] and then do an insert before operation and choose “exampleHeader”.
For example, if you have an interlinear example such as the one shown in (144), repeated from (109) above, then click on the word “interlinear" in the node path bar and then do an insert before operation.[19] The only option will be to insert “exampleHeading”. Choose this. You can then type your header information, including inserting any “embedded” elements.[24]
As I noted in section 5, you should give each example a unique identifier name (that begins with a lower case x). This is so you can refer to the example elsewhere in the paper.
To make such a reference to an example, you use the exampleRef element. While typing text (such as in a p (paragraph) element), insert an element[19] and choose exampleRef. You will see  . If you immediately press the F11 key on your keyboard (or click on the black drop-down arrow or use menu items XLingPaper / Set Reference F11 or if you right-click on it and choose Set Reference), a dialog box will pop up that lists all the example identifiers in your paper. If I do this on one XLingPaper paper I wrote, it looks like this:
You can type in the name of the example or scroll down until you find the one you want. Note that capitalization is significant when typing. When your document is processed, a hyperlink is made between the reference and the example.[21]
As an example, suppose you keyed what is shown in (146):
If example xMonosyllabicStems turned out to be the third example in the document and example xIamb was the twenty-first, the output of (146) would be:
| (147) |
|
Notice that one can also create example references which contain a sequence of letters. One does this by using the paren, punct, and letterOnly attributes. See the table in (148). The equal attribute can be used to insert an equals sign in the reference. This, of course, indicates that the particular example has been given earlier in the paper.
Example reference elements can be used anywhere within a document. They do not need to immediately precede or follow their respective example declaration.
There may be times when you find you have chosen an incorrect example and want to fix it. In the output, you can find the number of the correct example and so want to be able to use the number. You can get a list of the numbers by following the following steps:
The attributes of the exampleRef element are summarized in the table in (148).[13]
| (148) |
|
As mentioned in section 1.3, there are two default languages, one for vernacular language data and one for glosses. Sometimes you need to add a language element (as discussed in section 1.3) and then set individual language data items and/or glosses to these non-default languages.
You do this by clicking in the text area of a langData or gloss element. If you immediately press the F11 key on your keyboard (or use menu items XLingPaper / Set Reference F11 or if you right-click on it and choose Set Reference), a dialog box will pop up that lists all the language identifiers in your paper. If I do this on one XLingPaper paper I wrote, it looks like this:
You can type in the name of the language or scroll down until you find the one you want. Note that capitalization is significant when typing.
Alternatively, you can use the Attributes Tool[13] to manually set the lang attribute to the value you need.
Besides the lang attribute, both langData and gloss elements have two other attributes: textbefore and textafter. These two attributes are ignored unless one has associated a publisher style sheet and set special override values in it for text before and text after to be inserted around each langData or gloss element in given contexts. See section 11.25 for associating a publisher style sheet and also see sections 6.15 and 6.16 in the publisher style sheet documentation .
If you wish, you can also set the language of the free translation element (free). You do this by clicking in the text area of a free element. If you immediately press the F11 key on your keyboard (or use menu items XLingPaper / Set Reference F11 or if you right-click on it and choose Set Reference), a dialog box will pop up that lists all the language identifiers in your paper. See section 5.11 for more illustrations of this procedure.
Alternatively, you can use the Attributes Tool[13] to manually set the lang attribute to the value you need.
Besides the lang attribute, the free element has two other attributes: textbefore and textafter. These two attributes are ignored unless one has associated a publisher style sheet and set special override values in it for text before and text after to be inserted around each free element. See section 11.25 for associating a publisher style sheet and also see sections 6.17 in the publisher style sheet documentation .
Sometimes it is appropriate to have two or maybe three examples side-by-side. You can do this by first creating a table (see section 6.1). You then replace the text within each cell with the appropriate example.
We recommend that you only do this for examples which are not very wide. Otherwise it is quite likely that the examples will not fit on the page when you create a PDF, Open Office Writer or Word version of your document.
One may also create tables, charts, and trees.
Table elements can be placed between paragraphs or as examples. In defining tables, one defines the row and column elements, etc. The XMLmind XML Editor has several nice tools to enable you to edit tables conveniently.
If you have an existing table in a file created via a word processing program like Microsoft Word, a spreadsheet program like Excel, or in a web page, see section 11.53 for how you may be able to copy it and convert it to a draft form of a table in XLingPaper.
One creates a table by inserting a new element.[19] You can initially create one of three types of tables (either within an example or separately):
| Type | Result |
|---|---|
| table | A blank table with two columns and two rows. |
| table(head_row) | A blank table with an initial header row and then two regular rows. All three rows have two columns. |
| table(head_row_head_col) | A blank table with an initial header row and then two regular rows. All three rows have two columns. The first column in all rows is a th element. |
Suppose we want to create a plain table with headers. We can insert a table as shown in (150).
When you press the Enter key, it should look like this:
Notice that there are three rows of two columns each. The first row will be treated as a header. You can add columns and rows as needed by using the menu commands for table editing. For example, if you click in the first column of the first row and choose menu items XLingPaper / Table Column, it should look like this:
You can insert columns before or after the one you clicked in, cut or copy the entire column or delete it. If you had just cut or copied another column, then you could also paste the copied column either before or after the selected column.
Doing something similar for the Table Row menu item produces a similar set of options, only it would be for rows instead of columns.
When you select menu item Table Cell, you get the following options:
You can span a column or a row. That is you can combine adjacent table cells into one cell. If this is not clear, you can always experiment a bit to see how it works.
As an example, if you keyed a table so it looks like what is in (154), it should come out as shown in (155).
This could come out as shown in (155).
| (155) |
|
||||||||||||||||||
Beginning with version 2.17.0 of XLingPaper, you can increase the size of a table by using the “Increase Table Size” dialog. You do this by first clicking anywhere within the table and then invoking the XLingPaper / Increase Table Size menu option as shown in example (156).
When you do this, you see the Increase Table Size dialog which might look like what is shown in example (157).
This shows the current number of header rows, then the current number of non-header rows, and finally the current number of columns. You can use the “spinners” to increase the number for each part of the table. (You can also decrease the numbers, but this command will only increase table sizes, never decrease them.) When you either press the Enter key or click on the “OK” button, XLingPaper will increase the header rows, non-header rows, and columns to the amounts you specified.
For example, suppose you want a table that has one header row, ten non-header rows and six columns. You first insert a table in the normal way.[19] Suppose you had just a table with a header row, so it looks like what is shown in example (158).
After clicking somewhere in this table, you invoke the Increase Table Size command and change the numbers to be what you want: 1 header row (which it already has), ten non-header rows, and six columns. The “Increase Table Size” dialog would look like what is shown in example (159).
After you press the “OK” button, the table will now look like what is in example (160).
The Increase Table Size command will work on embedded tables as well as on entire tables. Because of this, it is important to make sure you click within the table you wish to change sizes for before invoking the command.
One other thing to keep in mind while using the Increase Table Size command is that it will make use of some of the existing material in the table. When it increases the number of header rows, it copies the first row in the table and then makes copies of that row until the total number of required header rows are present.. When it increases the number of non-header rows, it copies the last row in the table and then copies that row until the total number of required non-header rows are present. When it increases the number of columns, it copies the last column in the table and then copies that column until the total number of required columns are present.
Finally, please note that if the table you are working on already has row spans or column spans, the Increase Table Size command may not work as you might expect or it may not even be able to increase the sizes at all. Therefore, please try to use this command before you set any row spans or column spans.
There are times, such as in class handouts, poster sessions, and even in textbooks, where one may want to use a table to display a set of data. To facilitate locating data items in class or poster session discussions, one would like to have a line number for the data in a particular table. Rather than having to key such line numbers by hand, XLingPaper allows you to use the counter element within a td or th element. It will automatically keep track of the count of this and all previous counter elements within the current table element at the same level in the table. By default, it displays the count as a number with a following period. If you have more than 9 such rows, you may well want to set the align attribute of each enclosing td element to right so that the numbers align.
You can have the counter appear in other formats by setting the counterNumberFormat attribute of the closest containing table element. Example (161) shows the possible values you can use. We attempt to show the formated results in the XMLmind XML Editor, except that the 01 value shows just like the 1 does.
| (161) |
|
Example (162) shows how one such data display might look.
Tables can also have captions. To add a caption, one needs to do the following:
One can then enter the caption.
As an example, suppose one keys the following table:[64]
One can then remove the border lines by setting the border attribute of the table element to zero such as in (164). It is possible to have finer control over the border lines within a table, but it is not recommended that you do so.[66]
The result should come out as in (165) (assuming this is the fifth example in the document).
| (165) |
|
|||||||||||||||||||||||||||||||||||||||||||||||||
You can have footnotes in tables. XLingPaper's default behavior is to show the footnotes in the table just like it does footnotes/endnotes in prose. Please note that if the table is long, you will most likely not want to have any endnote elements inside a th element that forms a part of the header for the table. This is because if the table goes across a page boundary, the PDF formatting programs will automatically repeat the header information, footnote and all, on the next page. Thus, you will get the same footnote repeated once for every page the long table is on.
There are times, however, when you might need to have any footnotes in a given table show at the bottom of that table, not in the default location for general footnotes/endnotes. In such cases, the norm is not to use footnote numbers but rather a sequence of symbols such as an asterisk (*), a dagger (†), a double dagger (‡), a section symbol (§), and a paragraph symbol (¶). That is, the requirement is for the footnotes to stay with the table wherever that table appears and the footnote numbering is totally independent of the main footnote numbering elsewhere in the paper. How does one accomplish this with XLingPaper?
The basic solution is to create a table that has the footnote material embedded in it by hand. Here are some suggestions on how to do that.
The attributes used in the various elements within a table are summarized in the table in (166).[13] Not every element in a table has all of these attributes, but they are all listed here for ease of reference. When you are using the default way of producing PDF, you can use the XeLaTeXSpecial attribute of the tr element to add a horizontal line when you need an extra one. See line-before and line-after in Appendix D.
| (166) |
|
When using the default way of producing PDF (via XeLaTeX), there are some special cases you may run into. See the first five ordered list items in section 11.17.1.1.
In addition, you may find you need to set the XeLaTeXSpecial attribute sometimes to get certain special effects. The following lists them with links to where the content of the XeLaTeXSpecial attribute is found.
As Judicial Accountability Institute (2018) notes,
While XLingPaper does not have an element specifically for an epigraph, you can use a table element to produce an epigraph. You can use the various attributes to center, align it to the left or right, produce the spacing and content, etc., you need.
Alternatively, you can use a blockquote element.
One can also create charts. Chart elements can be placed between paragraphs or as examples. The content of a chart can either be “plain” text or an image (i.e., graphic) file.[69] In addition, you can use any list element (ol, ul, or dl) or a hanging indent paragraph (hangingIndent). The latter can be useful for entering dictionary entry examples.[70]
Suppose we want to create a non-example chart that shows an image (by the way, this is exactly what all the screenshots in this document are). We can insert a chart as shown in (167).
When you select chart(with_image) and press the Enter key, it should look like this:
When you click on the  symbol, you can set the attributes for this image.[13] It should look like this:
You can either type in the name of the image file in the src attribute or you can do this:
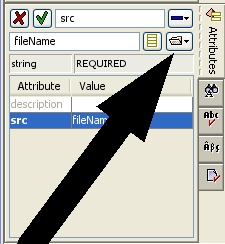
If you want, you can also type in a text description of the image in the description attribute (on a web page, this description will be used if the image file is not available and an audio file reader can use for web page output). Once you type the name of the image file (and press the Enter key), the image will appear within the XMLmind XML Editor itself.
For example, if the image is in a file called ParseC.gif, then if we key things as shown in (170), the corresponding output will be as in (171).[71]
You may find it helpful to set the background of an image to be transparent. This may especially be the case if the image is in an example with an example heading.
Sometimes the graphic appears very large within the XMLmind XML Editor. You can make it appear smaller by setting either the height or the width attribute (or both) to a number. This value indicates the number of pixels to use for showing the graphic image. Some possible values are on the order of 300 or 500, depending on your screen resolution and the size of the XMLmind XML Editor window on your computer. Please note that these values are just for showing the image within the XMLmind XML Editor. They are not used when creating any of the XLingPaper output formats.
If you want a border around the image file, then set the borderaround attribute to yes (the default is no).
If you want to center an image, use a table element (instead of a chart element). Make it have one column and one row (see section 6.1). In the table cell (td element), insert an img element. On the table element itself, set the border attribute to be 0 and set the align attribute to be center.[13]
Beginning with version 3.7.5 of XLingPaper, it is possible to have the XeLaTeX way of producing PDF attempt to fit an image within an example, chart, or figure. To make this fitting happen, you click on lingPaper in the node path bar[56] and then set the useImageWidthSetToWidthOfExampleFigureOrChart attribute to yes via the Attributes Tool. Note that if an example, chart or figure occurs within a landscape element, you may well need to manually set the XeLaTeXSpecial attribute of the img element to use a “width” value. See appendix D.
Note that if you try to use “plain” text instead of an image in a chart, you will probably want to use non-breaking spaces[72] before the text in each line and insert a br element[19] at the end of each line. Otherwise, the result will probably not be formatted the way you had hoped.
One can also create tree diagrams. From one perspective, tree diagrams are just charts. We have chosen to use a distinct element for trees and charts, however, as linguists typically consider these to be different things. You can type plain text to try and format the tree (by using a lot of non-breaking spaces[72] at the beginning of lines and br elements at the end of each line, for example) or you can use some tool to produce a tree image file (e.g., LingTree[73]). I recommend using the latter.
Tree elements can be placed between paragraphs or as examples. Suppose we want to create a non-example tree that shows an image file created by the LingTree program. We can insert a tree as shown in (172).
When you select tree(with_image) and press the Enter key, it should look like this:
When you click on the symbol, you can set the attributes for this image.[13] It should look like this:
You can either type in the name of the image file in the src attribute or you can do this:
If you want, you can also type in a text description of the image in the description attribute (on a web page, this description will be used if the image file is not available). Once you type the name of the image file (and press the Enter key), the image will appear within the XMLmind XML Editor itself.
For example, if the image is in a file called rikaykaamaanaykipaq.png, then if we key things as shown in (175), the corresponding output will be as in (176).
If you want to make an image file larger or smaller, you can do so by using one of the special attributes on the image element, depending on which output format you are using. See example (177). You may need to play with these values to get the output to look the way you want. Note that none of these will make any difference to how the image file shows within the XMLmind XML Editor.
| (177) |
|
Some publishers require one to put tables, charts and trees in special formatting items sometimes called “floats.” The idea is that where these items will appear in the published document will “float" depending on what is best as determined by the typesetter.[74] Personally, I am not a fan of floats. Whenever I am reading an article or book that has these, it is often the case that when a figure or table is referenced in the text, it is very hard to know where to look for the figure or table. Even though they are numbered, they typically do not appear very often so one does not know whether to look ahead or behind nor how far. It also is often the case that no list of figures or list of tables were provided, making it even more challenging to find the correct float.[75] Therefore, I am only reluctantly providing floats for XLingPaper. Please be nice to your readers and not use them unless absolutely necessary.
XLingPaper provides two kinds of floats: figures and numbered tables. Please note, however, that typesetters generally consider it bad style to mix footnotes with floats. Therefore, if there are any embedded endnote elements, the item will show up “in place.” Also note that any floats will not appear in the output when producing a Word 2003 document (see section 11.18).[76]
Something else to keep in mind is that these floats are intended to occur relatively infrequently. There should be lots of text and/or examples and/or other tables, etc., between them. If you have many of these in a row, the XeLaTeX way of producing PDF may well fail or the results may be very ugly.
Figures consist of either a required chart element or a required framedUnit element. They also can have an optional caption element. XLingPaper will automatically number the figures in your document. (Figures are numbered independently of numbered tables.) For papers, each figure is numbered consecutively. For books (i.e., documents containing chapter elements), the numbering for figures starts over with each chapter and appendix. The chapter number and appendix letter are prepended to the figure number.
Whether the caption appears before or after the chart is determined by the figureLabelAndCaptionLocation attribute of the lingPaper element. The default is set to after. To change the default setting or to overtly set the figureLabelAndCaptionLocation attribute, click on “lingPaper” in the node path bar.[56] Then use the Attribute tool[13] to find and change the figureLabelAndCaptionLocation attribute.
If you have an XLingPaper document for which you want to convert existing chart elements into figure elements, do the steps outlined in example (178) for each such chart element. Please note, however, that this will only work for chart elements that are not part of an example element.
To create a figure from scratch, do an insert before or insert after operation[19] and choose one of the figure options. For example, if we chose figure(with_caption_and_image), we would get what is shown in example (179).
Like other elements which can be referred to, figures have an id attribute. I suggest that you begin all figure id attributes with the letter "f."[17] The patches are for where you key your caption. See section 6.2 for how to set the image of the chart.
As an example, if you had the appropriate image file, then you could create a figure like what is in example (180).
If this is the first figure in the document, it will come out as in example (181).
| (181) |
|
The word "Figure" before the number is used by default. If you wish to use some other label, then you will need to change the figureLabel attribute of the lingPaper element. To set the figureLabel attribute, click on “lingPaper” in the node path bar.[56] Then use the Attribute tool[13] to find and change the figureLabel attribute.
One can also produce an automatically generated list of figures for one's XLingPaper document. One does this by inserting a listOfFiguresShownHere element within a preface or glossary element. Usually the preface or glossary element is a distinct preface or glossary and contains just the list of figures. You change the label attribute of the preface or glossary element to be something like “List of Figures” and so it will appear that way in the table of contents. The list of figures will include the figure label, figure number and any caption.[77]
The attributes of the figure element are summarized in the table in (182).[13]
| (182) |
|
As noted in section 6.4.1, you should give each figure a unique identifier name (that begins with a lower case f). This is so you can refer to the figure elsewhere in the paper.
To make such a reference to a figure, you use the figureRef element. While typing text (such as in a p (paragraph) element), insert an element[19] and choose figureRef. You will see  . If you immediately press the F11 key on your keyboard (or click on the black drop-down arrow or use menu items XLingPaper / Set Reference F11 or if you right-click on it and choose Set Reference), a dialog box will pop up that lists all the figure identifiers and their captions in your document.
You can type the identifier you want in the text box or scroll down until you find the one you want. Note that capitalization is significant when typing. When your document is processed, a hyperlink is made between the reference and the figure.[21]
One can also control what text precedes a figure reference, if one so chooses. Some people like to use a word such as “figure,” whereas others prefer to not have anything. One challenge with actually keying or not keying such words is that some publishers may want the author to do it one way or the other. In fact, some publications want authors to use capitalized "Figure" while others want authors to use lower case "figure".
In an effort to minimize an author's effort in dealing with this situation, XLingPaper provides you with the option of never keying such words, but rather to have them be inserted automatically when the paper (or book) is formatted. That is, if you so choose, you can never key words such as “figure” before a figureRef element. Which word or symbol will appear before them, if any, is controlled by setting various attributes of the figureRef element and the lingPaper element.[78] Please note that the default situation is for XLingPaper to not automatically insert these words; but if you wish, you can have XLingPaper insert them for you.
Example (183) lists the attributes of the lingPaper element that are relevant to this discussion. To modify them, click on “lingPaper” in the node path bar.[56] Then change them using the Attributes Tool.[13] Note that the key attribute is figureRefDefault. The other four are there so you can change the default text to what you need. There are four cases for whether the text needs to be capitalized or not and for whether there is only one reference or several. The default is to use the English words “figure,” “figures,” “Figure,” and “Figures” as appropriate. The “label” attributes are there so if you are writing in a non-English language, you can use the appropriate terms for that language.
| (183) |
|
The relevant attribute for controlling this text in the figureRef element is given in example (184).
| (184) |
|
|||||||||||||||||||
It is also possible to show just the caption or the short caption of a figure. One uses the showCaption attribute to control this as explained in example (185).
| (185) |
|
|||||||||||||||
Numbered tables consist of a required tablenumbered element[79] and either a required table element or a required img element.[80] XLingPaper will automatically number the tables in your document. (These tables are numbered independently of figures.) For papers, each numbered table is numbered consecutively. For books (i.e., documents containing chapter elements), the numbering for numbered tables starts over with each chapter and appendix. The chapter number and appendix letter are prepended to the table number.
If you have an XLingPaper document for which you want to convert existing table elements into tablenumbered elements, do the steps outlined in example (186) for each such table element. Please note, however, that this will only work for table elements that are not part of an example element.
To create a numbered table from scratch, do an insert before or insert after operation[19] and choose one of the tablenumbered options. For example, if we chose tablenumbered(caption_with_head_row), we would get what is shown in example (187).
Like other elements which can be referred to, numbered tables have an id attribute. I suggest that you begin all numbered table id attributes with the letters "nt."[17] The patches are for where you key your caption. See section 6.1 for how to create and edit the content of a table.
Whether the caption appears before or after the table is determined by the tablenumberedLabelAndCaptionLocation attribute of the lingPaper element. The default is set to before. To change the default setting or to overtly set the tablenumberedLabelAndCaptionLocation attribute, click on “lingPaper” in the node path bar.[56] Then use the Attribute tool[13] to find and change the tablenumberedLabelAndCaptionLocation attribute.
As an example, you could create a numbered table like what is in example (188).
If this is the first numbered table in the document, it will come out as in example (189).
| (189) |
|
The word "Table" before the number is used by default. If you wish to use some other label, then you will need to change the tablenumberedLabel attribute of the lingPaper element. To set the tablenumberedLabel attribute, click on “lingPaper” in the node path bar.[56] Then use the Attribute tool[13] to find and change the tablenumberedLabel attribute.
One can also produce an automatically generated list of numbered tables for one's XLingPaper document. One does this by inserting a listOfTablesShownHere element within a preface or glossary element. Usually the preface or glossary element is a distinct preface or glossary and contains just the list of tables. You change the label attribute of the preface or glossary element to be something like “List of Tables” and so it will appear that way in the table of contents. The list of numbered tables will include the table label, table number and any caption.[81]
The attributes of the tablenumbered element are summarized in the table in (190).[13]
| (190) |
|
As noted in section 6.4.3, you should give each numbered table a unique identifier name (that begins with lower case nt). This is so you can refer to the numbered table elsewhere in the paper.
To make such a reference to a numbered table, you use the tablenumberedRef element. While typing text (such as in a p (paragraph) element), insert an element[19] and choose tablenumberedRef. You will see  . If you immediately press the F11 key on your keyboard (or click on the black drop-down arrow or use menu items XLingPaper / Set Reference F11 or if you right-click on it and choose Set Reference), a dialog box will pop up that lists all the numbered table identifiers and their captions in your document.
You can type the identifier you want in the text box or scroll down until you find the one you want. Note that capitalization is significant when typing. When your document is processed, a hyperlink is made between the reference and the numbered table.[21]
One can also control what text precedes a numbered table reference, if one so chooses. Some people like to use a word such as “table,” whereas others prefer to not have anything. One challenge with actually keying or not keying such words is that some publishers may want the author to do it one way or the other. In fact, some publications want authors to use capitalized "Table" while others want authors to use lower case "table".
In an effort to minimize an author's effort in dealing with this situation, XLingPaper provides you with the option of never keying such words, but rather to have them be inserted automatically when the paper (or book) is formatted. That is, if you so choose, you can never key words such as “table” before a tablenumberedRef element. Which word or symbol will appear before them, if any, is controlled by setting various attributes of the tablenumberedRef element and the lingPaper element.[78] Please note that the default situation is for XLingPaper to not automatically insert these words; but if you wish, you can have XLingPaper insert them for you.
Example (191) lists the attributes of the lingPaper element that are relevant to this discussion. To modify them, click on “lingPaper” in the node path bar.[56] Then change them using the Attributes Tool.[13] Note that the key attribute is tablenumberedRefDefault. The other four are there so you can change the default text to what you need. There are four cases for whether the text needs to be capitalized or not and for whether there is only one reference or several. The default is to use the English words “table,” “tables,” “Table,” and “Tables” as appropriate. The “label” attributes are there so if you are writing in a non-English language, you can use the appropriate terms for that language.
| (191) |
|
There is only one relevant attribute for the tablenumberedRef element. It is given in example (192).
| (192) |
|
|||||||||||||||||||
It is also possible to show just the caption or the short caption of a numbered table. One uses the showCaption attribute to control this as explained in example (193).
| (193) |
|
|||||||||||||||
There are two cases where you might want to convert a table into a numbered table. As mentioned above in section 6.4.3, one case is when you have a table element that stands alone. To convert such existing table elements into tablenumbered elements, do the steps outlined in example (194) for each such table element.
For the case where you have a table element in an example, do the steps outlined in example (195).
Lists come in three varieties:
Each one is explained and illustrated in the following sections.
Unordered or bulleted lists consist of items, each of which is tagged with a bullet. To create an unordered list, insert a ul element:[19]
When you select ul and press the Enter key, it should look like this:
That is, it begins with two bulleted list items. You can start typing the content of each item. You can insert another item (which is an li element) by either typing Enter, Ctrl+Enter or by inserting before or after.[19]
For example, if you type what is shown in (198), the corresponding output will be as in (199).
| (199) |
|
One can embed lists within lists. Normally, one uses the same kind of list for both the outside and inside lists, but one can mix the varieties. To embed a list, click on the end of the text in the list item just above where you want to embed the list and insert another ul element.[19] It should look like this:
You can now start typing the content of the embedded list, add new list items, etc.
To remove an item from a list, you can click on the li element in the node path bar.[56] This will select the entire list item. You can now delete it (by typing Ctrl+k), cut it or copy it. If you cut or copy it, you can then paste it in another place in a list.
Ordered or numbered lists consist of items, each of which is tagged with a number or letter in sequence. To create an ordered list, insert an ol element:[19]
When you select ol and press the Enter key, it should look like this:
That is, it begins with two numbered list items. You can start typing the content of each item. You can insert another item (which is an li element) by either typing Enter, Ctrl+Enter or by inserting before or after.[19]
For example, if you type what is shown in (203), the corresponding output will be as in (204).
| (204) |
|
One can embed lists within lists. Normally, one uses the same kind of list for both the outside and inside lists, but one can mix the varieties. To embed a list, click on the end of the text in the list item just above where you want to embed the list and insert another ol element.[19] It should look like this:
You can now start typing the content of the embedded list, add new list items, etc.
To remove an item from a list, you can click on the li element in the node path bar.[56] This will select the entire list item. You can now delete it (by typing Ctrl+k), cut it or copy it. If you cut or copy it, you can then paste it in another place in a list.
For ordered lists, XLingPaper defaults to numbering the list elements at the highest level (i.e., using 1, 2, 3,... for each list item). If there is a nested ordered list at the second level, then it uses lower case letters (i.e., a, b, c, ...). For a third level nested ordered list, it uses lower case roman numerals (i.e., i, ii, iii, iv, v, ...). If there is a fourth level nested ordered list, it will use numbers again. It repeats this “numbers, lower case letters, lower case roman numerals” for each successive nested ordered list.
There are times when you may want to be able to choose the numbers or letters to use. You do this by setting the numberFormat attribute of the ol element. Example (206) shows the possible values you can use.[82]
| (206) |
|
Please note that while the output will have the correct number or letter, you will not see them in the XMLmind XML Editor.
Sometimes you may want to use an ordered list to create an outline, perhaps in a dissertation proposal to show the proposed content of various chapters and their sections You also want to include the section numbers. You can now do this for the default way of producing PDF only. You do it by nesting ol elements and setting two attributes: numberFormat and numberLevel. Set numberLevel to multiple (which enables it to correctly set the level numbers). You set the numberFormat attribute to values as shown in example (207).
| (207) |
|
You can also begin the pattern with a capital A if you are showing appendices, say.
When you have more than nine numbered items at any level, then you should use double "11" instead of a single "1". For example, suppose that chapter 5 has eleven sections in it. For chapter 5's embedded ol element, use "1.11”. If any of these subsections of chapter 5 have further subsections, use “1.11.1”, etc. If you just use the usual “1.1” or “1.1.1”, the alignment will not be correct in the PDF.
Please note that while the output will have the correct number or letter, you will not see them in the XMLmind XML Editor.
Definition lists are lists whose items have two parts: a term and its definition. Appendix A in this document has such a list in it. To create a definition list, insert a dl element:[19]
When you select dl and press the Enter key, it should look like this:
Like unordered and ordered lists, it begins with two definition list items. The term is the one closest to the left and the definition is indented.
You can start typing the content of each term and definition. The term will be bolded (in the XMLmind XML Editor). You can insert another term by clicking at the end of a definition and then doing an insert after[19] for a dt element. When you've typed in the term, you can do an insert after for the dd definition element.
For example, if you type what is shown in (210), the corresponding output will be as in (211).
| (211) |
|
To remove a term from a list, you can click on the dt element in the node path bar.[56] This will select the term item. You can now delete it (by typing Ctrl+k), cut it or copy it. If you cut or copy it, you can then paste it in another place in a list. Similarly, you can select and delete or copy a dd definition element.
The default way of producing PDF does not put the content of the dd element on a new line like the web page output does. If you want it to be on a new line, then set the showddOnNewLineInPDF attribute to yes on the dl element.
A mentioned in section 1, XLingPaper manages references and citations to references. Section 4.5 discusses how to create references. This section shows how to make citations to the references.
Reference citations involve two aspects: the declaration of a label and citations to that label. As with example number names, the label is chosen by the user. A label can be any sequence of letters and numbers the user wishes to use (such as rChomsky81 or rLGB, for example). The id attribute of the refWork element declares the unique label. The citation element refers to the label and XLingPaper will insert the author name(s)[83] and date in an appropriate fashion.
As I noted in section 4.5, you should give each reference work a unique identifier name (that begins with a lower case r). This id should consist of letters and numbers, but no spaces. This is so you can refer to the reference elsewhere in the paper.
To make such a citation to a reference, you use the citation element. While typing text (such as in a p (paragraph) element), insert an element[19] and choose citation. You will see  . If you immediately press the F11 key on your keyboard (or click on the black drop-down arrow or use menu items XLingPaper / Set Reference F11 or if you right-click on it and choose Set Reference), a dialog box will pop up that lists all the reference works in your references. They will be sorted first by the citename attribute of the refAuthor element (see section 4.5), the date of the refWork, and then by the refTitle element of the refWork. A colon will separate the citename from the title. At the end of the line, the id will be shown within squiggly brackets.
For one XLingPaper paper I've worked on, it looked like this:
. If you immediately press the F11 key on your keyboard (or click on the black drop-down arrow or use menu items XLingPaper / Set Reference F11 or if you right-click on it and choose Set Reference), a dialog box will pop up that lists all the reference works in your references. They will be sorted first by the citename attribute of the refAuthor element (see section 4.5), the date of the refWork, and then by the refTitle element of the refWork. A colon will separate the citename from the title. At the end of the line, the id will be shown within squiggly brackets.
For one XLingPaper paper I've worked on, it looked like this:
You can type the name you want or scroll down until you find the one you want. Note that capitalization is significant when typing. When your document is processed, the citation is created using a standard linguistic format that is also a hyperlink to the referenced work.[21]
Consider the examples shown in (213) which come out as shown in (214) (assuming that the appropriate reference elements have been made).
| (214) |
|
Recall that XLingPaper only includes those reference entries which have a corresponding citation somewhere in the file(s). Suppose that there are two refWork elements for a particular refAuthor element, both of which are for the same year as example (215) below has for Clements (and Dixon, too).
If only the second such entry is cited in the text (i.e., via a citation element), then the date should be produced as 1985, not as 1985b or even as 1985a. XLingPaper formats this correctly. It adjusts the value of the letter in the date for such entries to correspond to the appropriate value. If there were three dates (such as 1985a, 1985b, and 1985c) and only two were cited (such as 1985b and 1985c), then XLingPaper will output these as 1985a and 1985b, respectively.
The content of the refDate element can be any text, so one can also use strings such as in prep., to appear, or forthcoming as the date.
In some cases (such as for some documents on historical linguistics), a date is not required or even desired. For these, set the date attribute of the citation element to no. While the date will not show in the output, it is still shown in the XMLmind XML Editor so that you can more easily know which reference is being cited.
The placement of the parentheses around the date in the citation within the text can be controlled by the user. The default option is to enclose the date in parentheses. In (213)-(214) above, notice how the citation to Regnier 1989 did not have parentheses around the date. That's because the paren attribute was set to a value of none, which outputs the date without any parentheses. The table in (216) delineates the various options.[13] The last two (citationBoth and citationInitial) will put an opening parenthesis before the author name(s). This is as a convenience for those cases where the citation is to be enclosed in parentheses.
| (216) |
|
In addition, one can control whether or not the author name appears. The default action is for the name to appear. If you do not want the author name to appear, use the author attribute and give it a value of no.[13] This is useful when listing several works by the same author(s). For example, if the citations are keyed as in (217), the results will be what is shown in (218) (assuming the appropriate reference entries have been made).
| (218) |
|
Note in (217) that the citation to rEWillett82 has been selected, so we see the Attribute Tool for this citation. Notice that the author attribute has been set to no and that the paren attribute has been set to none so that just the date appears in (218).
Sometimes a writer wishes to include a page number with the citation. XLingPaper provides a means for doing this. Suppose the references section is the same as that in (213)-(214) above. Then if we set the page attribute to 251 for the Greenberg citation element, the result will be as in (219).
| (219) |
|
The contents of the page attribute[13] of the citation element is inserted after the date with an intervening colon. Any string of characters (not just digits) can be used as a page number.
Sometimes a writer wishes to include a time stamp with the citation for when the referenced material is audio or visual material. XLingPaper provides a means for doing this. You set the timestamp attribute of the citation element to do this.
The contents of the timestamp attribute[13] of the citation element is inserted after the date with an intervening space. Any string of characters can be used as a time stamp.
The expectation is that you will not set both the page and timestamp attributes for a given citation element. If you do, the page number will always appear first.
The reference citation attributes are summarized in (220).[13]
| (220) |
|
Some linguistic papers and books include one or more complete interlinear glossed texts, often in one or more appendices. XLingPaper allows you to include such texts. The form of the interlinear within the interlinear text may be the same as any of those described for interlinear examples (see section 5.3). Long interlinears will not automatically wrap except for the XeLaTeX way of producing PDF[51] and web page output.[52]
Occasionally, such interlinear text is preceded by the same text in paragraph form.[84] In such cases, use a prose-text element to key the text. Set the lang attribute of the prose-text element to the id attribute value of the language element the text is written in. The text will then be formatted in the output per the information contained in that language element.
It is also possible to insert paragraphs (p elements) or continuation paragraphs (pc elements) between interlinear elements. This can be used to insert commentary on the text.
One possible way to include an interlinear text is to use the SIL FieldWorks Language Explorer program to interlinearize a text and then export the entire interlinear text in XLingPaper format. We suggest you use the “XLingPaper, align words" option. You can then open the exported file into the XMLmind XML Editor and merely copy and paste the resulting text into an XLingPaper document. You will also probably need to copy and paste the language elements from the exported file into your document. Most likely you will need to do this one by one. See http://fieldworks.sil.org/flex/ for more on the SIL FieldWorks Language Explorer program.
The ID in the text and textref attributes of the interlinear elements in the exported text have a pattern of “T-IDsomething-line_number” where something is usually a sequence of letters and/or digits and line_number is the line number that shows in SIL FieldWorks Language Explorer.
Note that if you use this option, then most of what is described in the next section has already been done for you.
One can also key an entire interlinear text by hand. There are two ways to do this. One is to create an interlinear text as a modular document. You can then make this text be part of more than one XLingPaper document. To do this, use menu items File / New. Scroll down to the XLingPaper section and choose “Interlinear text (part of a modular document).”
The other way is to merely create the text within your current document. To do this, one can, say, perform an insert after command (e.g., press Ctrl+j or right-click and choose Insert After...), and type interlinear-text in the Edit Tool.[3] It should look like this:
The first option[85] results in the following:
You can then key in the title of the text and also a shortened title. The shortened title is used when indicating line numbers and also for when an example within the document refers to this text (see section 5.3.4.1).
After this, you can create the interlinear portions which constitute the text. You can use methods similar to those outlined in sections 5.3.1.1-5.3.1.2, including using abbreviations. For example, it might look something like this:[86]
When formatted, this will look like what is shown in (224).
| (224) |
|
||||||||||||||||||||||||||||||||||||||||||||||||||||||||||||||||||||||||||||||||||||||||||||||||||||||||||||||||||||||||||||||||||||||||||||||
Notice how XLingPaper uses the shortened title and automatically assigns a line number. (If the text was imported from SIL FieldWorks Language Explorer as described in section 9.1, then the line number will be the one given by SIL FieldWorks Language Explorer.) See here for what the ID in the text and textref attributes of the interlinear element looks like for a text taken from SIL FieldWorks Language Explorer. You can simulate this pattern to control the line number XLingPaper will produce in the output.
If you will want to make reference to a portion of an interlinear, then you should give a unique text ID attribute[17] to the interlinear element in such a portion (this is done automatically for you if you import a text from SIL FieldWorks Language Explorer). Suppose we do this for the second portion of the text shown in (223) above, using an text ID of TLIQ2. (We do this by clicking somewhere in the portion, clicking on ‘interlinear’ in the node path bar[56], and then typing TLIQ2 in the Attributes Tool[13].) The result will be:
You can now make reference to this in an interlinear example. See section 5.3.4.1 for more on this.
It is also possible to make a reference to an interlinear within text material (such as in a p element or a langData element). To do this, insert an interlinearRefCitation element and set its reference to an interlinear text. See section 12.9 for the easiest way to do this. For example, if we refer to the second portion in (225), it will appear in the output as shown in (226).
| (226) |
|
It is also possible to refer to the text ID attribute of the entire interlinear text, if the interlinear text has one. In such cases, only the short title of the text will appear.
The attributes of the interlinearRefCitation element are summarized in the table in (227).[13]
| (227) |
|
Sometimes one has a number of distinct XLingPaper documents on a particular language or topic. Some of these documents contain interlinear text. Others are discussions of constructions in the language. In the latter kind of document, one does not want to have to include the entire interlinear text because it is in its own document in the series. And yet, one wants to be able to copy or refer to particular interlinears within the text, including having a hyper-link to the document containing the interlinear text. How does one do this?
First, open the XLingPaper document containing the interlinear text in the XMLmind XML Editor. Make sure that the interlinear-text element itself has the text attribute set to a unique value (this is the ID of the entire interlinear text). Now copy the interlinear-text element as a reference by using menu items Edit / Reference / Copy as Reference.[87]
Second, insert a referencedInterlinearTexts element just before the languages element (near the bottom). It might look something like what is shown in example (228).
Open up the "Referenced Interlinear Texts" by clicking on the plus sign. You will now see what is shown in example (229).
Click on "Interlinear text:" and do a paste. This will link in the interlinear text from your other document. Now click on where it says "url" and type in the location of the XLingPaper file containing the interlinear text. Do not include any file extension. The extension will be supplied automatically by the output. This location can be relative to where the current document is. For example, if the file is named “MyText.xml” and is in a subdirectory called “Texts,” use “Texts/MyText” as the url. If the file is located on the Internet, then use its full URL value minus the final file extension. An example might be “https://mexico.sil.org/sites/mexico/files/zorra_atrapada” for a file on the Internet.
You can now refer to any interlinear within the interlinear text by following the steps outlined in section 5.3.4.1. Note, however, that the interlinear text itself will not appear in the output. The output will, however, have a source reference for the line in the interlinear and this reference will be a hyperlink to the line in the text file located via the value you gave in the “url” field. When you click on this hyperlink, it will open up the file and show the line of the text.
While using the XMLmind XML Editor version 7.2+, you may get a validity message saying “element has no attribute “xml:lang” [cvc-complex-type.3]”. This error has a red background color. This is caused by a mismatch in the xml:lang attribute of the lingPaper element between the two documents (the master document and the document containing the interlinear text). If your document containing the text, say, has the xml:lang attribute of the lingPaper element set to es but the xml:lang attribute of the lingPaper element of the master document either has the xml:lang attribute of the lingPaper element not set at all or set to something other than es, then you will get this validity message. To fix it, make sure that both documents have the same value in the xml:lang attribute of the lingPaper element. (If the xml:lang attribute of the lingPaper element is empty in both or in the document containing the interlinear text, then you will not get this message.) Note that after changing the xml:lang attribute of the lingPaper element in the master document, you may need to shut down the XMLmind XML Editor editor, restart it, and then reload the master document before it will stop showing the validity message. Further, if your master document is large, it may take a very long time for the change to the xml:lang attribute of the lingPaper element to take effect.
XLingPaper allows for two types of special effects.
Within a paragraph or other text, you may want to create some special effects (such as I do here for the word XLingPaper and for element and attribute names). Normally you will use an object element for these, although there is also the langData element. The latter is to be used for all language data in order to provide a consistent rendering for language data. It also tags all instances of such language data within the document. This is important for archiving purposes.
When you create an XLingPaper document, a pre-defined set of type elements are included. You can see them by opening the very last item as shown in (230).
One important, but easy to forget, issue is that you are actually tagging your data with these object elements. Thus, it is actually wiser in the long run to create an object element that is for the kind of thing it is as opposed to how you want it to format. This is especially challenging for those of us who have been using programs that show what we are keying in the way it is to appear on paper; we become conditioned to think in terms of formatting rather than in terms of the kind of item it is. By tagging it as a special object, if we (or someone else) ever decide to format these kinds of items differently, it is very easy to change - merely change the formatting information of the type element. If we have merely tagged these as “bold” or “italic” or used some special color, however, we have to manually search through the document to figure out which ones to change.
If you wish to produce some special effect for any non-language data item, follow these steps.
 .
.
You can type the name you want or scroll down until you find the one you want. Note that when you type, capitalization is significant.
Alternatively, you can use the Attributes Tool[13] to manually set the type attribute to the value you need.
There is another way to do this now, also. You can do this instead:
The attributes of the type element are summarized in the table shown in (232).[13]
| (232) |
|
You can also add highlights or other effects to a language data item by embedding an object element within a langData element.
There are three kinds of special hypertext links available.
The first is for linking material within the document. One does this by inserting[19] a genericRef element within text. The genericRef element has one attribute:[89] gref which should be the id attribute of some section, appendix, example, endnote, or other element that has an id attribute.[90] You can also type some text that will show up as a hyperlink on that text to the appropriate section, appendix, example, endnote, etc.
For example, suppose you want to create a generic reference to a section1 element with an id attribute of sIntroduction. After you insert the genericRef element, it might look like this:
If you immediately press the F11 key on your keyboard (or click on the black drop-down arrow or use menu items XLingPaper / Set Reference F11 or if you right-click on it and choose Set Reference), a dialog box will pop up that lists all the possible ids that you could use. For one XLingPaper paper I've worked on, it, it looked like this:
You can type the name of the one you want or scroll down until you find the one you want (sIntroduction in our example here). You can then type some text within the black patch shown in example (233).[21] So if you were to type introduction, it would come out looking like this:
For links to items outside of the document, one can use the link element within text or other constructs to link to another document or a media object (for example, a sound file). The link element has an href attribute which should be the URI of the other document or the media object you wish to link to. It also has an openInNewTab attribute which can be set to yes if you want to force it to be opened in a new tab when viewed with the web page output. The openInNewTab attribute is ignored in other outputs. The default value is no.
Type some text or embed an image (via the img element) between the begin link element and its end tag. The result will be a hyperlink on that text and/or image that will link to the media object.
Here are two examples of a link element:

Please note that as a URI, the value of the href attribute should have regular English letters and numbers in it. It is possible to use accented letters in the URI file name, but you may well find that the resulting XLingPaper output (either web page or PDF) will not find the file. There are technical reasons for this.[91] Therefore, we advise you to use basic English letters and numbers whenever possible. When it is not possible, there is a special XLingPaper command you can use to convert your file name to a special URI format. To use this command, do the following:
An alternative way is to embed a sound or movie file into a PDF file via the mediaObject element. The way one does this for the default (XeLaTeX) way of producing PDF and the RenderX XEP way of producing PDF differs. (Any mediaObject elements will be converted to hyperlinks in webpage output. The files will not be embedded in the resulting webpage file, however.)
For webpage and the default (XeLaTeX) way of producing PDF, you will need to get the free Symbola font and install it on your computer. You can get it at http://software.sil.org/xlingpaper/resources/symbola-font/. If you installed XLingPaper before version 2.25.0, you will also need to get and install the XeLaTeX upgade package at http://software.sil.org/xlingpaper/resources/xelatex-upgrade/.
The attributes of the mediaObject element used by the XeLaTeX way of producing PDF are summarized in the table in (236).[13]
| (236) |
|
| (237) |
|
The attributes of the mediaObject element used by the RenderX XEP way of producing PDF are summarized in the table in (238).[13]
| (238) |
|
Please be aware that including media objects can make the resulting PDF file very large, simply because the PDF file must include all the media object files. Note that when a given media object file occurs more than once in the document, each occurrence will include that file again.
You can easily control whether to include or exclude all mediaObject elements in a given document by setting the includemediaobjects attribute of the lingPaper element to be yes (the default is no). To set the includemediaobjects, click on “lingPaper” in the node path bar.[56]
This section lists some answers to some common questions on the order of “How do I do X?”. Some of these are not addressed elsewhere.
If it is language data that you want to come out in bold or italic, then set the font-weight attribute of the appropriate language element to bold for bold or set the font-style attribute to italic for italic. See section 1.3.
If it is just some text that you want to make bold or italic, insert[19] an object element and set its type to bold or italic. See section 10.1.
One important, but easy to forget, issue is that you are actually tagging your data with these object elements. Thus, it is actually wiser in the long run to create an object element that is for the kind of thing it is as opposed to how you want it to format. This is especially challenging for those of us who have been using programs that show what we are keying in the way it is to appear on paper; we become conditioned to think in terms of formatting rather than in terms of the kind of item it is. By tagging it as a special object, if we (or someone else) ever decide to format these kinds of items differently, it is very easy to change - merely change the formatting information of the type element. If we have merely tagged these as “bold” or “italic,” however, we have to manually search through the document to figure out which ones to change.
To make some text be superscript or subscript (whether that text is in language data or not), insert[19] an object element and set its type to superscript or subscript. See section 10.1.
One important, but easy to forget, issue is that you are actually tagging your data with these object elements. Thus, it is actually wiser in the long run to create an object element that is for the kind of thing it is as opposed to how you want it to format. This is especially challenging for those of us who have been using programs that show what we are keying in the way it is to appear on paper; we become conditioned to think in terms of formatting rather than in terms of the kind of item it is. By tagging it as a special object, if we (or someone else) ever decide to format these kinds of items differently, it is very easy to change - merely change the formatting information of the type element. If we have merely tagged these as “bold” or “italic,” however, we have to manually search through the document to figure out which ones to change.
If it is language data that you want to always show in a particular color, then set the color attribute of the appropriate language element. See section 1.3.
If it is just some text that you want to show in a particular color, insert[19] an object element and set its type to a color type. You may have to add a type element. See section 10.1.
One important, but easy to forget, issue is that you are actually tagging your data with these object elements. Thus, it is actually wiser in the long run to create an object element that is for the kind of thing it is as opposed to how you want it to format. This is especially challenging for those of us who have been using programs that show what we are keying in the way it is to appear on paper; we become conditioned to think in terms of formatting rather than in terms of the kind of item it is. By tagging it as a special object, if we (or someone else) ever decide to format these kinds of items differently, it is very easy to change - merely change the formatting information of the type element. If we have merely tagged these with some color, however, we have to manually search through the document to figure out which ones to change.
If you have, say, language data that you need to use a large font size for (as often happens with non-roman fonts), if you use a font size set to a particular point size (e.g., 24pt), then your data will always have that size wherever it occurs. This can be problematic for text within elements like secTitle or endnote. The language data will come out either too small or too large.
The solution is to specify a font size that is a percentage (e.g., 120%). Then, if you use this element in a secTitle or an endnote element, it should come out proportionately well in those contexts.
If you, like many of us, use the Charis SIL and/or Doulos SIL font in your document, you may notice some unpleasant formatting issues when producing either a webpage or the RenderX XEP PDF output.
I'm told that these fonts have different ascender and descender values than fonts like Times New Roman.[92] So when you try and mix these fonts in a paragraph or in an interlinear example, sometimes the spacing between lines in a paragraph (in a webpage, say) or the horizontal alignment of interlinear lines (in the RenderX XEP PDF output) do not come out as one would like. For example, the webpage problem might be something like what is in (239)[93] where there is extra vertical space between the lines containing one of these fonts.
For webpage output, one thing you can do is to set the font of your browser to use, say, Charis SIL. It will then look like this:
Notice that now the line spacing is even.
The problem with the RenderX XEP PDF output might look something like what is shown in (241) where the word in one of these fonts is almost a whole line down from the other items on the line. (This only happens when using the RenderX XEP approach to producing PDF; the XeLaTeX way does not have this problem. See section 11.17.)
The way to fix this is to add a special formula to the xsl-foSpecial attribute of all language elements that use either the Charis SIL or Doulos SIL font. If you set the xsl-foSpecial attribute to be text-altitude="0.693em" text-depth="0.215em" then it should come out looking more like what is shown in (242).
Many authors prefer to use small caps for “grammatical” glosses (e.g., inflectional affix glosses). How does one do this?
One can select the portion of a gloss that is the “grammatical gloss” and then press F5 or select menu item XLingPaper / Mark selection as grammatical gloss. The selected text will be tagged with an object element whose type attribute will be set to tGrammaticalGloss. You will need to make sure you have a type element whose id attribute is set to tGrammaticalGloss. You can format it as you wish, including using small caps (see section 10.1). If you create a new XLingPaper document using version 1.11.0 or later, the “grammatical gloss” type element will automatically be included and set to small caps.
As always when using small caps, remember that only lower case letters come out as small caps. Upper case letters will remain capitalized.
Another thing to remember is that the packages that produce PDF output are typesetting packages and typesetters consider small caps to be distinct fonts. Many of us are used to how programs like Microsoft Word and Internet Explorer will approximate small caps for us. The typesetting tools used to produce PDF versions of a XLingPaper document, however, will only produce true small caps when you have a real small caps font. If you do not have a true small caps font, then XLingPaper will attempt to approximate small caps for you. Be aware, however, that this approximation will not be of the same quality as a true small caps font. If you are using Charis SIL fonts, it is possible to create true small caps versions of these.[94] There is also a set of Charis SIL Small Caps fonts at http://software.sil.org/xlingpaper/resources/small-caps-fonts/.
See section 4.6.3 for an automated way of producing a list of abbreviations.
While XLingPaper does not have an overt element for adding a list of abbreviations in the front matter, one can use a preface element to make a list of abbreviations. Here's one way:
Note that you can have multiple preface elements in the front matter section, so you can use this method to create other specialized front matter sections.
To create a master list of references,[95] use the File / New menu item. Find the XLingPaper section and select “References (part of a modular document)”.
This will open up a new document that has just the References portion of an XLingPaper document, along with two (blank) refAuthor elements.
Key your reference information, adding new authors and works as needed. (See section 4.5.)
When you have your master references file the way you want it, you can make it be a part of a modular document by doing the following:

You have now made the linkage between your main document and the master references document.
When you are editing your main document and want to add a reference to your master references document, go to your master references document and make your additions. When you are done making the additions, use menu item Edit / Reference / Edit Referencing Document. This will take you back to your main document.
The next time you need to make an addition to the master references document, you can use menu item Edit / Reference / Edit Referenced Document.
If you find that you need to sort your master references file, see section 11.55.
To find text in a document, use the Search Tool. It is located in the same place that the Attributes Tool is,[13] but is on a different tab. The Search Tool's tab icon looks like this: 
Click on the Search Tool tab. You will see something like this:

You type in the text you want to look for in the Search box. Notice that the XMLmind XML Editor keeps track of the text you have looked for during the most recent editing session. To see these, click on the drop down arrow in the Search box.
You can choose to control various options by checking the boxes or selecting the direction of the search (up or down).
You start the search by hitting the Enter key or clicking on the Start button. When it finds a match, it shows it. You can then either skip it or the whole element it is in, or stop looking.
To find and replace some text, you do what you need to do to find text (see section 11.9), but you check the Replace box. After checking this box, you can type in the replacement text in the box below Replace. Like the Search text box, the XMLmind XML Editor remembers the replacement texts you have used before during this editing session.
When you start the replace operation, it will find the next instance of the matching text to be searched for. You can then skip it, replace the text or even replace all instances (be careful with the last one so you do not accidentally replace ones you did not intend to replace).
Unlike earlier versions of the XMLmind XML Editor, XMLmind XML Editor version 7.3+ has a way to dynamically indicate mis-spelled words. Like many other editors, it uses a red squiggle line underneath the word to indicate a word it does not recognize.
You control what language it uses, among other things, by clicking on the Check Spelling dropdown icon at the bottom of the
screen. It looks like this:  If you click on the part to the left, it controls whether the dynamic spelling checking is done or not (the little check
box is checked when it is set to do checking and it not checked when it is not). The dropdown arrow shows a dialog box where
you can choose what language to use for the spelling checking and/or to perform a spelling check.
If you click on the part to the left, it controls whether the dynamic spelling checking is done or not (the little check
box is checked when it is set to do checking and it not checked when it is not). The dropdown arrow shows a dialog box where
you can choose what language to use for the spelling checking and/or to perform a spelling check.
The dialog box looks something like this:
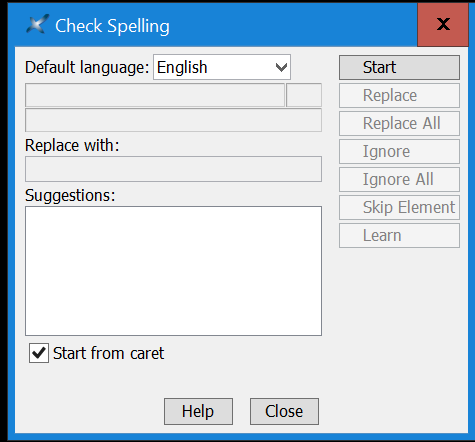
Make sure that the default language is the language your document is written in. If you need a spelling checker for French, German, or Spanish and do not see these languages listed in the Default language drop down, you will need to install the correct addon spelling package. See section 11.11.1 below.
Click on the Start button. When the XMLmind XML Editor finds a word that it does not recognize, it will show it to you in context. You can ignore it, have the spelling checker learn it, or replace it with one of the suggested corrections.
This version of XLingPaper for the XMLmind XML Editor ignores the contents of these elements while doing a spelling check:
To add a spelling checker for XMLmind XML Editor version 7.3+, use menu item Options / Install Add-ons. Note that you must be connected to the Internet for this to work. Look in the Category column for “Dictionary”. If you find the language you need, check the box at the beginning of the line and then click on the OK button. This will install the dictionary for you. You will need to restart the XMLmind XML Editor after installing the dictionary files.
From what I can tell, the XMLmind XML Editor does not automatically insert ‘smart’ quotes like Word does. But one can still insert them.
One can use some special key stroke combinations to enter “curved” quote marks. In (243), when there is a plus sign between the keys, type all the keys at the same time as indicated in the “Key stroke combination” column. The result is given in the “Result” column.
| (243) |
|
Another way is to do this:
| (244) |
|
To key a non-breaking space, use the insert character dialog discussed in section 11.12, but type in nbsp (for non-breaking space).
Another way to insert a non-breaking space is to use Ctrl-Space, that is, hold the Ctrl key down while simultaneously pressing the space bar.
To key a non-breaking hyphen, use the insert character dialog discussed in section 11.12, but type in nbhy (for non-breaking hyphen).
One of the nice things about using the XMLmind XML Editor is that it automatically maintains the structure of an XLingPaper document. One cannot insert an element in an incorrect position. The XMLmind XML Editor simply will not let you do that. And that, of course, is a very good thing.
Nonetheless, there are at least two ways in which an XLingPaper document can have some validity problems. These problems can show up in at least two ways.
First, you may have already noticed that usually there is a green check mark in the lower left corner of the window, as indicated in the following screen shot by the large black arrow.
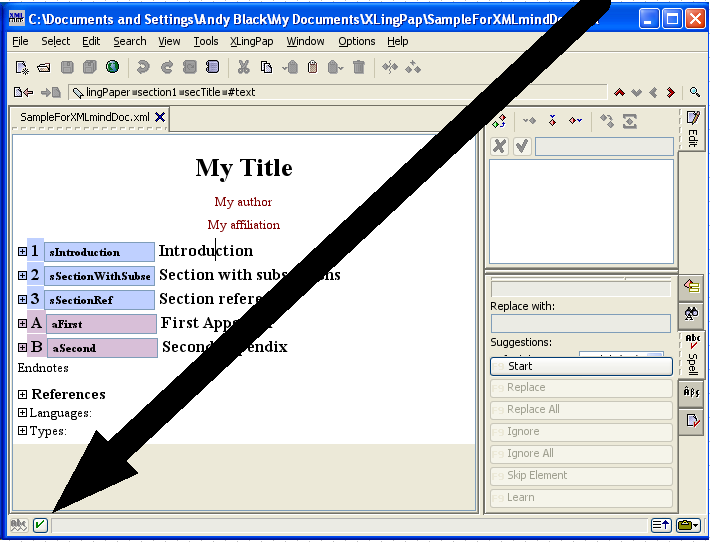
If the document has a validity problem, this icon will turn yellow like this  or it will be red like this
  .[97]
.[97]
When your file is saved and there is some such problem, you may also see the Validity tab open up on the right, in the same area where the Attributes tool is. For example, it might look like this:
Unfortunately, the messages like the ones above in (245) that the validity tool gives are not that easy to understand. The nice thing, though, is that the blue numbers enclosed in
square brackets are hyperlinks to the place in your document where the problem is. If you have the red image showing, then these warning messages will have some suggested steps for how to fix the problem.
In (245), there are instances of the two errors I mentioned above:
So to find out where an error is, click on the blue number enclosed in square brackets. The place should open up in the editor and it should be selected. (On rare occasions, clicking on the number will not show you the problem. When this happens, you can try and use the ugly "no style sheet" view. Clicking on the number should then take you to the element that has the problem. To use this view, use the menu item View / 0 (no style sheet). Then click on the number. To return to the nicer XLingPaper view, use menu item View / XLingPap.)
After you fix the errors (and do a save), the Validity tool area should become blank. You will probably then want to click on the Attributes Tool tab.[13]
In section 1.2, I mentioned that you can use the XMLmind XML Editor to produce webpages. How does one do that?
Use the menu items XLingPaper / Produce Webpage F7.[98] This invokes a transform on your document and produces a file with the same name as your XLingPaper document file, but with an extension of htm (which is often used for webpages). This new file is in the same directory as your XLingPaper document.[99]
To see what the webpage looks like, you can use the menu items XLingPaper / Show Webpage F8.[100] This starts up your web browser showing your processed file.
Note that once you have an instance of your processed file opened in your web browser, you can do the following steps repeatedly:
By following these three steps, you can incrementally write and check the output of your document.
In section 1.2, I mentioned that you can use the XMLmind XML Editor to produce a PDF file version of your document. How does one do that?
Beginning with version 2.6.0 of XLingPaper, there is an automatic way to produce a PDF file. The freely available programs required to do this are included in the XLingPaper configuration installation package (see section 1.2.2). There also is an older way to produce PDF.
Therefore we have two ways to produce PDF. The default way uses XeLaTeX (see section 11.17.1). The older way is to use RenderX XEP (see section 11.17.2). In both cases, the resulting PDF has the fonts used embedded in it.
Also beginning with version 2.6.0, we try to automatically load the PDF file into your default PDF viewer program. On Windows operating systems, because at least some of these programs refuse to allow the PDF file to be changed while they are showing that PDF file, you need to close the file before it can be made again. If you (like me) happen to forget, a message dialog box will be displayed reminding you to do it.
By the way, on Windows operating systems, if you use the freely available Foxit READER program to read your PDF files, then it is possible to enter annotations or comments in the PDF. The Foxit READER can be obtained at http://www.foxitsoftware.com/. See section 11.30 for other ideas on adding comments.
The first and default[101] way to produce PDF is to use the menu item XLingPaper / Produce PDF F9.[102] This invokes a transform on your document and then tries to run the XeLaTeX tool to produce a PDF file. It will produce a file with the same name as your XLingPaper document file, but with an extension of pdf. This new file is in the same directory as your XLingPaper document. Since it needs to have some working files, it also produces a new sub-directory (XLingPaperPDFTemp) for these files. Please note that it can take a while for the XeLaTeX tool to complete its task. This is especially true the first time you run a document that has fonts the XeLaTeX tool has not seen before. If you note any odd results or errors in the PDF output (or if the PDF output process never finishes), please send an email message to xlingpaper_support@sil.org. Also please see section 11.45.
See the note on reading PDF files above, too.
There are some known limitations with the XeLaTeX approach:
| Operating System | Screen-oriented ruler program |
|---|---|
| Windows (XP, Vista, Windows 7) | JRuler (http://www.spadixbd.com/freetools/?referrer=JRulerUser) |
| Mac OS X 10.4+ (Intel processor) | Free Ruler (http://www.pascal.com/software/freeruler/). I had to manually adjust the Unit Conversion Settings to be correct for the screen I was using. I did this by using Free Ruler menu item Units / Conversion Settings, Unit Conversion tab. |
| Linux | The best I found was gruler, also known as ScreenRuler (http://gnomecoder.wordpress.com/screenruler/), although it did not seem to show correct units of measurement. If you discover a better tool, please let me know. |
If you used the XLingPaper configuration installation package, then you already have what you need to use the XeLaTeX approach to producing PDF.
If you did not use the XLingPaper configuration installation package, please do so. See section 1.2.2.
The second way to produce PDF is to use the menu item XLingPaper / Produce PDF (RenderX) Ctrl+Shift+F9.[106] This invokes a transform on your document and then tries to run the RenderX XEP tool to produce a PDF file. If you have the RenderX XEP tool installed on your computer,[107] it will produce a file with the same name as your XLingPaper document file, but with an extension of pdf. This new file is in the same directory as your XLingPaper document. Please note that it can take a while for the RenderX XEP tool to complete its task. If you note any odd results or errors in the PDF output, please send an email message to xlingpaper_support@sil.org.
See the note on reading PDF files above, too.
If you do not have the RenderX XEP tool installed, you will see a message saying that apparently you do not have this tool installed on your machine.
To obtain the RenderX XEP tool, you can download a free, personal use version from http://www.renderx.com/download/personal.html. They also have a free academic version available at http://www.renderx.com/download/academic.html.[108]
There are some known limitations with the RenderX XEP approach:[109]
Installing the RenderX XEP tool, unfortunately, is non-trivial, to put it mildly. I have no idea why they make it so challenging to do... and it is not just with the free versions that they do this! On the bright side, you can get a free version and it really does do a great job of formatting. No other similar tool (i.e., one that uses XSL-FO technologies) that I have tried could even come close to getting the proper output, especially for interlinear examples. All of the other ones would require you to do custom hand-editing for each example.
The steps to follow are below. You may want to have someone help you with these steps since they are so complicated. (These steps are for installing on a Windows machine. For Unix or Mac, see the footnote.)[111]
In section 1.2, I mentioned that you can use the XMLmind XML Editor to produce a file in Microsoft Word 2003 format for your document. How does one do that?
There are actually two ways to do this. (Some users who have the full version of Adobe Acrobat have said that its PDF to Word conversion works well. I tried it on one file and it came out about the same as the first option below.)
The first is to produce a PDF file using the default way of producing PDF. See section 11.17. Then go to http://www.pdftoword.com/ and use their free online converter service. This will produce a Word file that has the exact same formatting as the PDF. There are three drawbacks as of July 20, 2012:
The second way is to use the menu items XLingPaper / Produce Word 2003 Document. This invokes a transform on your document and then tries to run the XMLmind XSL Utility tool to produce a Word 2003 document file. If you have the XMLmind XSL Utility tool installed on your computer, it will produce a file with the same name as your XLingPaper document file, but with an extension of doc. This new file is in the same directory as your XLingPaper document. Please note that it may take a while for the XMLmind XSL Utility tool to complete its task.
If you do not have the XMLmind XSL Utility tool installed, you will see a message saying that apparently you do not have this tool installed on your machine.
To obtain the XMLmind XSL Utility, you can download the latest personal edition from http://software.sil.org/xlingpaper/resources/xmlmind-xsl-utility/. Be sure to read the license information in the installation program to determine if the Personal Edition License is appropriate for your situation. (SIL members can use the Personal Edition License.) If the Personal Edition License is not correct for you, please go to http://www.xmlmind.com/foconverter/buy.html and buy a license for the Professional Edition.
The following table delineates what to get depending on your operating system:
| Operating System | Installer to download |
|---|---|
| Windows (XP, Vista, Windows 7) | xslutil_perso-4.6.1-setup.exe |
| Mac OS X 10.4+ | xslutil_perso-4.6.1.zip |
| Linux | xslutil_perso-4.6.1.zip |
After you have downloaded the file, do the following:
| Operating System | What to do |
|---|---|
| Windows (XP, Vista, Windows 7) | Run the installer; be sure to install it in the "C:\Program Files" directory (or "C:\Program Files (x86)" directory on 64-bit versions). |
| Mac OS X 10.4+ | Unzip it wherever you'd like, then do the following in a Terminal: sudo ln -s Full_path_to_where_you_unzipped_it/xslutil_perso-Version_number /usr/local/bin/xslutil Note that on some Mac systems, you may need to first make the /usr/local/bin directory via commands like these: sudo mkdir -p /usr/local sudo mkdir -p /usr/local/bin |
| Linux | Unzip it wherever you'd like, then do the following in a Terminal: sudo ln -s Full_path_to_where_you_unzipped_it/xslutil_perso-Version_number /usr/local/bin/xslutil |
On Windows machines, the current XLingPaper configuration files will also work with versions 4.2p1, 4.3.1, and 4.3.2 of this converter.
By the way, you can also invoke this tool by itself and use it to convert to some other formats, too. You will need to use the .fo version of your file (that this process also produces) as your input file. Then you will need to select the output format you wish. Ones that make the most sense are to map from FO to .docx, .odt, or .rtf.
Please note that this process of producing a Word 2003 document is not as mature and stable as the process to produce a webpage and PDF is. Here are the known limitations:
If you note any odd results or errors, please send an email message to xlingpaper_support@sil.org.
In section 1.2, I mentioned that you can use the XMLmind XML Editor to produce a file in Open Office Writer format for your document. How does one do that?
Like for producing a Word version, there are two options.
The first is to produce a PDF file using the default way of producing PDF. See section 11.17. Then go to http://www.pdftoword.com/ and use their free online converter service. This will produce a Word file that has the exact same formatting as the PDF. There are three drawbacks as of July 20, 2012:
Finally, open this Word file with Open Office Writer. Note that it may not be 100% perfect, but it will be close.
The second option is to use the menu items XLingPaper / Produce Open Office Document. This invokes a transform on your document and then tries to run the XMLmind XSL Utility tool to produce an Open Office Writer document file. If you have the XMLmind XSL Utility tool installed on your computer, it will produce a file with the same name as your XLingPaper document file, but with an extension of odt. This new file is in the same directory as your XLingPaper document. Please note that it may take a while for the XMLmind XSL Utility tool to complete its task.
If you do not have the XMLmind XSL Utility tool installed, you will see a message saying that apparently you do not have this tool installed on your machine.
To obtain the XMLmind XSL Utility, see the instructions in section 11.18.
On Windows machines, the current XLingPaper configuration files will also work with versions 4.2p1, 4.3.1 and 4.3.2 of this converter.
By the way, you can also invoke this tool by itself and use it to convert to some other formats, too. You will need to use the .fo version of your file (that this process also produces) as your input file. Then you will need to select the output format you wish. Ones that you will most likely want to use are to map from FO to .docx or .rtf.
Please note that this process of producing an Open Office Writer document is not as mature and stable as the process to produce a webpage or PDF is. Here are the known issues:
Any display which is rendered as a table may have oddly spaced columns.[112] This includes many example elements. There is an Open Office Extension package I have written to help with this. The macro attempts to apply the "auto-fit" table capability to all the tables in the document. You can obtain the macro by performing these steps:
Note that the macro does not always work for each and every example/table. Sometimes when there is a list interlinear, the widest one will not get reformatted. You have to manually adjust the width of the table and then apply the macro again.
If you note any odd results or errors, please send an email message to xlingpaper_support@sil.org.
A very common issue people run into while using XLingPaper with the XMLmind XML Editor occurs when they have created lower-level sections (say section2 or section3) and now want to add a new section at a higher level. In programs like Microsoft Word, one merely went to the end of the lower level section, pressed the Enter key, typed the title of the higher level section, and then changed the style to be the higher level.
With a structured editor like the XMLmind XML Editor, this is not possible. A section1 element can only go after another section1 element. A section2 element can only go after another section2 element, etc. You can insert a section3 element within (at the end) of a section2 element, but you cannot insert a section2 element after a section3 element - that would mean you have a level 2 inside a level 2, which does not make sense - sections at the same level do not nest.
Given this structured way of thinking, how does one insert, say, a section2 element after a section3 element? The following outlines one way:
Sometimes while writing, one realizes that the material one has within a section should really be broken up into several sub-sections. For example, the material that at first seemed like it should all be part of a section2 element, say, should really be split into two or more section3 elements. How does one make this split or “demote” this material to sub-sections?
One can do this as follows.
Here's an example. Suppose you have something like what is shown in (246).
In addition, suppose that you want to split the second paragraph and first example into a section3 element and you also want to split the third paragraph and last example into a section3 element. First, click at the beginning of the “We begin” paragraph, hold the Shift key down and use the down arrow key to move the cursor to the beginning of the “We now...” paragraph. It might look like this:
Now, click on the XLingPaper menu item and select Demote selected portion of section. After you do this, it will look like what is shown in (248).
Notice that the selected portion of (247) has been moved into a new section3 element. This new section3 element is now at the end of the section2 element. Why? Because sub-sections can only occur at the end of a section.
You can now type in the title of the new sub-section and you can create the unique ID for this new sub-section, too. Let's say the title is “Condition State Verbs” and the ID is “sVerbsConditionState”.
Now click at the beginning of the “We now ...” paragraph, hold the Shift key down and use the down arrow key to move the cursor to the end of the example. It might look like this:
Notice that in this case, where we are selecting the last portion in the original section, that the cursor is not on the following sub-section, but rather at the end of the free translation of the final example. The reason is that the XMLmind XML Editor is a structured editor and we have to select reasonable chunks of elements. See below for a bit more on this.
Once again, click on the XLingPaper menu item and select Demote selected portion of section. After you do this, it will look like what is shown in (250).
Now we have the second portion showing up as section3 element. Also notice that the order of the “demoted” material is now the same as it originally was.
As before, you can now type in the title of the new sub-section and you can create the unique ID for this new sub-section, also. You have now successfully split this section into two sub-sections.
Note that when you are working on splitting the final portion and that portion only has one element in it (say a paragraph), then the above procedure may not work correctly. You have to click on the element name in the node path bar[56] and then apply the Demote selected portion of section command. If you run into this, an informational message should appear reminding you of what to do. Another option to try is to merely add an empty paragraph after the last element you want to include, then do your selection as before. This may actually prove easier to remember to do.
Sometimes while writing, one realizes that the material that at first seemed like it should be a section2 element, say, should really be a section1 element (or it should really be a section3 element). If this material is currently entered as a section2 element, how does one change it?
One can do this as follows.
Here's an example. Suppose you have something like what is shown in (251).
In addition, suppose that you want to promote section 2.1.1 from being a section3 element to being a section2 element. First, click on the “2.1.1” in order to select the entire section3 element. It might look like this:
Now, click on the XLingPaper menu item and select Promote selected section; copy to clipboard. After you do this, it will still look like (252).
Now click on section “2.2” so that it might look like this:
Do a Paste Before action (by right-clicking and choosing Paste Before, using the Edit menu and choosing Paste Before, or by typing Ctrl+U). It might now look like this:
Now all of the content that was in section “2.1.1” is showing up as section “2.2.” You can open up the new section “2.2” and make sure all of it is there. Notice that all the section elements have been promoted up one level so that what was a section3 element is now a section2 element, what was a section4 element is now a section3 element, etc.
The next step is to go and delete the original section you promoted.
Note that there are some limitations about what can and cannot be demoted or promoted:
Sometimes while writing, one realizes that the paragraphs, examples, etc., one has just written should really be put into a sub-section. For example, one might be working in a section2 element and then decide to convert several paragraphs, etc., into a section3 element.
The first thing many of us try is to go to the top of what needs to become that section3 element and try to insert a section3 element. After all, this is how we would have done it in our favorite text editor. But, the XMLmind XML Editor is a structured editor and not a text editor. Therefore, when we try this in the XMLmind XML Editor, we discover that no section3 elements show up at this point. Why? Because we are trying to insert a section3 element in the middle of a section2 element and that does not make sense structurally: a section does not consist of some paragraphs, one or more sub-sections, and then more paragraphs (back at the section level). You see, rather than being a pain, the XMLmind XML Editor is actually helping us maintain proper structure - we were trying to create structural junk and it will not let us.
What one has to do is the following:[114]
If you chose the Copy operation in step 6 above, you will now need to go back and delete that material.
Whenever you are inserting an element[19] and see that one possible element to add is comment, you can type in a comment. The comment will not appear in any output unless you overtly set the showcommentinoutput attribute of the lingPaper element to yes. (To set this attribute, click on lingPaper in the node path bar[56] and then use the Attributes Tool.[13]) In all outputs except the default XeLaTeX PDF output, the comment will appear with a yellow background. For the default XeLaTeX PDF output, the comment will begin with [[ in a yellow box and will end with ]] in a yellow box.
Sections 11.17 and 11.18 discuss how to produce a PDF or Microsoft Word 2003 version of your XLingPaper document. While this does produce a nicely formatted PDF document and a form of a Microsoft Word 2003 document, you do not have any direct control over the formatting produced. This can especially be a problem if you wish to submit your document to a particular journal or publisher which has specific formatting requirements.
Beginning with version 2.0 of XLingPaper, this problem is alleviated by the use of publisher style sheets. The idea is that you can write your document using XLingPaper and then associate it with a particular publisher style sheet. Once your document has been associated with such a style sheet, whenever you produce output, the formatting will now conform to the associated style sheet. One implication of this is that as you write your document, you do not have to be thinking about the target format. Just use the normal XLingPaper elements and, when it is time to produce the output, associate the style sheet you need and produce the output. If you change your mind about where you want to submit your document, in theory all you have to do is associate (or re-associate) the document to the new style sheet.[115]
To associate your document to a publisher style sheet, do this:
Use the menu items XLingPaper / Associate a publisher style sheet.
This will bring up a dialog box like the one shown in (255).
Choose one (or navigate to where you know one is) and then click on the Open button.
The publisher style sheets themselves can be created and/or customized, but how to do that is outside the scope of this documentation. See the XLingPaper Publisher Style Sheet User Documentation if you need to create or modify a publisher style sheet.
If you do need to create or modify a publisher style sheet, please be sure to save the publisher style sheet file in a directory near your document. Do not directly make changes to the publisher style sheets included with XLingPaper. The reason is that the next time you update to a new version of XLingPaper, you will probably lose your changes.
If you have associated a publisher style sheet with your document (see section 11.25), how can you remove or "un-associate" it from a style sheet?
To remove an associated publisher style sheet from your document, use the menu items XLingPaper / Remove (unassociate) a publisher style sheet. Note that this will not delete the associated publisher style sheet from your disk drive. It will only remove the association of that publisher style sheet to your current document.
If you are using version 4.0.0 or higher of the XMLmind XML Editor, then all font information should show properly in the XMLmind XML Editor. Whenever you change the font information, however, you will either need to reload your file into the XMLmind XML Editor or you will need to do a “Redraw” command before the changes will show in theXMLmind XML Editor. To do a “Redraw” command, use View menu item / Redraw Ctrl+L.[117] Please be aware that the "Redraw” command will close all opened sections (i.e., when the "Redraw” command finishes, the window iin the XMLmind XML Editor will look just like it does when you first open the file).
For more on language data, see section 1.3.
Some users have complained about the default language identifiers that come with XLingPaper. These users almost always work in one vernacular language and one gloss language. They would like to use identifiers that reflect the names of these languages rather than the default generic ones of lVernacular and lGloss.[118]
There is a way to do this, but it comes with a warning and therefore this is not a suggested thing that every user should do. The main warning is that the change is only temporary. The next time you install an updated set of XLingPaper configuration files, you will have to make the change again.
So, if you really want to do this, follow these steps while running the XMLmind XML Editor.
After you click on the OK button for the fourth dialog box, this command will change the default attributes in the key XLingPaper configuration files. If you decide to set the defaults back, you can run this command again, being sure to use your new values for the current (old) items and the original items for the new ones.
Note that you will need to restart the XMLmind XML Editor again in order for your changes to take effect.
Most elements (including the top-level lingPaper one itself) have an attribute called xml:lang. This is primarily for archival purposes. You can use this attribute to fill in the language code of the content of that element. See ISO 639 codes for more information. The intention behind including the top-level lingPaper is as a short-hand way to indicate that the text in this document is in the language specified by the xml:lang unless indicated otherwise.
After you or a colleague produces a PDF file, you may well want to be able to add comments to it. Typically, such comments would be to make suggestions on wording or presentation or formatting.
How can one do this with XLingPaper? There are at least three ways:
For those whose working style includes writing a paper before presenting it, you may be wondering how to create a handout once the paper is written as an XLingPaper document.
Here is one way:
An alternative method is to do the above but at the point of cutting out material, leave what you know you will need as notes to yourself for doing the presentation. You can even add material if need be. After saving this version, make a copy of it and cut out your notes so that all that is left is what you want your listeners to have.
Sometimes one needs to create a poster session presentation for a paper.
Here is one way:
Note that this produces regular sized pages, but the content will be magnified by a factor of 1.5. If you need the material to be larger, you can edit the publisher style sheet and change the magnification factor item under Document Content Layout. Since the text size is larger, you may well need to adjust interlinear examples and tables to make them fit. (For more on publisher style sheets, click here to see the documentation.)
Sometimes a referenced work will have a very long web page address (URL). These will often not format well in the PDF output. There is a way to insert some special characters in the url element to allow the PDF formatters to break the line. The character to use is Unicode character U+200B ‘Zero width space.’ As you can probably infer from the name of this character, it acts like a space, but does not take up any horizontal width. Therefore the PDF formatters can break the line wherever one of these zero width spaces occurs and yet there will not be a normal space (which is just what one would want). The main drawback to using this special Unicode character is that you cannot see it (because it does not take any horizontal width)!
To enter this special zero width space character in the XMLmind XML Editor, do this:
If when using the XeLaTeX way of producing PDF, you find a word in a URL being hyphenated, you can follow the above procedure but instead of inserting a zero width space, insert a zero width joiner character (“0x200d”) at the place where the hyphen occurs. Alternatively, you could insert a zero space width at that point. In this case, the line should break at that point but there will be no hyphen.
Please note that you do *not* want to insert any of these zero width characters in the href attribute of a link element. The resulting hyperlink will not work correctly.
Sometimes a table or other material will fit better on a page that is in landscape mode instead of the default portrait mode. One can do this by enclosing the material within a landscape element. One way to enclose such material is to select it and then use the Convert [wrap] capability of the XMLmind XML Editor and choose landscape. You can do a "Convert [Wrap]" operation via Edit / Convert [wrap], pressing Ctrl-Shift-T, or by clicking on the convert [wrap] icon in the Edit tool.[3]
Please note that this material will start a new page in the output. Also, using the landscape element within an index does not work with the default XeLaTeX way of producing PDF.
If you discover that you want to go back to portrait mode, do the following steps:
Most major elements (such as chapter, part, appendix, section1, section2, etc.) and most front matter and back matter elements have an attribute called showinlandscapemode. If it is set to yes, then the default way of producing PDF via XeLaTeX will make that element (and all its sub-elements) appear in landscape mode.
To make an entire document be in landscape mode, create a publisher style sheet that has the page height and width dimensions for landscape and then associate that publisher style sheet to the document. See section 11.25 for more or click here to see the documentation on publisher style sheets.
Sometimes while working on a document, you discover that you have glossed a particular item (using abbrRef elements; see section 4.6) and that you used the wrong abbreviation for the gloss. How do you go back and change them?
Here is one way, but the details depend on which version of the XMLmind XML Editor editor you are using. Example (257) is for version 8 and example (258) is for version 7.
| (257) |
|
| (258) |
|
If you need to change many of these abbrRef elements, then you can save yourself some time and work by making a keyboard macro. Do these steps (remember that you need to release the Esc key after pressing it in all of these before you press the next key):
To run the macro, type Esc-p (I think the m above is for "macro" and the p here is for "play" - as in "play the macro"). My experience in using macros in the XMLmind XML Editor says that they only work if you do every step using the keyboard. If you use the mouse for any of it, it will not play back.
Sometimes one may have an XLingPaper document that uses certain language IDs for some langData and/or gloss elements that are not what you want. This might happen in some instances, for example, when exporting text from a program like FieldWorks Language Explorer. The language ID may be similar to what you want, but not precisely the same. Having to go through such a document and change the IDs one-by-one would be a lot of work.
If you find that you need to do this, follow these steps while running the XMLmind XML Editor.
After you click on the OK button for the fourth dialog box, this command will find every langData element whose lang is set the old language ID and change it to the new value. Similarly, it will find every gloss element whose lang attribute is set the old gloss ID and change it to the new one.
Please note that if there are any language elements whose id attribute has the old value (whether for langData or for gloss), this command will also change that id attribute to the new value.
There are two possible ways to key a special symbol. Possibly the easiest way is to do this:
The second way to key such a special symbol is to use the XMLmind XML Editor's Character Tool.[120] Look for your character in the list and click on it.
The default user interface for both the XMLmind XML Editor and XLingPaper is in English. There also are versions in French and Spanish. (If you notice any error in these versions, please let us know.)
To use one of these non-English versions of the user interface, do the following steps:
You should now see the menu items using the language you chose.
Please note that these non-English versions are for the user interface only. The element names, attribute names, and some of the validity messages will still be in English. Also the user documentation files are only in English.
The default way of producing PDF, XeLaTeX, comes with a number of special algorithms for automatically hyphenating running text in the PDF output. The default algorithm is for English.
To use one of these non-English algorithms for hyphenation, look in the chart in appendix C and find the language you are writing your document in. Set the xml:lang attribute of the lingPaper element to either the two letter or the three letter code of that language.
Please note that if the first version of XLingPaper you got is older than version 2.18.0, then you will need to get a special updated version of the XeLaTeX package used by XLingPaper. See http://software.sil.org/xlingpaper/resources/xelatex-upgrade/ for more. If you do not have this update, trying to produce the PDF will fail when you also try to use hyphenation for a non-English language.
Also, if you find that you need to have XeLaTeX hyphenate some words differently than what the algorithm does, you can create a custom XML file containing these words. The format of this file should be as shown in example (259). (You can use menu item File / New and choose “Hyphenation exceptions file” under “Subsidiary Files” to create such a file.)
| (259) |
|
Where example (259) has the ellipsis, put your exceptional words. You can enter a regular hyphen character to indicate where the hyphenation should occur. Be sure to save this file in UTF-8 format.
If any of your words have a character that is normally considered to be punctuation (such as an apostrophe or closing single quote), then add these in this file as shown in example (260). Note that the word forming items must come before any word items.
| (260) |
|
One other thing to note about how XeLaTeX hyphenates: If a word has an orthographic hyphen in the middle of it, XeLaTeX will not hyphenate the word, no matter how far it goes into the margin. To overcome this, insert a ‘zero-width space’ character between the hyphen and the next letter to make XeLaTeX hyphenate it. See section 11.40 on how to insert a ‘zero-width space’ character.
Finally, make sure you have a language element whose id attribute is the same as the two or three letter code you used in the xml:lang attribute of the lingPaper element. For example, if the xml:lang attribute of the lingPaper element is set to de or en, then you may need to create a new language element whose id attribute is set to de or en. Recall that the language elements are created in the "Languages" section of the XML editor, which is typically below the "Reference" section. Then set the hyphenationExceptionsFile attribute of that language element to the location of your hyphenation exceptions file; we suggest you use the “Browse Files...” button of the Attributes tool.[121] If you put your languages element in a referenced file and that file is not in the same directory as the main document, please note that you will have to set the hyphenationExceptionsFile attribute to refer to where it is located with respect to the main document; otherwise, XeLaTeX will not know about the exceptions and they will not be used when hyphenating.
The default way of producing PDF, XeLaTeX, will normally use extra wide spacing (sentence-spacing) after a period followed by a space. This produces the correct output in the vast majority of cases. Sometimes, however, when there is an abbreviation, you do not want to have this extra wide spacing. You want the normal spacing used between words (word-spacing).
There are actually three cases where this can be an issue:
For these relatively rare cases, you can make the output do what you want by inserting a special zero width character after the period and before the following space. Example (261) delineates which special character to use for each case.
| (261) |
|
Here are the steps needed:
Please note that if you inadvertently insert two or more of these zero width characters, the output will come out in its default mode (i.e., it will not have the change you want). Be sure to only insert one of these zero width characters. You can always delete the characters there until you can see that no extra ones are present and then insert them again.
One final note: many, if not most, manuals of style will say that you should key a comma after the abbreviations i.e. and e.g. This makes good sense because if you were to use the English equivalents of these abbreviations, chances are that you would use a comma after them. This means that for these two common abbreviations, if you use a comma after them, you will not need to do anything special. The XeLaTeX output will come out the way it should automatically.
Sometimes while typing prose material in a paragraph, say, you want to include some language data. One way to do this is:
The lang attribute of the newly created langData element will be set to lVernacular. If this is not the language ID you want, you can immediately type the F11 key on your keyboard (or use menu items XLingPaper / Set Reference) and then choose the language ID you want.
Sometimes while typing prose material in a paragraph, say, you want to insert a gloss. One way to do this is:
The lang attribute of the newly created gloss element will be set to lGloss. If this is not the language ID you want, you can immediately type the F11 key on your keyboard (or use menu items XLingPaper / Set Reference) and then choose the language ID you want.
In section 1.2, I mentioned that you can use XLingPaper with the XMLmind XML Editor to produce a file in EPUB format for your document. This can be done for both papers and for books. How does one do it?
First note that this process only works when you have associated a publisher style sheet with your file. See section 11.25.
Use the menu items XLingPaper / Produce EBook (in EPUB format) Ctrl+Shift+F7.[122] This starts a four step process to convert your document into an EBook in EPUB format. It may take quite a while depending on the size of your document. It will produce a file with the same name as your XLingPaper document file, but with an extension of epub. This new file is in the same directory as your XLingPaper document. When it is done processing, there should be an audible beep and then XLingPaper will try and load the newly created EBook into your system's default's EBook viewer program.
We try to produce an EPUB document that passes EPUBCheck (https://www.w3.org/publishing/epubcheck/). If you have a choice between using a JPG or a PNG file for a graphic, then please use the PNG. EPUBCheck will report a “fallback” error if you use the JPG. Better yet, if you can, please use an SVG file for the image. This is because SVG images do not deteriorate or pixelate when enlarged.
The cover image provided by XLingPaper is very simple. When you publish your EBook, most likely you will want to create your own. Many EPUB creators use Sigil (https://sigil-ebook.com/) to finalize the publishing of a document. Besides the cover, you can use it to handle metadata, the title page, copyright page, and more. As we note in section 11.45, XLingPaper does not try to handle publisher-specific front matter pages.
If you note any odd results or errors, please send an email message to xlingpaper_support@sil.org.
When it comes time to actually produce a final PDF of a book or a thesis or a dissertation, how does one deal with the specific, custom pages that a given publisher or school requires to be at the beginning? We're talking about copyright pages, a thesis/dissertation approval page, etc., etc.
Since it seems like each publisher and each institution tend to have their own, custom requirements on what needs to go on each page and where, XLingPaper does not attempt to model these custom front matter pages. Rather, I suggest that you create these (custom) pages via a word processing program like Open Office Writer or Microsoft Word. Then save or print the output as a PDF file.
Next, use a PDF tool that allows you to combine two or more PDF files into one. Example (262) lists some tools that will do this.
| (262) |
|
||||||||||||||||||||||||||||||||||||||||||||||||||||||||||||||||||
The basic idea is to merge the two PDF files. In general, start with the XLingPaper-produced PDF file first. This is most likely to preserve the hyperlinks in the merged PDF document.
Some of these allow you to insert one file before or after another. In those cases, load the XLingPaper PDF first and then insert the front matter before it. This will probably preserve the hyperlinks in the document.
Since a given XLingPaper document may contain the main document plus a number of “referenced” (or embedded) documents as well as refer to any number of image files, making sure you have a backup of all the relevant files for a given document can be difficult. It also can be difficult to make sure you have all the needed files if you wish to share your document with someone else. You can now ask XLingPaper to create a zip file for you that has all these files in it.
This also can be useful for archving.
To do so, follow these steps:
Please note that if any of the files involved in your document are in directories above the directory where your main document is, the zip file will adjust so that the highest level directory is at the top and all other files will be in their respective directories.
If you are sending this file to XLingPaper support, please do one of two things:
If you are using the XMLmind XML Editor with the XLingPaper configuration files on a computer with a rather small screen, the long list of XLingPaper menu items may not all fit on your computer's screen. While some operating systems provide a way to still see the missing items, some do not. If you find yourself in this situation, then do this:
Please note that you will need to do this every time you install a new version of XLingPaper. The installer does not remember the option you had.
If you find that you do not like the shorter version for some reason, you can re-instate the longer version. Follow the steps above except use the command “UseLongerMenus” instead of “UseShorterMenus”.
It is not unusual for an author to write a paper and then later want to include that paper (or a revision of it) as a chapter in a book. This often happens when a student is working on a thesis or a dissertation: papers written earlier for classes may well work as part of a thesis or dissertation.
If one has used XLingPaper to write such a paper, one may want to convert that paper to a chapter so one can include it in the thesis or dissertation XLingPaper book document. To do so, follow these steps:
You can then copy the chapter element from that new document into the appropriate location in the thesis or dissertation book document you are making.
When you use the FieldWorks Language Explorer program (which is also known as FLEx) to export an interlinear text to XLingPaper format, it may include any number of object elements whose type attribute is set to tHomographNumber. While this homograph number is quite useful in FLEx, it may not be appropriate for the interlinear text or examples you need in your XLingPaper document. You can have XLingPaper remove these by using the FLExExportRemoveHomographNumbers command.
To do so, follow these steps:
Sometimes you may want to find all instances of an element scattered throughout your XLingPaper document. For example, if you or a colleague enter comment elements in various places, you may want to be able to find them all without having to open up each section and look for them.
Here is a way you can do that:
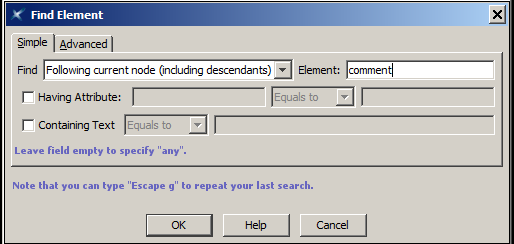
Sometimes you realize that some material you have written in a paragraph, say, should really be within an endnote element. One way to do this is:
Please note two things:
If you have an extremely large XLingPaper document, it may take a long time to load into the XMLmind XML Editor program (and may take a long time to overtly save the file, too). One reason for this is that we normally try and do extra
validation checks to help you know when there might be a problem or inconsistency with the document (see section 11.15). When XLingPaper finds a problem with one of these extra validation checks, you may see the symbol show up in the lower left corner of the program's window. Unfortunately, on very large documents, these checks can
take a very long time to perform.
To avoid this check, we now offer you a way to not have these extra checks be performed. Please note that while your document will load (and save) much more quickly, you may run into problems when trying to produce PDF output. That is because these validation checks would have told you that there was something amiss in the document and that it might not be able to produce PDF as a result.
To disable these extra checks, insert a validation element at the end of the document (if you have associated a publisher style sheet, insert this element by clicking on the element just before the publisher style sheet and do an “Insert After” command). Click on the “minimum” option. To enable the checks again, click on the “maximum” option..
Sometimes you have an interlinear example which you realize would be better displayed as part of a list interlinear example (or maybe the other way around). How can you make such a conversion? The answer involves using a special keyboard command which selects all the child elements of the interlinear (or listInterlinear). Here are the steps:
You should now have the contents of the source item in the target item.
If you have an existing table in a file created via a word processing program like Microsoft Word, a spreadsheet program like Excel, or in a web page, you may be able to copy it, run an XLingPaper special command, and then paste a draft form of the table into XLingPaper. The result is very unlikely to be perfect, but it may save you the trouble of having to rekey the table completely by hand.
In particular, the following will probably not come through correctly:
To use this process, follow these steps:
You should now have an XLingPaper version of the table.
Another thing to note is that sometimes this process leaves a temporary file in the same directory where your document is. The name of this file will be “XLingPaperTempTable.html” and will have the raw data from the original copy. You may not be able to delete it until after you close the XMLmind XML Editor program.[123]
Newer versions of the XMLmind XML Editor come with the ability to create and edit MathML files (with an extension of .mml). If you need mathematical formulas or matrices, using MathML can be helpful. In addition, LibreOffice has a way to create math formulas and save them as MathML (be sure to use the MathMl 2.0” format). Some have used this to produce phrase structure rules.
XLingPaper now allows you to insert an img element and set its src attribute to a MathML file (note that it must have an extension of ".mml”). The MathML file will be displayed in the XLingPaper document just like it is in the XMLmind XML Editor.
Whenever you produce an output in XLingPaper, XLingPaper will automatically produce an SVG file (with extension .svg) and a PDF file (with extension .pdf) of that MathML file. The output will then use the SVG or the PDF version as appropriate and the mathematical formula or matrix will show in the output.
Sometimes you may find that your master list of references file (see section 11.8) is not sorted by author name. You can sort this by doing the following:[124]
You can then copy the references element from that new document into your master references file at its references element.
Sometimes you may inadvertently create two or more refAuthor elements with the same author name. There is a special command you can use to find these. Do the following:
This section outlines some ways that one can be more productive while using the XMLmind XML Editor.
To delete an element, you can click on its name in the node path bar[56] and then type Ctrl+k. Instead of clicking the node path bar, you can also keep typing the Ctrl+UpArrow key until the element has been selected (it will have a thin red line around it).
Sometimes you type in some text and then remember that you want to make it be within some other element, like an object element. One way to avoid retyping is to select the text and then do a Convert operation on it:
You can also use the keyboard shortcut of Ctrl+T instead of doing the right-click. There also is a button on the Edit Tool for this: 
If, on the other hand, you have both text and elements that you want to convert to some element (for example, you want to insert text and an object element into another object element), then you should use the Convert[Wrap] operation on it:
You can also use the keyboard shortcut of Ctrl+Shift+T instead of doing the right-click. There also is a button on the Edit Tool for this: 
Remember to look at the node path bar[56] to see what is actually selected. This can help you make sure you are actually selecting the element you think you are.
You have already seen how you can right-click and select to insert before, insert, or insert after.
One way to become more productive is to learn the keyboard shortcuts for these operations. How I remember them is as follows:
You have already seen how you can right-click and select to paste before, paste, or paste after.
One way to become more productive is to learn the keyboard shortcuts for these operations. How I remember them is as follows:
Sometimes you want to perform a right-click operation. You can do this either by moving the mouse or just by pressing the F12 key at the point where you are. Sometimes using this key can be more efficient.[125]
When you see a little red flashing triangle on the left edge of some section, it indicates that the cursor is inside. It might look like this (where the big black arrow points to it):

When you open this section, then you can find the cursor (although it may be inside a sub-section in which case the little red flashing triangle will be by that sub-section).
Sometimes you may start to insert a new element and then realize that this is not what you want to do. You can cancel this operation by pressing the Esc key.
Whenever you want to insert an element that has a reference to some other element, normally you do two steps: insert the element and then press F11 to set the reference. You can now do both steps at once by using the Insert and then Set Reference command. This is found in the XLingPaper / Insert and then Set Reference menu item or by pressing the Shift+F11 keys together. When you do this, it first opens up a dialog box listing the possible elements that have references as shown in (263). (Note that if it is not possible to insert a reference at the location where you are, no dialog box will show.)
You can then type the name of the element you want to insert (or press the Esc key to cancel). As soon as you press the Enter key, that element will be inserted and the dialog box for choosing a reference for that element will show. Which dialog box appears depends on which element you chose. This second dialog box is exactly the same one you see when you have inserted that element by hand and then press the F11 key.
XLingPaper also offers a variation of this command. It allows you to insert and then set the reference for two consecutive reference elements and automatically inserts an n-dash character between the two. It also formats the two items as one might need for such a range. This variation is found in the XLingPaper / Insert and then Set Reference Range menu item or by pressing the Ctrl+Alt+Shift+F11 keys together, all at the same time. When you do this, it first opens up a dialog box listing the possible elements that have references that can occur in a range as shown in (264). (Note that if it is not possible to insert a reference at the location where you are, no dialog box will show.)
You can then type the name of the two consecutive elements you want to insert (or press the Esc key to cancel). As soon as you press the Enter key, the first instance of that element will be inserted and the dialog box for choosing a reference for that element will show. Which dialog box appears depends on which element you chose. This second dialog box is exactly the same one you see when you have inserted that element by hand and then press the F11 key. After you select the item, you will see another instance of that same dialog box. This is for the second element in the range. XLingPaper will automatically insert an n-dash character between the two elements and will attempt to set all the attribute values of the two elements in the most likely way you want. For example, if you use this approach to enter two exampleRef elements, the first exampleRef element will have its paren attribute set to initial. The second exampleRef element will have its paren attribute set to final and its letterOnly attribute set to yes.
As mentioned in section 4.5.12, there is a command that lets you jump from where you are to the references section, including letting you select which work you want to edit or see. XLingPaper will remember the location of where you are working right now and then jump you to the refWork that you selected.
After you do whatever it is you need to do in the references, you can return to where you were when you jumped to the references
section. You return by using the XMLmind XML Editor's Select / Navigation / Go Back menu item command or you can click on the toolbar icon (on the far right).
Use this command and the ability to jump back to where you were whenever you discover you need to add new reference information.
XLingPaper now has an option which allows you to see what the example ID is for a given example via the webpage output (see section 11.16). By hovering your mouse over the example number in the webpage showing in your browser, a small pop-up window will show you the corresponding example ID. You can also do this for the letter portion in a list kind of example (i.e., listDefinition, listInterlinear, listSingle, and listWord elements). The example (or letter) ID will appear for as long as your mouse remains over the example number or letter.
To get this behavior, you must set the showExampleIdOnHoverInWebpage attribute on the lingPaper element to yes. To set it, click on “lingPaper” in the node path bar.[56] Then change it using the Attributes Tool.[13] Note that if your document is large, it may take a while before the attribute value finishing changing.
There are times when you are writing a long document and glossing an interlinear text, say, or working on a complicated table. To save some time, you can put the text or table in a new, small document, copy (or refer to) the language, type, abbreviation and publisher style sheet elements, and work in the small document until you get things to work correctly. Then you can copy it to the large document.
When your document is ready for publication, sometimes one needs to include a blurb containing particulars about the publication and also sometimes one needs to include contact information for the authors. In addition, one might want to add keywords metadata. One includes this kind of information via the optional publishingInfo element. To insert a publishingInfo element, click on an element before any publisher style sheet (which will be the last of any of the following: types, framedTypes, indexTerms, comment) and do an Insert After command.[19]
The publishingInfo element has the optional attributes shown in example (265) and three optional parts: the blurb, author contacts, and keywords.
| (265) |
|
The optional publishingBlurb element can be used to indicate the particulars of a publication, such as the particular issue of a journal a paper is a part of, copyright notice, links to online versions of the paper, etc. The content of a publishingBlurb element is plain text and/or any of the embedded elements.[24] When you need multiple lines in the blurb, separate each part by a br element.
Some publications include more than merely an author's name and affiliation. They want to show the author's contact information, including things like full name (perhaps including degree initials, professor title, etc.), mail address, phone number, and/or a web site or other electronic contact information.
Like references, the authorContacts element can be used for multiple XLingPaper documents. (See section 11.8 for how to do this, but use "Author Contacts” instead of "References”.) It contains one or more authorContact elements. Each authorContact element can contain any combination of one or more of the elements given in (266). In addition, it has a required id attribute.[17]
| (266) |
All of the elements listed in (266) contain plain text plus any embedded elements,[24] except contactEmail (which uses just plain text).
The contactElectronic element also has a show attribute. When it is set to no, the content of the contactElectronic element will not be included in the output. When it is set to yes (which is the default), the content of the contactElectronic element will be included in the output.
The optional keywords element can be used to include keyword phrases that will be included in the metadata for this document. The list of keywords can also be shown in the front matter and/or the back matter by inserting a keywordsShownHere element in the front matter or the back matter. Inside of the keywords element you can have one or more keyword elements.
When writing a text book or perhaps when providing certain kinds of documentation, you may want to set off some material within a frame. For example, in a text book you may want to show what a sample write-up for a given topic might look like, including one or more examples along with a prose description. For such things, one wants to have a line around some indented material and maybe even have a special background color to set it off from the rest of the text material.
Given that an author may want to have many instances of these kinds of special displays and that the indents and background color should be the same for displays of the same kind, XLingPaper provides three elements for handling framed units.
The first element, framedTypes, is a container for the second kind of element, framedType. This is just like the types element is a container for individual type elements (see section 10.1 for more on type elements). To insert a framedTypes element, click on the types element and do an Insert After command.[19]
Each framedType element lets you define the indents and background color formatting for a given type of a framed unit. The attributes you can set for a framedType are given in the table in (267).
| (267) |
|
The third element is framedUnit. You use this element to surround or embed the set of other elements you need to be in the offset portion. In addition, you set its framedType attribute to refer to the framedType element that has the formatting you need for this framed unit. If the framed unit contains any example, figure, or tablenumbered elements, these elements will be numbered independently from the other example, figure, or tablenumbered elements elsewhere in the document that are not within the current framedUnit element.
The framedUnit element also has three other attributes as shown in the table in (268).
| (268) |
|
To create a framed unit, do one of two things:
Also please note that for the default way of producing PDF (via XeLaTeX), you will need to have initially installed XLingPaper before October 2012 or you will need to get and install the XeLaTeX Upgrade package. See http://software.sil.org/xlingpaper/resources/xelatex-upgrade/.
There are times when one may wish to have certain “chunks” of material excluded for a particular output of a given document. Other times, one will want to include these “chunks” of material for a different output. Ideally, one would not want to have to create two separate documents - one with the excluded material and one without.
Now XLingPaper has a way to control which “chunks” of material, if any, should be excluded within a single document when producing an output. The basic idea is to tag any “chunk” material that might need to be excluded for some output with a particular content “type” that you have defined. Then you define a set of content choices where each choice indicates zero, one, or more of these content types. When you are ready to produce an output for the document, you select the choice that excludes the type(s) you want and the resulting output will have all material in the document except those “chunks” with the type(s) of that choice.
As an example, suppose you have a grammar for a minority language which includes some pedagogically-oriented material usually in the introduction of many sections and you also have some examples showing what the national language does. You may want four outputs for this depending on the intended audience: one with everything, one without the introductory material, one without the national language comparative examples, and one with neither the introductory material nor the national language comparative examples.
To make this happen, one would first create a contentControl element. To insert a contentControl element, click on the last element before any publisher style sheet (usually the types element) and do an Insert After command.[19] (The order of elements in this portion of a file are: “Types,” "Framed Types," “Index Terms,” comment element, “Publishing Info,”, and then "Content Control.”) Select contentControl. This will look something like this:
When you click on the plus sign to open it, it will look like this:
Notice that there are two parts: Content types and Content control choices. The types section is where you can define one or more types. Each type has an id attribute which must be unique. We suggest you begin all contentType ids with “ct”. For our example, we will want two types: one for introductory material and one for national language comparative material. We could make it look like this:
Next, we would want to create the various output control choices. Each contentControlChoice element has a label and also an exclude attribute. The exclude attribute is used to set zero, one or more of the contentType ids. For our example, we might make it look like this:
The first one would leave the exclude attribute empty. The second would set it to ctIntro. The third would set it to ctComparative. The final would set the exclude attribute to be “ctIntro ctComparative”.
Having defined the content types and content choices, we now would need to work our way through our document and find each “chunk” of material that might need to be excluded. For example, there may be a p element at the beginning of a section that needs to be marked as being introductory material. We click in the p element (and perhaps even on the “p” in the node path bar[56]). If we then press the F11 key on the keyboard (or use menu items XLingPaper / Set Reference F11), a dialog box will pop up that lists all the content types we defined. We can then select one (ctIntro in this case). We would do something similar for the national language comparative examples (click on the example element and then use the Set Reference tool to select ctComparative).
The complete list of elements which can be tagged with a content type id is given in example (273).[126]
| (273) |
|
Please note that there could be a problem if you exclude an example, say, but have an exampleRef element that refers to the excluded example and that exampleRef is not also in some material (like a p) that is also excluded. Since the example will not be in the output, the exampleRef will not be able to refer to it properly. Thus, in the output, it will be incorrect. We check for these kinds of potential problems and attempt to report them in the Validity tool.[127]
One way to avoid this problem is to set the contentType attribute of an exampleRef element to a content type so that it will only appear when that content type is used. You could have two or more exampleRef elements one immediately after the other with each one referring to a the example that will appear with a given content type and each one having its contentType attribute set to the same content type as its referring example. One can do this for any of the reference elements shown in example (274).
| (274) |
|
To set the contentType attribute of one of these elements, do this:
 ).
).
If you are trying to use content control to pick one of several publisherStyleSheet elements, you will need to manually insert the additional publisherStyleSheet elements. If you use the menu items XLingPaper / Associate a publisher style sheet command, it always replaces the last publisherStyleSheet element. Also, if content control actually allows more than one publisher style sheet, then XLingPaper will use only the first one allowed.
When we are ready to produce an output, we would click on the radio button of the choice we wanted. If that was to exclude the introductory material, then it would look like this:
You may sometimes want the “chunks” to show in the XMLmind XML Editor for all possible content types and sometimes you may not. You control this by setting the showOnlyChosenItemsInEditor attribute of the contentControl element. If you want only the chosen “chunks” to show (that is, only those “chunk” elements which are not excluded by the currently selected content control choice), set this attribute's value to yes. Otherwise, set it to no (which is the default).
When it comes to lines in an interlinear text, there may also be times when you wish only certain lines to be included in the output. You can do this by first making sure that the interlinear-text element is tagged with a contentType attribute set so that the entire text will be included. Then set the linesToInclude attribute of the interlinear-text element to have the line numbers to include. You must set these as a comma followed by the line number followed by a comma. For example, if you want lines 1, 2, and 4 to show, then use ,1,2,4, whereas if you want lines 2 and 3 to show use ,2,3,. Notice that each number is preceded and followed by a comma. This is to deal with (possibly rare) cases where there are 10 or more lines in an interlinear. If we just used a following comma, say, then 1 would match 11, and we might not want to include the first line. By using both a preceding and a following comma, we avoid this issue.
On some occasions, one may want to place certain material within a hanging indent paragraph. To do so, use a hangingIndent element. These can be used anywhere a “chunk” element can be used.[15]
The default is for the first line to be at the left edge and for all other lines to be indented 1em. You can change this by using the hangingIndentInitialIndent and hangingIndentNormalIndent elements of a publisher style sheet (see section 11.25 for more on publisher style sheets). Naturally, you will have to associate your document with your publisher style sheet to make this take effect.
Another way to change the indent values is to set either of the special attributes of a hangingIndent element shown in example (276).
| (276) |
|
When you set either one of these attributes for a given hangingIndent element, the value(s) will be used for the hanging indent paragraph. In particular, if you have an associated publisher style sheet that has the hanging indent elements above set, setting either attribute shown in example (276) will override the values of the publisher style sheet.
If you are using XLingPaper to produce a volume which contains a collection of papers, normally each such paper is a chapter in the resulting volume. Each such chapter will certainly have its unique set of authors and in addition may have its own front and/or back matter. To deal with this situation, XLingPaper offers a document whose major pieces are chapterInCollection elements instead of chapter elements.
The editor(s) of such a volume can use the File / New menu item and choose the “Book (Collection of chapters authored by different authors)” option. This will be the collection document.
Each contributing set of author(s) can use the “Paper (Section-oriented)” XLingPaper kind of document for what will become their chapter in the volume. When their work is complete, they can submit the XLingPaper file(s) to the editor(s). The editor(s) can then convert each such submitted paper to a “chapter in a collection” document by using the Tools / Execute Command,[39] typing “PaperToChapterInCollection” in the “Command” box, and pressing “OK”. This will create and open a new XLingPaper document with the same name as the paper document but with the addition of “AsChapterInCollection” at the end of the file name proper. This new document will also be automatically loaded into the XMLmind XML Editor. The editor(s) can then copy the chapterInCollection element from that new document into the appropriate location in the collection volume document they are making.
Note that the main difference between a chapter element and a chapterInCollection element is that the chapterInCollection element can have front matter and back matter embedded within it. For the non-appendix back matter, it is up to the collection volume editor(s) as to whether each chapter in the volume should have its own set of glossaries (e.g., list of abbreviations), references, and endnotes (should the editors choose to use endnotes) or if there should be a common set of glossaries, references, and endnotes for the entire volume. Both options are possible with XLingPaper.
The editors will probably need to combine abbreviations and references used by contributing authors into a common set or they may want to provide authors with a starting set to use. There will be a similar need for dealing with language and type elements.
Finally, editors can create a publisher style sheet for the collection volume. They should make use of the chapterInCollectionLayout, chapterInCollectionFrontMatterLayout, and chapterInCollectionBackMatterLayout elements to control how the content of the chapter is to be formatted. See the documentation in XLingPaper Publisher Style Sheet User Documentation.
If you wish, you can create a list of the ISO 639-3 codes that are used in a document. Just like references and citations, the idea here is that while the list of ISO 639-3 codes can be large, XLingPaper will only show those that are actually used somewhere within the document. You can thus maintain a master file that has the set of languages (and their ISO 639-3 code and language names), include it in your document, and then, make a reference to an ISO 639-3 code in the list. Besides only including the ISO 639-3 codes actually used somewhere in the document, XLingPaper will also create a hyperlink between the code and the actual code in the list of codes. Of course, the list will also include the language name of the code.
This master list of languages can also give the name of the language in multiple languages. So if you typically write your papers in either English or Spanish, say, you can maintain the list of language names in both languages. For a given paper, you indicate which language to use by setting the iso639-3codelang attribute of the main lingPaper element. To find this attribute, click on lingPaper in the node path bar,[56] and then use the Attributes Tool[13] to find and edit the iso639-3codelang attribute. You will need to key in the id of one of the language elements in your document (e.g., en for English, es for Spanish, or fr for French). If you do not set this attribute, then the first language name item found will be used. Also, if you inadvertently do not have an id for the language you selected, but you do have one for another language, then the first language name found will be used, too. See section 18.1 for more on creating master lists with two or more languages. Also see section 18.4 for information on sorting the output list of ISO 639-3 codes.
One makes a reference to an ISO 639-3 code by inserting an iso639-3codeRef element and then setting its reference to one of the language elements in the master list. The easiest way to do this is described in section 18.2.
Further, you can choose where you want this list of ISO 639-3 codes to appear. While one keys the list of language names in the langName element under each language element with an ISO639-3Code attribute filled in, you can elect to have the list appear within any of the following elements:
To get the list of ISO 639-3 codes to appear, one inserts an iso639-3codesShownHere element at the appropriate place in one of these elements. For all but in an endnote, XLingPaper will create a table showing the ISO 639-3 codes that have been used. For an endnote, XLingPaper will show the ISO 639-3 codes that have been used in a comma separated list.
The following sections explain how all of this can be done in more detail.
As mentioned in section 1.3, one creates a list of language elements and one can set the ISO639-3Code attribute to the code of that language. If you want to display a list of ISO 639-3 codes, then for each such language element, you also need to insert within it one or more langName elements. Each langName element contains the name of the language. You can have more than one langName element if you need the name to be in different languages. Example (277) shows one with both English and Spanish names for the lzai language element.
To create a reference to an ISO 639-3 code, perform an insert operation[19] and select iso639-3codeRef. Then press the F11 key to bring up the chooser for languages. (An easier way is to press the Shift and F11 keys together.) You then type the language ID you need or scroll down to find it.
As mentioned above, one can have the list of ISO 639-3 codes appear in various places.
Please note that unless you overtly tell XLingPaper to show the list of ISO 639-3 codes, no such list will appear in the formatted output.
We'll illustrate how to show the list of ISO 639-3 codes in an endnote first and then in a glossary.
To show the list in an endnote, first insert the endnote element (see section 4.4 for how to do this). Type any text you want and then insert the special iso639-3codesShownHere element. This is how it looked in one XLingPaper paper:
In this paper, it was formatted as follows in the web page output:
| (279) |
|
Turning now to showing the ISO 639-3 codes in a glossary, one needs to insert a glossary element in the back matter. One can then open up the glossary element and type any prefatory material one might want (of course, one does not have to type anything). One then inserts the special iso639-3codesShownHere element. Note that since this will be formatted as a table, it needs to go after or before a paragraph (p element); it will not work to put it within a paragraph.
One should also change the label attribute of the glossary element to something like “ISO 639-3 Codes” so the title of this section does not say “Glossary.” It might look like this:
When formatted in a web page, it might look like this:
When the list of ISO 639-3 codes is formatted as a table, you can control the width of the code column, the equals sign column, and/or the language name column via attributes on the iso639-3codesShownHere element. See example (282).
| (282) |
|
If your document is not written in English or if your list of ISO 639-3 codes contains language names in multiple languages, you may well want to have the list of codes that XLingPaper outputs be sorted by a particular language. Note that the default behavior is for XLingPaper to not do any special sorting: the list of codes will occur in the same order they are given within the languages element.
To get XLingPaper to sort the list of codes in the output, you must set the sortRefsAbbrsByDocumentLanguage attribute of the main lingPaper element. To do so, click anywhere in the document (except in any part of an associated publisher style sheet). In the node path bar,[56] click on lingPaper. Then use the Attributes Tool[13] to set the sortRefsAbbrsByDocumentLanguage attribute to a value of yes.
The sorting algorithm used depends on the language code you have indicated, if any. The default is ‘en’ (for English). If you have set the iso639-3codeslang attribute of the main lingPaper element of the document, then XLingPaper will use that code. If the iso639-3codeslang attribute is not set, XLingPaper will use the xml:lang attribute of the lingPaper element, if it is set. Some of the known language codes to use are shown in example (42).
There may be times when you want to write a document which will be in more than one language. Using content control (see section 15) it was possible to create content types for each language. One would write each “chunk” item first in one language and then in the other. You would tag each “chunk” with its appropriate content type. The problem, though, was that there was not a way to create distinct title and label items for each language. For example, every chapter or section element has a secTitle element, but there was not a way to indicate a portion of this title as being for only a particular language. Similarly, if one uses a contents element or a preface or glossary element, there is a way to change the label attribute on these to be in a particular language, but there was only one choice. In both of these cases, when one switched from one language to another, one had to manually change all titles and all labels from the one language to the other.
Now XLingPaper has a way to use content control to determine separate titles and labels without having to manually change anything. As noted above, there are two kinds of items which would need this mechanism: titles and labels.
The elements where one might need to have multilingual titles are title, shortTitle, subtitle, and secTitle. Normally, one just keys in the content material in each of these. For the multilingual case, that will not work. One must replace the text with a titleContentChoices element. This will have two instances of titleContents elements. Type the title in the first language in the first titleContents element. Then press the F11 key on the keyboard (or use menu items XLingPaper / Set Reference F11), and a dialog box will pop up that lists all the content types you've defined. Choose the one for the language of this title. Now go to the second titleContents element, type in its title in its language, and then set its content type to its language.
The elements where one might need to have multilingual labels are given in example (283).
| (283) |
|
Normally, whenever you need a special label value for any of these, you just key that value in the label attribute. For the multilingual case, that will not work. One must click on the element and then do an Insert command. In the list of possible elements to insert, choose labelContentChoices. This will have two instances of labelContents elements. Type the label in the first language in the first labelContents element. Then press the F11 key on the keyboard (or use menu items XLingPaper / Set Reference F11), and a dialog box will pop up that lists all the content types you've defined. Choose the one for the language of this label. Now go to the second labelContents element, type in its label in its language, and then set its content type to its language.
When you have a book that is too long to be printed as a single volume, one can follow the following process. The idea is that the table of contents for the first volume will include everything in the entire document, including labels for where each volume begins. The table of contents for the last volume will only have the volume label for that last volume and all content in that volume, including all the back matter. If there are any middle volumes, each one's table of contents will only have the volume label for that volume and the content for that volume.
In order to ensure that all material is present, you will need to produce a separate (PDF) output for each volume that includes all of the document with the exception of the table of contents portion. That is, when you produce volume 2, say, the output will have everything in the entire document in it, but the table of contents will only have what needs to be in volume 2.
After producing these PDF files, you then will need to manually create the PDF that will be used to print each volume. See section 11.44 for ideas on this. You will need to use a PDF editing tool to copy the volume one portions into the volume one output file, the volume two portions into the volume two output file, etc.
The following sections provide some more details.
In your document, insert volume elements before the contents element and before the part, chapter, or chapterICollection element that begins the next volume. For each volume element, set its number attribute. Unlike other elements, we leave it up to you to choose how you want to represent the number (e.g., digit, roman numeral, the number word in the language of the document, etc.). If “Volume” is the incorrect label, change its label attribute.
You will need to produce the PDF separately for each volume. You control which volumes show in the table of contents by setting the following two attributes in the publishingInfo element:
Then produce the output. Check the table of contents to make sure each is correct. When it is, use a PDF editing tool to produce your volume's final PDF file.
This appendix lists the various elements available with XLingPaper and briefly explains their usage. They are listed in alphabetical order. See appendix B for elements one can use in defining a publisher style sheet.
This appendix lists the various elements available for an XLingPaper publisher style sheet and briefly explains their usage. They are listed in alphabetical order. See the XLingPaper Publisher Style Sheet User Documentation for more.
As mentioned in section 11.39, In order to have the default way of producing PDF hyphenate the running text in a non-English way, you need to know the language code to use. The following table lists the languages and their codes that are supposed to work.
| Language Name | Two letter code | Three letter code |
|---|---|---|
| Albanian | sq | sqi |
| Amharic | am | amh |
| Arabic | ar | ara |
| Asturian | ast | |
| Basque | eu | eus |
| Bengali | bn | ben |
| Bulgarian | bg | bul |
| Catalan | ca | cat |
| Coptic | cop | |
| Croatian | hr | hrv |
| Czech | cs | ces |
| Danish | da | dan |
| Dutch | nl | nld |
| English | en | eng |
| Esperanto | eo | epo |
| Estonian | et | est |
| Farsi | fa | fas |
| Finnish | fi | fin |
| French | fr | fra |
| Galician | gl | glg |
| German | de | deu |
| Greek | el | ell |
| Hebrew | he | heb |
| Hindi | hi | hin |
| Hungarian | hu | hun |
| Icelandic | is | isl |
| Indonesian | id | ind |
| Interlingua | ia | ina |
| Irish | ga | gle |
| Italian | it | ita |
| Lao | lo | lao |
| Latin | la | lat |
| Latvian | lv | lav |
| Lithuanian | lt | lit |
| Lower Sorbian | dsb | |
| Malay | ms | msa |
| Malayalam | ml | mal |
| Marathi | mr | mar |
| Nynorsk | nn | nno |
| Occitan | oc | oci |
| Polish | pl | pol |
| Portuges | pt | por |
| Romanian | ro | ron |
| Russian | ru | rus |
| Sanskrit | sa | san |
| Scottish | gd | gla |
| Serbian | sr | srp |
| Slovak | sk | slk |
| Slovenian | sl | slv |
| Spanish | es | spa |
| Swedish | sv | swe |
| Syriac | syr | |
| Tamil | ta | tam |
| Telugu | te | tel |
| Thai | th | tha |
| Turkish | tr | tur |
| Turkmen | tk | tuk |
| Ukrainian | uk | ukr |
| Urdu | ur | urd |
| Upper Sorbian | hsb | |
| Vietnamese | vi | vie |
| Welsh | cy | cym |
My experience in using the default XeLaTeX way of producing PDF is that one does not usually need to use these very often. Currently there is a limited set of these attributes. They go in the XeLaTeXSpecial attribute of various elements. Each one needs to be followed by a space.
| Attribute | Possible values | Meaning | Examples | ||
|---|---|---|---|---|---|
| border-left | 0, 1 or 2 | Add a vertical line to the left of the current td or th element. This will only work when the border attribute of the table element is set to 0 (zero). | border-left='1' | ||
| border-right | 0, 1 or 2 | Add a vertical line to the right of the current td or th element. This will only work when the border attribute of the table element is set to 0 (zero). | border-right='1' | ||
| break-before | none | Force a line break before a link element. This can be useful when the URL of the link is too long to fit on the line. | break-before | ||
| clearpage | none | Force a page break before this point and also force any footnotes to appear at the bottom of the page where the break occurs. See also pagebreak below. You only need one of the clearpage or pagebreak, not both. | clearpage | ||
| contentsbreak | none | Force a page break before this item in the table of contents. | contentsbreak | ||
| extra-columns-before | a numerical value | In the rare case where a table has row spans and a table cell shows too far to the left, use this value in the td or th element. The value to use is the number of extra columns the cell should have before it. For example, if a cell should be in column four, but shows in column three and there are no other cells before it, use extra-columns-before='3'. If the cell is in column six and there is a cell in column four of this same row (and column five is empty because a row span takes its place), use extra-columns-before='1'. |
|
||
| fix-final-landscape | none | Fix incorrect table of contents page numbers caused by having the final main item be in landscape mode. See known limitations. | fix-final-landscape | ||
| fix-free-literal-footnote-placement | none | Fix incorrect footnote content placement. In rare cases, footnote material can appear on a following page. See known limitations. | fix-free-literal-footnote-placement | ||
| font-feature | Font feature=value. There are two ways to indicate the font feature and its value: First, a single quote, the name of the font feature (including spaces), an equals sign, the name of the value (including spaces), and another single quote. Second is to use a single quote, the number of the font feature, an equals sign, the number of the value, and a single quote. | Tell XeLaTeX to use the specified font feature for this font. This only makes sense for elements with font-related attributes. If you use this in a publisher style sheet langDataLayout, glossLayout, or freeLayout, it will only work if you also include the font-family attribute. It also requires you to have installed the XeLaTeX Upgrade package. See http://software.sil.org/xlingpaper/resources/xelatex-upgrade/. If you are using the TeX Live 2020 version of XeLaTeX, only the name version of the font feature will work. |
|
||
| graphite | none | Tell XeLaTeX to use the Graphite renderer for this font. This only makes sense for elements with font-related attributes. If you use this in a publisher style sheet langDataLayout, glossLayout, or freeLayout, it will only work if you also include the font-family attribute. It also requires you to have installed the XeLaTeX Upgrade package. See http://software.sil.org/xlingpaper/resources/xelatex-upgrade/. | graphite | ||
| interlinear-aligned-word-skip | a TeX ‘glue’ value | Provides the ‘glue’ value to use as the space between aligned interlinear word units (when the automatically wrap long interlinear option is set; see 5.3). This only works on example, interlinear-text, and listInterlinear elements. The default amount of ‘glue’ is 6.66666pt plus 3.33333pt minus 2.22222pt (this is what is used by Kew & McConnel 1990:56). |
|
||
| language | a three letter code | For Open Type fonts, it sets the font language system tag to be the three letter code. See http://www.microsoft.com/typography/otspec/languagetags.htm. This only works on elements that have a font-family attribute. |
|
||
| line-after | none | Used in a tr element within a table. This will output a horizontal line after the content of the row. | line-after | ||
| line-before | none | Used in a tr element within a table. This will output a horizontal line before the content of the row. | line-before | ||
| line-through | none | Make the content of this object element render with a line through the characters | line-through | ||
| longtable-patch | none | In some rare cases, when using a publisher style sheet that uses sectionTitle elements on headers or footers for odd and/or even pages, the running headers or footers may not use the correct section title when there is also a table on the page. (Even pages should show the first section title; odd pages should show the last section title.) You can put longtable-patch in the XeLaTeXSpecial attribute of the publisherStyleSheet element of the publisher style sheet. Please note that while this will probably fix the incorrect section title, it may cause other issues in the PDF output where there are tables. (This is why this is an optional choice.)[128] | longtable-patch | ||
| needspace | a numerical value | Suggest that the example needs at least the specified number of lines (this only works on an example element). For some reason, this helps keep sequences of examples from breaking a page too soon. |
|
||
| overfullhbox | a numerical value followed immediately by pt (for points) | If a line is too long (overfull), insert a black box with a width of the indicated number of points (this only works on a lingPaper element). |
|
||
| pagebreak | none | Force a page break before this point. See also clearpage above. You only need one of the clearpage or pagebreak, not both. | pagebreak | ||
| pagebreakafter | none | Force a page break after this point. This only works in a wrd element in the first line element of a lineGroup when using the automatically wrap interlinear option (which is 'on' by default for the XeLaTeX way of producing PDF). | pagebreakafter | ||
| row-separation | a numerical value followed immediately by pt (for points) or ex (for the vertical height of a lower-case letter x) | Insert the indicated number of points (or ex units) between each row of the table (this only works on a table or a tr element). Note that if a row is formatted containing multiple lines, the space inserted is calculated from the first/top line in the row. |
|
||
| scaled | an integer value indicating a percentage; 1000 = 100%; 750 = 75% | Adjust the scaling factor of the image. This only works on an img element. Note also that this does not work at all when using the TeX Live 2020 version of XeLaTeX. Use the “width” value instead, if needed. |
|
||
| script | a four letter code | For Open Type fonts, it sets the font script tag to be the four letter code. See http://www.microsoft.com/typography/otspec/scripttags.htm. This only works on elements that have a font-family attribute. |
|
||
| Script | script code | For Open Type fonts, it sets the font script tag to what the polyglossia LaTeX package needs. This only works on elements that have a font-family attribute. Use this for the TeX Live 2020 version of XeLaTeX (such as on Mac OS X Catalina). |
|
||
| singlespacing | none | Force single spacing in a double spaced or space-and-a-half document. This only works in a chart element containing text and when the chart element is not in a table or example. | singlespacing | ||
| subscript | none | Make the content of this object element render as a subscript | subscript | ||
| subscriptany | none | Make the content of this object element render as a subscript no matter what the content is. This is for cases where a font (like Charis 7.000) has font features for certain subscript and/or superscript characters; as a result, only these characters come out in subscript or superscript. Use this attribute to get any characters to come out properly. | subscriptany | ||
| superscript | none | Make the content of this object element render as a superscript | superscript | ||
| superscriptany | none | Make the content of this object element render as a superscript no matter what the content is. This is for cases where a font (like Charis 7.000) has font features for certain superscript characters; as a result, only these characters come out in superscript. Use this attribute to get any characters to come out properly. | superscriptany | ||
| underline | none | Make the content of this object element render with an underline | underline | ||
| valign-fixup | a numerical value followed immediately by ex (for the typesetter's vertical space unit called an ex, often the height of the lower case letter x) or by pt (for points) | Adjust the vertical position of the content of a cell in a table by the amount specified (this only works on td and th elements). A negative value makes the content appear lower; a positive value makes it appear higher. |
|
||
| vertical-adjustment | a numerical value followed immediately by ex (for the typesetter's vertical space unit called an ex, often the height of the lower case letter x) or by pt (for points) | Adjust the vertical position of an image by the amount specified (this only works on an img element). A negative value makes the image appear higher; a positive value makes it appear lower. |
|
||
| width | a numerical value followed immediately by a unit of measure (such as pt, in, cm, em, or mm). | The image will be produced using the width specified (this only works on an img element). This is always available when using the TeX Live 2020 version of XeLaTeX. You can also set the useImageWidthSetToWidthOfExampleFigureOrChart attribute to yes on the lingPaper element and then this value will be used to override any other default value. |
|
The name of this product, XLingPaper is based on work by David Weber back in the mid 1980s: he wrote a CC table for the old ManuScripter program that was for linguistic documents. Since back then files were limited to six characters plus a three letter extension, he called it LNGPAP. My work was based on XML, so I put an X in the front and added the i in Ling. The problem is that several people felt uncomfortable with the pap part since it reminded them of the PAP smear test ladies go through. So I changed it to XLingPaper.
The first version was written in the summer of 2001. In fall of 2005, I learned about the XMLmind XML Editor and began creating the configuration files for use with it. The first version only had web page output and only worked on Windows. In mid 2006, thanks to a suggestion by Gary Simons, I started adding output for XSL-FO which the RenderX XEP program would convert to PDF.
In late 2007, I started adding the publisher style sheet capability.
In 2009, I made it work on Mac and Linux and also added the XeLaTeX way of producing PDF.
See the XLingPaper / About XLingPaper menu item for more details.
When inserting a new element at the end of a document (under the lingPaper element and after the backMatter element), it can be hard to know exactly where to try and insert the new item. The following lists the order in which the elements can occur and shows what each might look like to help you identify where to try and do the insertion.
| Element | Appearance |
|---|---|
| referencedInterlinearTexts | Referenced Interlinear Texts: |
| languages | Languages: |
| types | Types: |
| framedTypes | Framed Types: |
| indexTerms | Index Terms: |
| comment | (has a yellow background) |
| publishingInfo | Publishing info: |
| contentControl | Content control: |
| validation | Validation status: |
Endnotes
| [1] |
See http://www.xmlmind.com/xmleditor/ for current information on this editor. |
||||||||||||||||||||||||||||||||||||||||||||
| [2] |
Some versions of the Keyman program prevent this sequence from working. You may need to turn Keyman off temporarily to get the sequence to work. |
||||||||||||||||||||||||||||||||||||||||||||
| [3] |
The Edit Tool is located in the upper right hand corner and looks something like this:
|
||||||||||||||||||||||||||||||||||||||||||||
| [4] |
You may have to set some options to get it to happen this way. |
||||||||||||||||||||||||||||||||||||||||||||
| [5] |
Since Macs do not have an Insert key, you have to use F1 on Macs. |
||||||||||||||||||||||||||||||||||||||||||||
| [6] |
See section 12 for more ways to be productive with the XMLmind XML Editor. |
||||||||||||||||||||||||||||||||||||||||||||
| [7] |
The Swatches tab shows “swatches” of color tiles. The HSB tab allows you set a color via its Hue, Saturation, and Brightness. The RGB tab, allows you set a color via its Red, Green, and Blue values. |
||||||||||||||||||||||||||||||||||||||||||||
| [8] |
My experience in using the RenderX XEP way of producing PDF is that one does not usually need to use these very often. Since these are actually part of a typesetting package, the list of attributes is long and a bit complicated, given that not every attribute is appropriate for every situation. Nonetheless, here are some that may prove useful to you in certain situations.
|
||||||||||||||||||||||||||||||||||||||||||||
| [9] |
Technically, any sequence of “embedded” elements may occur in a section title. See [24]. |
||||||||||||||||||||||||||||||||||||||||||||
| [10] |
This is used for the default way of producing PDF. Other output methods will use a raised period. |
||||||||||||||||||||||||||||||||||||||||||||
| [11] |
There is a version attribute on the lingPaper element, also, but this attribute is for documenting what version of XLingPaper that particular document's original "template" was from (the items you see when you use the File / New menu item). It is never output anywhere. |
||||||||||||||||||||||||||||||||||||||||||||
| [12] |
To change the default comma and a space between each keyword, you will need to associate a publisher style sheet with your document (see section 11.25) and to use a keywordsLayout element within that style sheet's frontMatterLayout element. |
||||||||||||||||||||||||||||||||||||||||||||
| [13] |
Remember that in the XMLmind XML Editor, you can see the attributes of an element in the Attributes tool which is located on the lower right corner. You may have
to click on the Attributes tool tab |
||||||||||||||||||||||||||||||||||||||||||||
| [14] |
Some Spanish conventions use “Contenido” for the front matter (and a level of one) and “Índice” for the back matter (and a level of three). |
||||||||||||||||||||||||||||||||||||||||||||
| [15] |
The "chunk" elements are: p, pc, hangingIndent, example, table, tablenumbered, chart, figure, tree, blockquote, ol, ul, dl, prose-text and interlinear-text. |
||||||||||||||||||||||||||||||||||||||||||||
| [16] |
Technically, any sequence of “embedded” elements may occur in a section title. See [24]. |
||||||||||||||||||||||||||||||||||||||||||||
| [17] |
I suggest that you use a unique prefix letter for each kind of id. That way, when you are keying a reference to that kind of element using a tool that shows all of the id values in a list, you can more easily find the possible list of ids (they will all be together since they all begin with the same letter). Here are some suggested initial letters you can use:
|
||||||||||||||||||||||||||||||||||||||||||||
| [18] |
In fact, the XMLmind XML Editor will not let you enter spaces and then leave the area where you are typing the unique name. You will hear a “beep” indicating an error. |
||||||||||||||||||||||||||||||||||||||||||||
| [19] |
See section 1.2.3 for how to insert an element. |
||||||||||||||||||||||||||||||||||||||||||||
| [20] |
Beginning with version 3.5 of the XMLmind XML Editor, this list sorts by section number. Unfortunately, it is treating numbers as letters so “10” sorts just after “1” instead of just after “9”. |
||||||||||||||||||||||||||||||||||||||||||||
| [21] |
Remember from section 1.2.3 that when you insert an element while typing, you will probably need to type the Insert key to continue typing (on Macs, use F1). |
||||||||||||||||||||||||||||||||||||||||||||
| [22] |
An XLingPaper style sheet for a particular publisher can be set to override any of these settings with the § symbol. So if you find that a publisher requires this symbol, you will only need to use a stylesheet for their requirements. See section 11.25 or click here to see the publisher style sheet documentation. |
||||||||||||||||||||||||||||||||||||||||||||
| [23] |
This does not work with the RenderX XEP way of producing PDF. |
||||||||||||||||||||||||||||||||||||||||||||
| [24] |
The "embedded" elements are: langData, gloss, exampleRef, sectionRef, appendixRef, citation, comment, object, br, endnote, endnoteRef, figureRef, tablenumberedRef, q, img, genericRef, genericTarget, interlinearRefCitation, link, indexedItem, indexedRangeBegin, indexedRangeEnd, abbrRef, glossaryTermRef, iso639-3codeRef, and mediaObject. |
||||||||||||||||||||||||||||||||||||||||||||
| [25] |
See sections 17.86 and 17.94 of the 15th edition of the Chicago Manual of Style or see sections 14.124 and 14.131 of the 16th edtion. |
||||||||||||||||||||||||||||||||||||||||||||
| [26] |
A given XLingPaper publisher style sheet contains what the minimal number is. It is in the referencesLayout element, in its usecitationformatwhennumbereofsharedpaperis attribute. The default for publisher style sheets is 0 (which means that no collection or proceedings will use the citation format). The default for XLingPaper documents that do not have an associated publisher style sheet is 2. For more on publisher style sheets, see section 11.25 or click here to see the publisher style sheet documentation. |
||||||||||||||||||||||||||||||||||||||||||||
| [27] |
Apparently due to a bug in the XMLmind XML Editor, no icons are shown for fieldNotes or webPage elements. |
||||||||||||||||||||||||||||||||||||||||||||
| [28] |
The Ctrl+Shift+F11 at the end is a reminder that can invoke this command merely by pressing the Ctrl, Shift, and F11 keys all at the same time (I do it by first holding down both the Ctrl and Shift keys and then pressing the F11 key). |
||||||||||||||||||||||||||||||||||||||||||||
| [29] |
Which codes actually work may well depend on what languages the Java implementation on your machine has collating sequences for. |
||||||||||||||||||||||||||||||||||||||||||||
| [30] | |||||||||||||||||||||||||||||||||||||||||||||
| [31] | |||||||||||||||||||||||||||||||||||||||||||||
| [32] |
Many of these are taken from Lucy Scribner Library (n.d). |
||||||||||||||||||||||||||||||||||||||||||||
| [33] |
If you select the abbrInLang element in the node path bar,[56] and then immediately press the F11 key on your keyboard (or use menu items XLingPaper / Set Reference F11), a dialog box will pop up that lists all the language identifiers in your paper. You can then select the one that is correct for this abbreviation. |
||||||||||||||||||||||||||||||||||||||||||||
| [34] |
You can also do this in item elements within a morpheme-aligned interlinear when the type attribute is set to gls. |
||||||||||||||||||||||||||||||||||||||||||||
| [35] |
The Ctrl+Shift+F10 at the end is a reminder that you can invoke this process merely by pressing the Ctrl, Shift and F10 keys at the same time. |
||||||||||||||||||||||||||||||||||||||||||||
| [36] |
We use these since these are the delimiters proposed in the Leipzig glossing standard. See http://www.eva.mpg.de/lingua/resources/glossing-rules.php. |
||||||||||||||||||||||||||||||||||||||||||||
| [37] |
This is intended to mean that if your list of abbreviations has “3” and “sg” as separate abbreviations, then the automatic method will find “3sg” as consisting of a sequence of two abbrRef elements: the first will refer to the “3” abbreviation and the second will refer to the “sg” abbreviation. |
||||||||||||||||||||||||||||||||||||||||||||
| [38] |
There is a trick you can use to get the automated method to not split an abbreviation at (what appear to be) periods. You do this by not keying periods in the abbrTerm element, but rather a “one dot leader” character (Unicode 0x2024). It looks like this:․ (that is, it looks exactly like a period but is not). Note that some fonts may not have a glyph for this Unicode code point. |
||||||||||||||||||||||||||||||||||||||||||||
| [39] |
Some versions of the XMLmind XML Editor do not automatically include this menu item. To get it, do this:
|
||||||||||||||||||||||||||||||||||||||||||||
| [40] |
If the definition of a cited glossary term refers to another term that is not cited, that referred to term will also be included in the output. |
||||||||||||||||||||||||||||||||||||||||||||
| [41] |
If you select the glossaryTermInLang element in the node path bar,[56] and then immediately press the F11 key on your keyboard (or use menu items XLingPaper / Set Reference F11), a dialog box will pop up that lists all the language identifiers in your paper. You can then select the one that is correct for this glossary term. |
||||||||||||||||||||||||||||||||||||||||||||
| [42] |
To change the default comma and a space between each keyword, you will need to associate a publisher style sheet with your document (see section 11.25) and to use a keywordsLayout element within that style sheet's backMatterLayout element. |
||||||||||||||||||||||||||||||||||||||||||||
| [43] |
Note that if any term element in a master set has an embedded object element, then the containing document will need to have the appropriate type element referred to by the embedded object element. Similarly, if there is an embedded langData or gloss element, then the appropriate language element will need to be included in the containing document. |
||||||||||||||||||||||||||||||||||||||||||||
| [44] |
Please note that this order is not good Spanish. It is for illustrative purposes only. |
||||||||||||||||||||||||||||||||||||||||||||
| [45] |
For web page output, XLingPaper will not show the end range section if the end section is the same as the begin range section. |
||||||||||||||||||||||||||||||||||||||||||||
| [46] |
The exact color you see will depend on the color of the lVernacular language element and the color of the lGloss language element. |
||||||||||||||||||||||||||||||||||||||||||||
| [47] |
The data are from Marlo (2008:165). |
||||||||||||||||||||||||||||||||||||||||||||
| [48] |
When using the XMLmind XML Editor, XLingPaper will automatically set the num and letter attributes to be the same value. You do not need to worry about maintaining them separately. |
||||||||||||||||||||||||||||||||||||||||||||
| [49] |
The data are from Marlo (2008:181). |
||||||||||||||||||||||||||||||||||||||||||||
| [50] |
See section 4.6 for more on using abbreviations. |
||||||||||||||||||||||||||||||||||||||||||||
| [51] |
To make this automatic wrapping happen, you click on lingPaper in the node path bar[56] and then set the automaticallywrapinterlinears attribute to yes via the Attributes Tool.[13] |
||||||||||||||||||||||||||||||||||||||||||||
| [52] |
Note that if you are using a style sheet with your document, the web output will only wrap if you also have the ignorePageWidthForWebPageOutput attribute of the pageLayout element set to yes. |
||||||||||||||||||||||||||||||||||||||||||||
| [53] |
The Shift+F10 at the end is a reminder that you can invoke this process merely by pressing the Shift and F10 keys at the same time. |
||||||||||||||||||||||||||||||||||||||||||||
| [54] |
For example, suppose you have abbreviation labels of 3 and pst (for 3rd person and past tense, respectively). You then could key a gloss like 3-sleep-pst. Later in step 4, these abbreviations will automatically be converted to their respective abbrRef elements. In our example, the “3” will be converted into the abbrRef corresponding to the abbreviation label “3” and the “pst” will be converted into the abbrRef corresponding to the abbreviation label “pst.” |
||||||||||||||||||||||||||||||||||||||||||||
| [55] | |||||||||||||||||||||||||||||||||||||||||||||
| [56] |
Remember that the node path bar is located in the upper part of the window. The big black arrow is pointing to it in the screenshot below.
|
||||||||||||||||||||||||||||||||||||||||||||
| [57] |
This is a modified form of the interlinear described by Hughes, Bird, and Bow (2003). The modifications are the use of iword instead of word to avoid a conflict with XLingPap's word element and the addition of the morphset element to allow it show up nicely in the XMLmind XML Editor. |
||||||||||||||||||||||||||||||||||||||||||||
| [58] |
Although, it might be possible to make it work in Microsoft Word 2003 with some appropriate macros and other work. |
||||||||||||||||||||||||||||||||||||||||||||
| [59] |
I'm not sure why, but sometimes the keyboard shortcut for copy (Ctrl+c) does not work. |
||||||||||||||||||||||||||||||||||||||||||||
| [60] |
The keyboard shortcut key for paste (Ctrl+v) should work here. |
||||||||||||||||||||||||||||||||||||||||||||
| [61] |
It should be there already if you used the SIL FieldWorks Language Explorer program to export the interlinear text. |
||||||||||||||||||||||||||||||||||||||||||||
| [62] |
The way to have the source appear after the free translation or on a line after the free translation is to use a publisher style sheet with the appropriate option set. See the publisher style sheet documentation. |
||||||||||||||||||||||||||||||||||||||||||||
| [63] |
When you insert elements within a table like this, you will probably see elements such as col, headerCol, headerRow, row, td,td, and tr listed in the Edit Tool[3]. I highly recommend that you do not use these while editing with the XMLmind XML Editor. While they will produce valid XLingPaper files, they will probably not look very nice in the XMLmind XML Editor. I highly recommend that you always use the menu items mentioned above. |
||||||||||||||||||||||||||||||||||||||||||||
| [64] |
The little raised dot in the upper left corner of the table is a non-breaking space character. One way to key this is to use Esc-C (i.e., hit the Escape key and then a capital C) and, in the resulting dialog box, type nbsp and the Enter key.[65] My experience with tables containing borders suggests that using a non-breaking space is a way to get otherwise empty cells to still have a border around them. |
||||||||||||||||||||||||||||||||||||||||||||
| [65] |
If you are using certain versions of the Keyman program, the dialog will not appear, just a capital C. You have to temporarily turn off the Keyman program to get this to work. |
||||||||||||||||||||||||||||||||||||||||||||
| [66] |
There are two reasons why it is not recommended. First and foremost, from my research in producing the default way of producing PDF, typesetters argue strongly against using any vertical lines at all in a table. In fact, they (practically) insist on only having some horizontal lines and that, sparingly. When I saw this, I was surprised. But then I found some linguistic books containing tables and, sure enough, these books followed this way - only horizontal lines, if any. I understand that the motivation for this is to make the tables easy to read. The more “noise” there is, the harder it is for the reader to quickly see the pertinent data. The second reason is that it is relatively difficult to do, even for just the web page output. For the default way of producing PDF via XeLaTeX, see appendix D, especially the border-left, border-right, line-after and line-before attributes. For an example using the web page output, here is a way to get started:
You should see that this table cell has a different kind of border. There are a number of possibilities for this "magic formula" - I just randomly chose one. I'm afraid I'll need to refer you to a reference web site and you'll have to play around to get what you want. (If this feels like being thrown into the deep end here, well, it's because it is...). See http://msdn.microsoft.com/en-us/library/ms531207%28VS.85%29.aspx, especially the Layout section. Notice that there are some possibilities for borders on the left, right, top, and bottom. These are to control the various sides of the cell. You can have more than one of these, but you'll need to be sure to follow the proper syntax to get them to work:
Each one has consists of the property name, a colon, a value, and a semi-colon. All of these will go in the cssSpecial attribute of your type element. To repeat what was said above: I do not recommend pursuing this way of using lines in tables. |
||||||||||||||||||||||||||||||||||||||||||||
| [67] |
The align attribute on a table element will work for both web page output and the default way of producing PDF. It will not work for the RenderX XEP way of producing PDF; this is because the RenderX XEP tool does not implement any way to do anything but left align a table. |
||||||||||||||||||||||||||||||||||||||||||||
| [68] |
There is a long list of color names you can use. See http://coloreminder.com/ for a listing. Be sure to click on the “Colors and Names” button. |
||||||||||||||||||||||||||||||||||||||||||||
| [69] |
If you find that you need a chart (such as a line chart, pie chart, etc.) based on some data you have, some users have found ChartBuilder (http://quartz.github.io/Chartbuilder/) to be helpful. In my experience with it, though, it only works with Google Chrome and Safari browsers. Internet Explorer and FireFox do not work. You may also find the comments on https://github.com/Quartz/Chartbuilder/issues/107 to be helpful. Another possible tool is Pygal (http://pygal.org/). While it is powerful and produces amazing SVG graphs, it can be a challenge to install and use for the non-computer programmer. It also requires you to have Python installed. |
||||||||||||||||||||||||||||||||||||||||||||
| [70] |
With the XeLaTeX default way of producing PDF, if you have many consecutive examples containing a hangingIndent within a chart, you may see large gaps in places in the PDF. To fix this, insert a paragraph (p element) after one of the examples and have it contain just a non-breaking space (see section 11.13). This can improve the page layout. I am not sure why this happens, but at least we can offer this workaround. |
||||||||||||||||||||||||||||||||||||||||||||
| [71] |
Image files can be produced using tools such as Paint and Visio, among others. Use formats such as JPEG File Interchange Format (*.jpg or *.jpeg files), Graphics Interchange Format (*.gif files) or Portable Network Graphics (*.png files). |
||||||||||||||||||||||||||||||||||||||||||||
| [72] |
One way to key this is to use Esc-C (i.e., hit the Escape key and then a capital C) and, in the resulting dialog box, type nbsp and the Enter key.[65] |
||||||||||||||||||||||||||||||||||||||||||||
| [73] |
When using LingTree, you can set it up so that its output is in SVG format. Then see converting SVG to PDF. |
||||||||||||||||||||||||||||||||||||||||||||
| [74] |
My assumption is that the goal is to save paper so they want the float to appear wherever it least affects the total number of pages of the document. |
||||||||||||||||||||||||||||||||||||||||||||
| [75] |
At least with hyper-linked documents, one can follow the reference link to the figure or table. But once it is printed on paper, that advantage goes away. |
||||||||||||||||||||||||||||||||||||||||||||
| [76] |
The reason is that the process that produces Word (and Open Office Writer) documents does not implement floats. |
||||||||||||||||||||||||||||||||||||||||||||
| [77] |
It is possible to include a shortened caption in the list if you wish. Click on the caption element within the figure element, do an "insert after" command, and then choose shortCaption. Type the shortened caption in it. The list will use the shortened caption, but the figure itself will use the full caption content. |
||||||||||||||||||||||||||||||||||||||||||||
| [78] |
An XLingPaper style sheet for a particular publisher can be set to override any of these settings with the lower case or capitalized form. So if you find that a publisher requires one or the other, you will only need to use a style sheet for their requirements. See section 11.25 or click here to see the publisher style sheet documentation. |
||||||||||||||||||||||||||||||||||||||||||||
| [79] |
We use tablenumbered instead of numberedtable so that when you are looking to insert a table, you will see it. Most of us will not naturally look under "n" for a table. |
||||||||||||||||||||||||||||||||||||||||||||
| [80] |
We allow an img element for cases where the table itself is in an image file. For example, the R program (http://www.r-project.org/) which is a statistical analysis tool can produce table outputs which can be converted to PDF. |
||||||||||||||||||||||||||||||||||||||||||||
| [81] |
It is possible to include a shortened caption in the list if you wish. Click on the caption element within the table element, do an "insert after" command, and then choose shortCaption. Type the shortened caption in it. The list will use the shortened caption, but the numbered table itself will use the full caption content. |
||||||||||||||||||||||||||||||||||||||||||||
| [82] |
For the default way of producing PDF, you can also use some other items such as Unicode digits in non-Roman languages (e.g., Hebrew, Thai or Tamil). |
||||||||||||||||||||||||||||||||||||||||||||
| [83] |
As declared in the citename attribute of the refAuthor element. |
||||||||||||||||||||||||||||||||||||||||||||
| [84] |
For example, some practical grammars are targeted at both native speakers of the language as well as linguists. The native speaker would prefer to read the text as prose rather than as interlinear. |
||||||||||||||||||||||||||||||||||||||||||||
| [85] |
The other two options use the morpheme-aligned approach to interlinear. See section 5.3.1.3. |
||||||||||||||||||||||||||||||||||||||||||||
| [86] |
This is taken from Regnier (1989). |
||||||||||||||||||||||||||||||||||||||||||||
| [87] |
If the Edit / Reference / Copy as Reference is grayed out, then probably the text attribute is not set. Be sure to set it. |
||||||||||||||||||||||||||||||||||||||||||||
| [88] |
This then acts rather like an XML character entity. Some XML editors (like the XMLmind XML Editor) replace XML character entities with the content of the entity. |
||||||||||||||||||||||||||||||||||||||||||||
| [89] |
Actually, it now has another attribute which we think will rarely be used. It is showlivalue and has significance only when the target element is an li element whose parent element is an ol element. The intention is to provide a way to refer to a list item and potentially have the number or letter of the list item show up in the output. It is described in (i) below. Please note that unlike all other reference items where the value is produced automatically for you, this one can be ambiguous. All others will be unique, but it is possible to have more than one list with the same list item number/value. So if you choose to use this capability, be aware that it can be ambiguous and be careful not to confuse your reader.
|
||||||||||||||||||||||||||||||||||||||||||||
| [90] |
One such element is genericTarget which you can insert just about anywhere. It allows you to create a hyperlink to almost anything. |
||||||||||||||||||||||||||||||||||||||||||||
| [91] |
The main issue is that when one uses accented letters, the accented letter internally can sometimes be stored and represented in two or more possible ways. For example, it is possible that the file name on the disk uses a “decomposed” form (called NFD) so that an accented vowel, say, would consist of two Unicode characters: the vowel followed by an accent diacritic character. The URI produced via the XMLmind XML Editor, on the other hand, will use a “composed” form (called NFC) so that the accented vowel is a single Unicode character. While both of these forms will look the same to the human eye, the computer's internal representation will actually be different. Since computers are such precise and picky machines, the program will not see the two as being the same. It can thus be frustrating to a user when it looks like the names are the same, but the program won't find the file. |
||||||||||||||||||||||||||||||||||||||||||||
| [92] |
I am not a font expert by any stretch of the imagination, so all this is over my head. I do offer a guess, however, that the source of these problems might be that the designers of these fonts chose to do this so that it would be easier to have stacked diacritics. |
||||||||||||||||||||||||||||||||||||||||||||
| [93] |
This is taken from a draft of a paper written by Colin Suggett. |
||||||||||||||||||||||||||||||||||||||||||||
| [94] |
See http://scripts.sil.org/cms/SCRIPTs/page.php?site_id=nrsi&item_id=ComplexRomanFontFAQ#1d1d13ef for more on how to do this. (This link was valid on July 10, 2009.) |
||||||||||||||||||||||||||||||||||||||||||||
| [95] |
To create a master list of abbreviations or other items is similar. |
||||||||||||||||||||||||||||||||||||||||||||
| [96] |
Make a new one if you do not already have one. See section 1.2.3. |
||||||||||||||||||||||||||||||||||||||||||||
| [97] |
If you have a serious validation problem, this icon will be red with a white X in it like this: |
||||||||||||||||||||||||||||||||||||||||||||
| [98] |
The F7 at the end is a reminder that you can invoke this process merely by pressing the F7 key. |
||||||||||||||||||||||||||||||||||||||||||||
| [99] |
If you have associated a publisher style sheet with your XLingPaper document (see section 11.25 or click here to see the publisher style sheet documentation), then the web page will reflect the information in that associated publisher style sheet as much as a web page can. For example, it will try to use the page width and margins as well as font layout of the publisher style sheet. It will not have any header or footers, however, since web pages do not have these. It also will produce a second file with the same name as your XLingPaper document file, but with an extension of css. |
||||||||||||||||||||||||||||||||||||||||||||
| [100] |
The F8 at the end is a reminder that you can invoke this process merely by pressing the F8 key. |
||||||||||||||||||||||||||||||||||||||||||||
| [101] |
The motivation for making the XeLaTeX approach be the default way is due to both the limitations of the RenderX XEP approach and, especially, because it is so hard to install the RenderX XEP tool. See sections 11.17.2.1 and 11.17.2.2. |
||||||||||||||||||||||||||||||||||||||||||||
| [102] |
The F9 at the end is a reminder that you can invoke this process merely by pressing the F9 key. |
||||||||||||||||||||||||||||||||||||||||||||
| [103] |
Please note that due to some very technical reasons if a table cell has a width attribute and it also has an endnote element which contains an example element, then we ignore the width attribute. If we do not, then XeLaTeX will fail to produce the PDF. |
||||||||||||||||||||||||||||||||||||||||||||
| [104] |
The percentage works only for a top-most table element. If you have an embedded table within another table, then you will probably get overlapping material. Also, the percentage is of the total width of the table (not, say, how much larger or smaller you want the column to be). |
||||||||||||||||||||||||||||||||||||||||||||
| [105] |
This is why there is the temporary directory mentioned above. It stores the files XeLaTeX needs to record the information needed between passes. |
||||||||||||||||||||||||||||||||||||||||||||
| [106] |
The Ctrl+Shift+F9 at the end is a reminder that you can invoke this process by pressing the Ctrl, Shift, and F9 keys at the same time (one way to do this is to hold both the Ctrl and Shift keys down with one hand and then press the F9 key with the other hand). |
||||||||||||||||||||||||||||||||||||||||||||
| [107] |
The current version expects it to be in C:\Program Files\RenderX\XEP. |
||||||||||||||||||||||||||||||||||||||||||||
| [108] |
I also tried the freely available FO-to-PDF converter tool called Apache FOP, Beta version 0.92 to see if it is as capable as the RenderX XEP tool is. Unfortunately, it does not yet handle the XSL-FO table-layout='auto' capability. This means that most tables and no interlinear examples come out correctly, given how I'm doing them in XSL-FO. (If you know of another way to handle these in XSL-FO, please let me know: xlingpaper_support@sil.org.) |
||||||||||||||||||||||||||||||||||||||||||||
| [109] |
All of the noted limitations of the RenderX XEP approach are not a problem at all for the XeLaTeX approach. |
||||||||||||||||||||||||||||||||||||||||||||
| [110] |
I have asked the makers of RenderX XEP to make it easier to install, but so far at least, they have not considered it important enough to make any changes. |
||||||||||||||||||||||||||||||||||||||||||||
| [111] |
For Unix and Mac operating systems, you can do the following:
|
||||||||||||||||||||||||||||||||||||||||||||
| [112] |
The reason is that the XMLmind XSL Utility tool does not pay attention to font metric information. |
||||||||||||||||||||||||||||||||||||||||||||
| [113] |
Apparently the XMLmind XSL Utility tool does not pay attention to the widow and orphan control information included in the XSL-FO output it processes. |
||||||||||||||||||||||||||||||||||||||||||||
| [114] |
In a later version of the XLingPaper configuration files, we may well be able to create a special command to make this process much simpler. |
||||||||||||||||||||||||||||||||||||||||||||
| [115] |
Note that some differences between publishers may also require you to change things like the formating for language items. |
||||||||||||||||||||||||||||||||||||||||||||
| [116] |
Note that if you are using multiple publisher style sheets and content control, this process will always replace the last publisher style sheet. See section 15. |
||||||||||||||||||||||||||||||||||||||||||||
| [117] |
The Ctrl+L at the end is a reminder that you can invoke this process merely by pressing the Ctrl and L keys at the same time. |
||||||||||||||||||||||||||||||||||||||||||||
| [118] |
In designing XLingPaper for the XMLmind XML Editor, I wanted something like this, too, but realized we would have to use generic labels normally. Part of the technical challenge is that the pre-canned element packages need to come with identifiers for things like embedded langData elements. I do not know how to change these dynamically while the XMLmind XML Editor program is running. All I know to do is to change the content of the files containing these pre-canned element packages (called “element templates”). The method provided here is an improvement over what it used to be, although it is still not wonderful... |
||||||||||||||||||||||||||||||||||||||||||||
| [119] |
See section 8 for information on making citations. |
||||||||||||||||||||||||||||||||||||||||||||
| [120] |
The Character Tool is located in the lower right hand portion of the XMLmind XML Editor, near the validity tool. It may look like this:
|
||||||||||||||||||||||||||||||||||||||||||||
| [121] |
On Windows operating systems, be sure and replace any backslash (\) characters with forward slashes (/). The “Browse Files...” button will automatically do this for ypu. |
||||||||||||||||||||||||||||||||||||||||||||
| [122] |
The Ctrl+Shift+F7 at the end is a reminder that you can invoke this process merely by holding down the Ctrl and Shift keys while also pressing the F7 key. |
||||||||||||||||||||||||||||||||||||||||||||
| [123] |
I have tried to avoid having this file show but so far have been unsuccessful for some very technical reasons. |
||||||||||||||||||||||||||||||||||||||||||||
| [124] |
We are indebted to Kent Rasmussen for providing the transform to make this possible. |
||||||||||||||||||||||||||||||||||||||||||||
| [125] |
It would have been better to use the Windows right-click key, but I could not get it to work. Hence, I had to settle for something like the F12 key. |
||||||||||||||||||||||||||||||||||||||||||||
| [126] |
In a publisher style sheet, a contentsLayout element can be tagged with a content type id. This is the only element inside a publisher style sheet which can be under content control. This capability is intended for the relatively rare case where one has a single document in multiple languages and one needs to control whether the table of contents appears in the front matter (e.g., English) or in the back matter (e.g., French) via the content control for that language. |
||||||||||||||||||||||||||||||||||||||||||||
| [127] |
See section 11.15 for more on the Validity tool. |
||||||||||||||||||||||||||||||||||||||||||||
| [128] |
It is called “longtable-patch” because the XeLaTeX package named “longtable” is causing the incorrect section title to appear. This “solution” is a patch to the “longtable” package. |
References
Hughes, Baden, Steven Bird and Catherine Bow. 2003. Encoding and Presenting Interlinear Text Using XML Technologies. In Knott, Alistair and Dominique Estival, eds. Proceedings Australasian Language Technology Workshop, 105-113. Melbourne, Australia: University of Melbourne.
Judicial Accountability Institute. 2018. Using An Epigraph In A Dissertation: 5 Points To Consider. (http://www.judicialaccountabilityinstitute.com/5-points-to-know-when-using-an-epigraph-in-a-dissertation/) (accessed 22 October 2018).
Kew, Jonathan and Stephen McConnel. 1990. Formatting Interlinear Text. Occassional Publications in Academic Computing Number 17. Dallas, Texas: Summer Institute of Linguistics.
Lucy Scribner Library. n.d. Writing an Annotated Bibliogrphy. (http://lib.skidmore.edu/library/index.php/li371-annotated-bib) (accessed April 2, 2014).
Marlo, Michael R. 2008. Tura Verbal Tonology. Studies in African Linguistics 37(2):153-243. (http://elanguage.net/journals/sal/article/view/721/976).
Regnier, Randy. 1989. Collection of unpublished Quiegolani Zapotec glossed texts. Summer Institute of Linguistics, Mexico Branch Manuscript.
Index
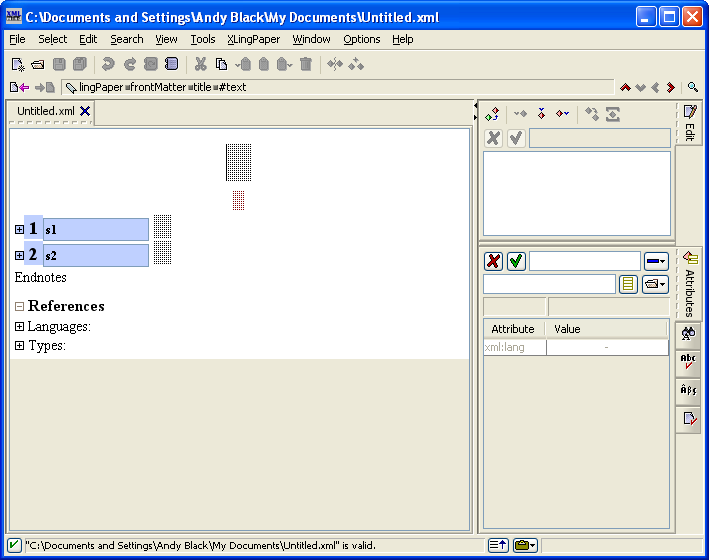
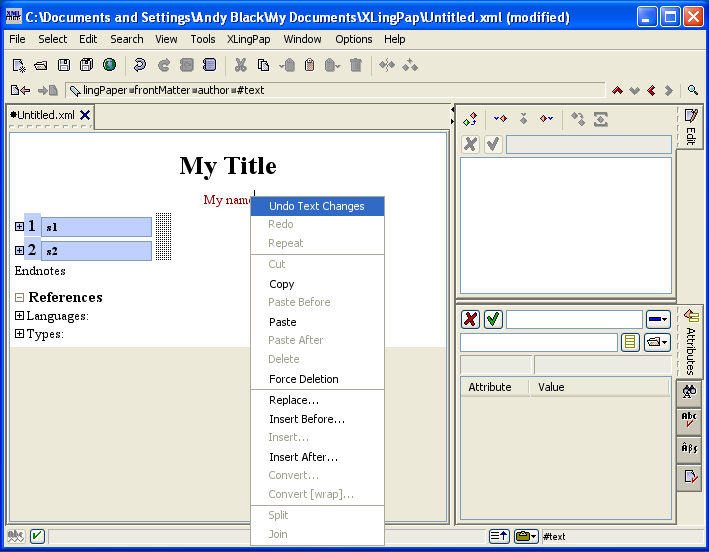
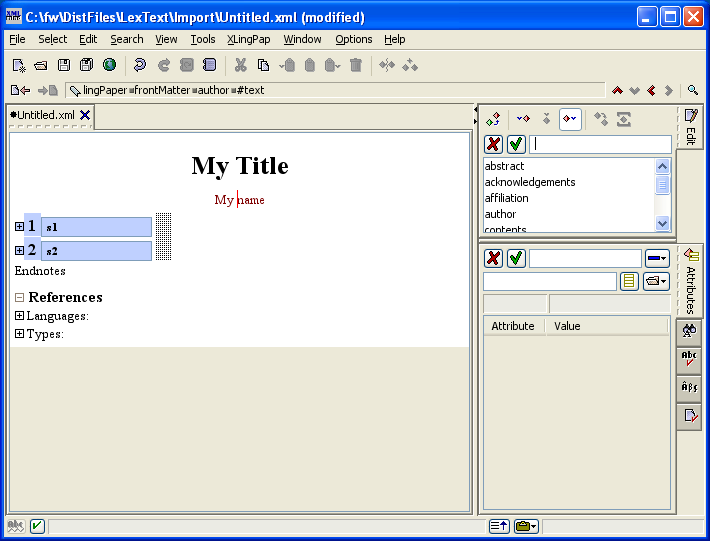

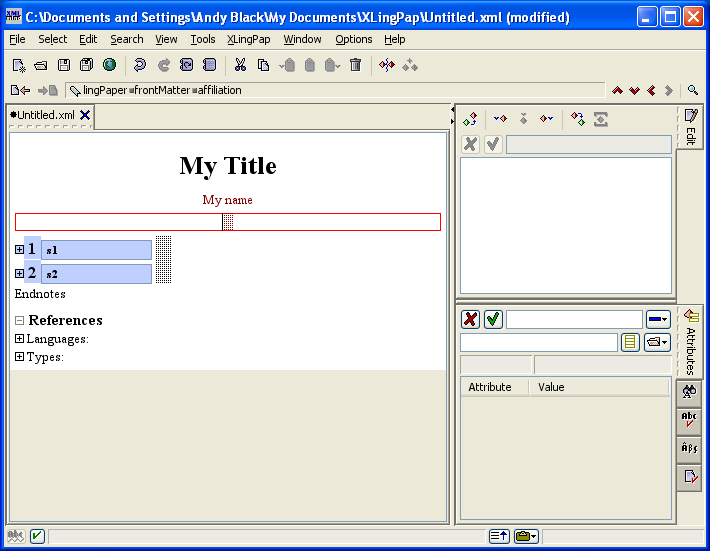
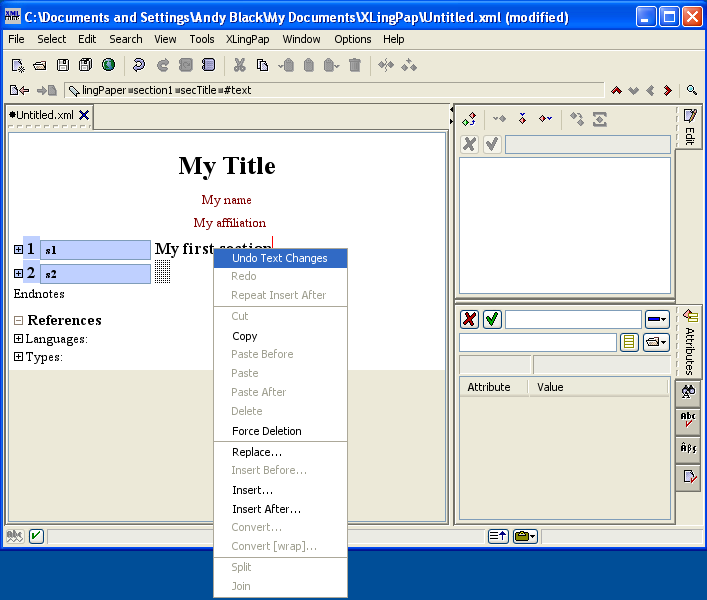
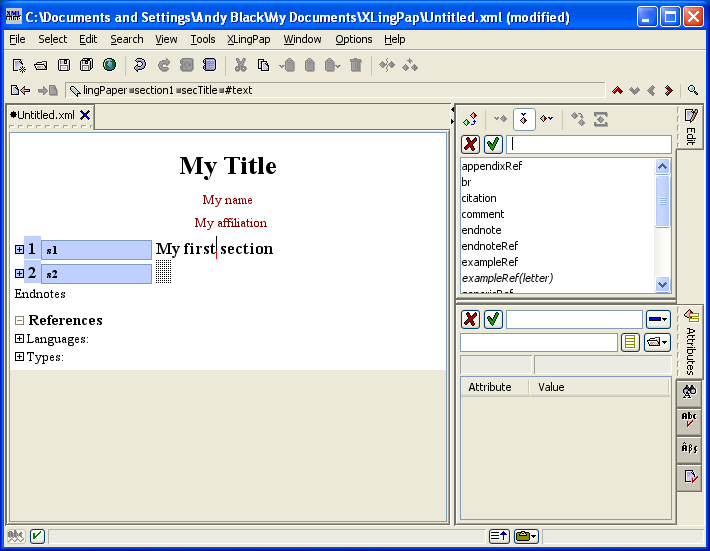
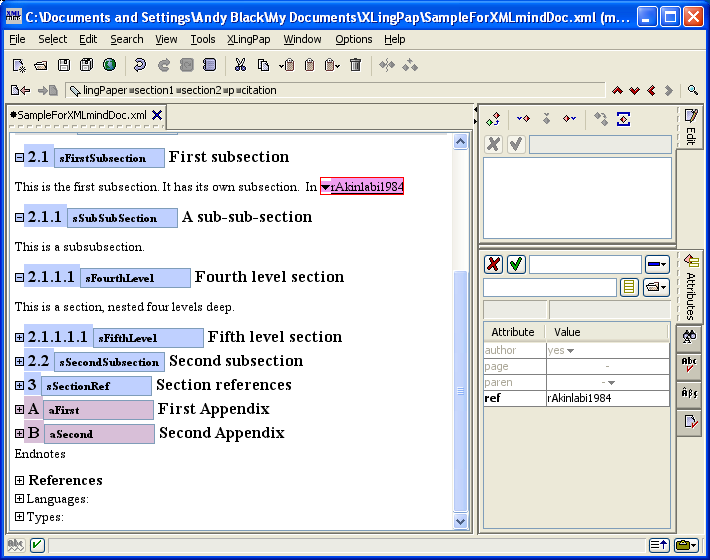
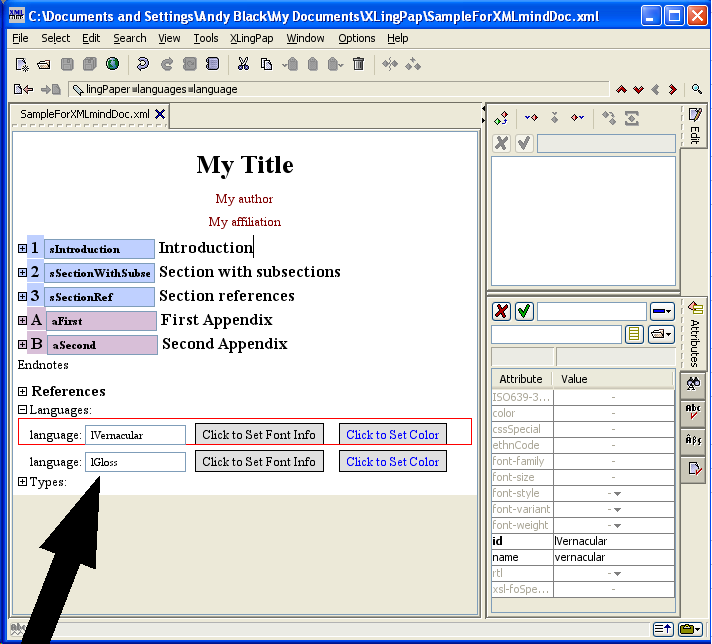

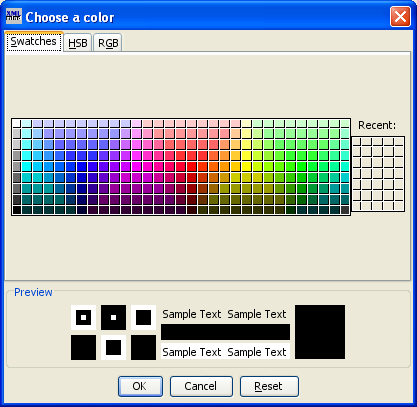


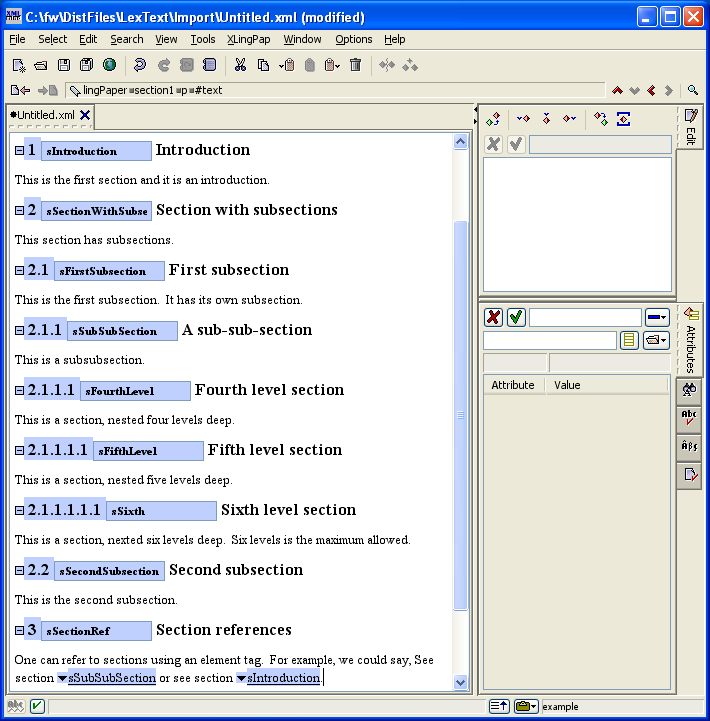
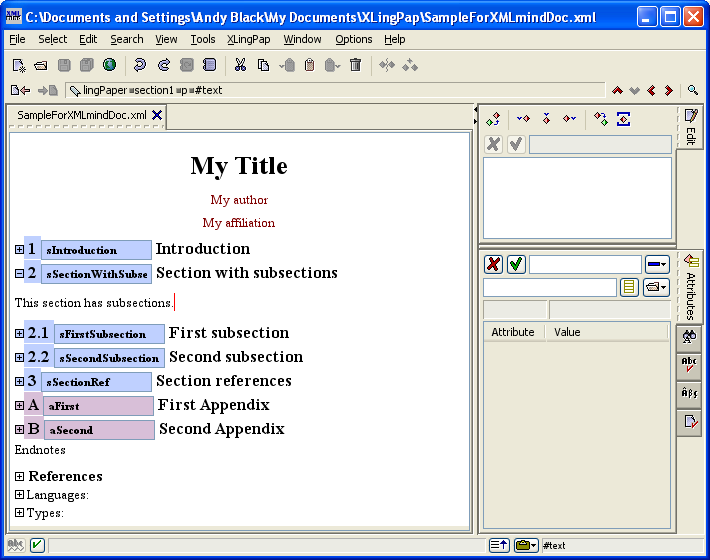

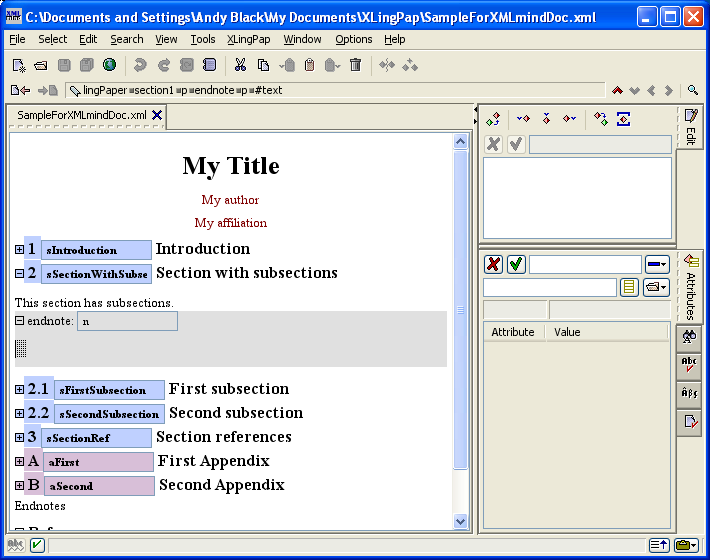
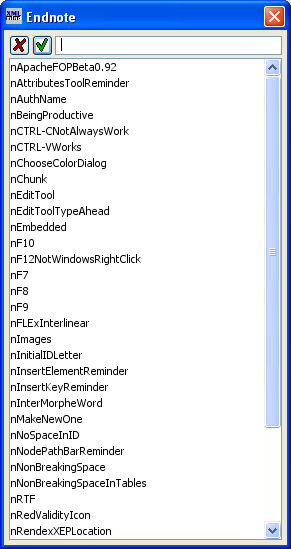

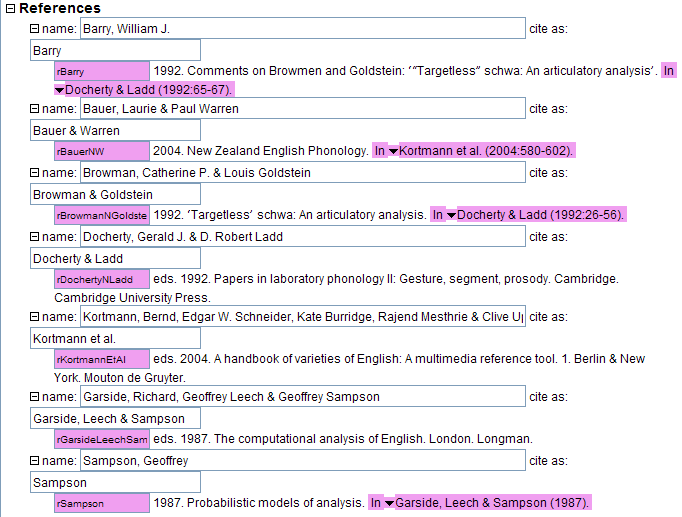
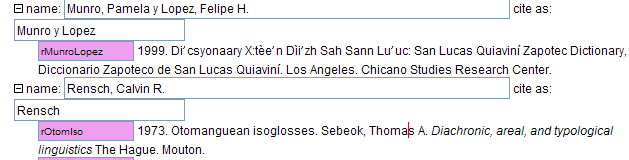
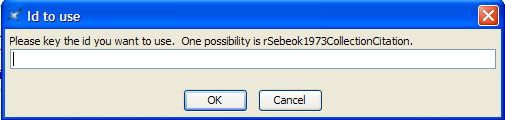
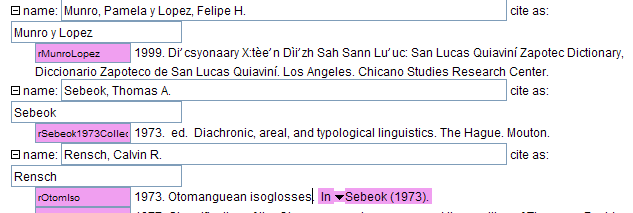
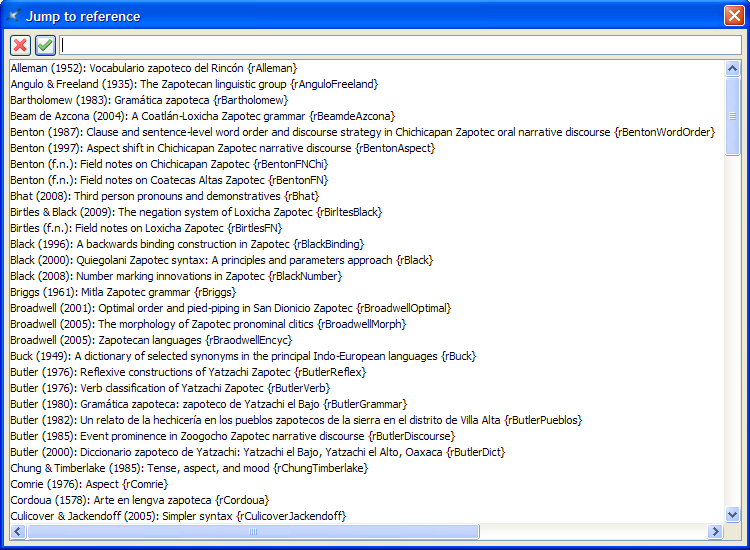
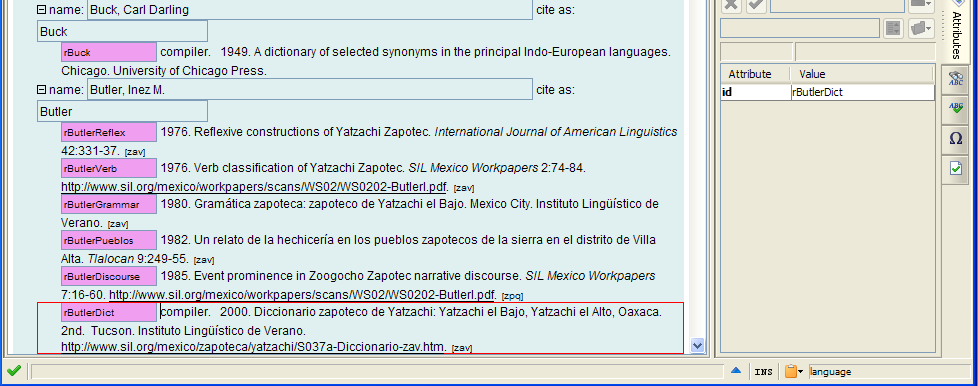

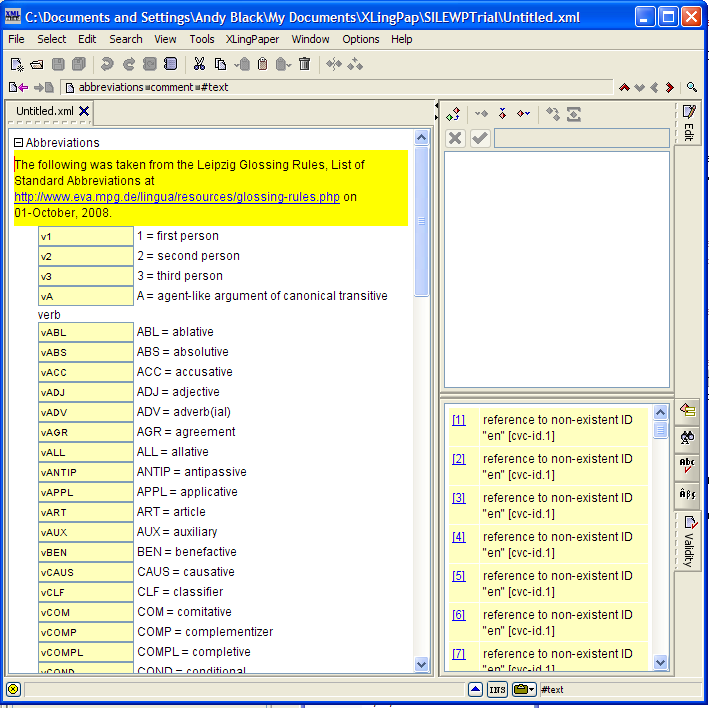
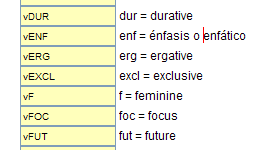
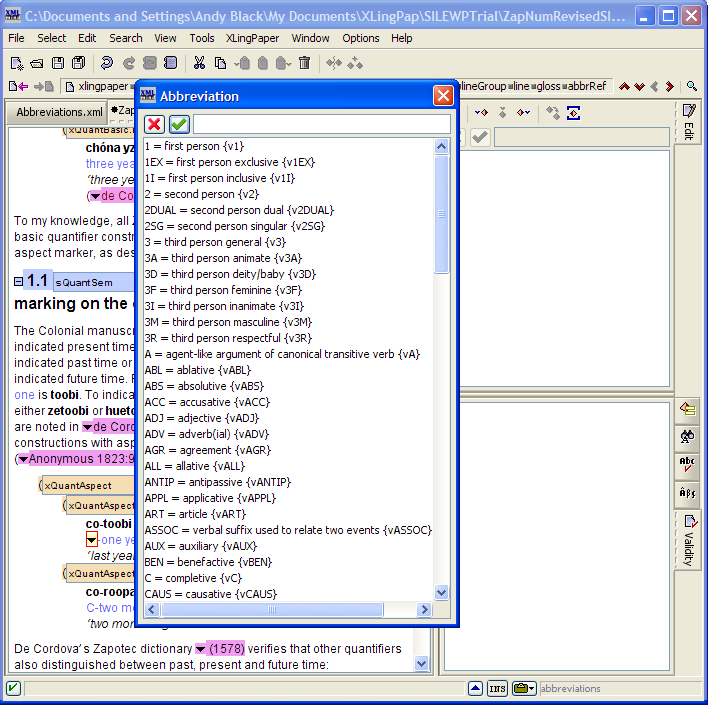
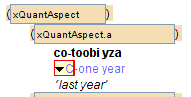
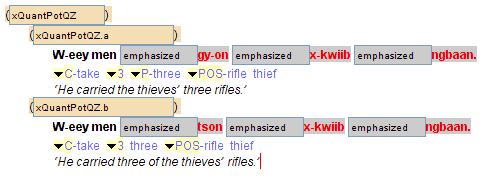
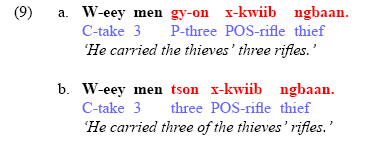

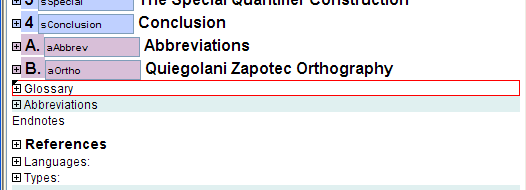
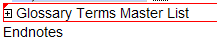
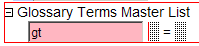


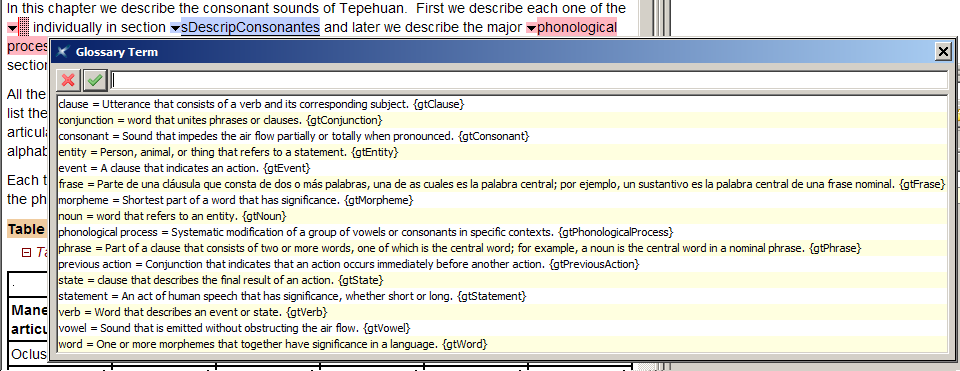

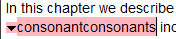
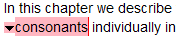
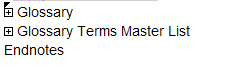
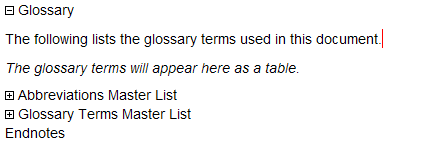
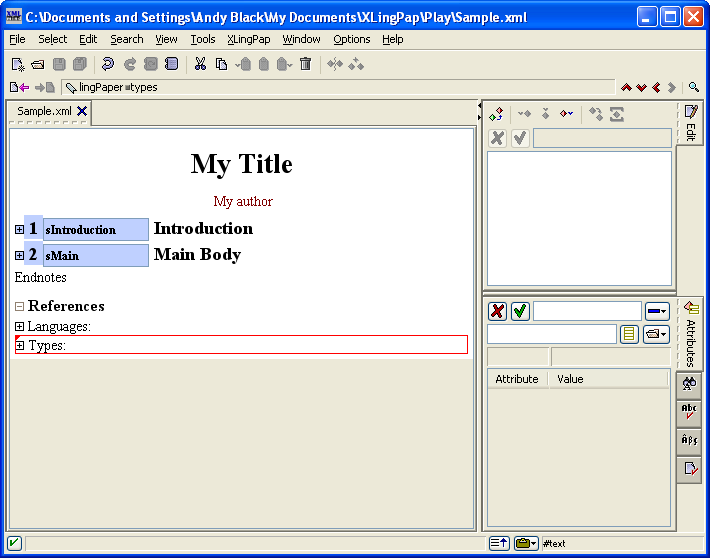
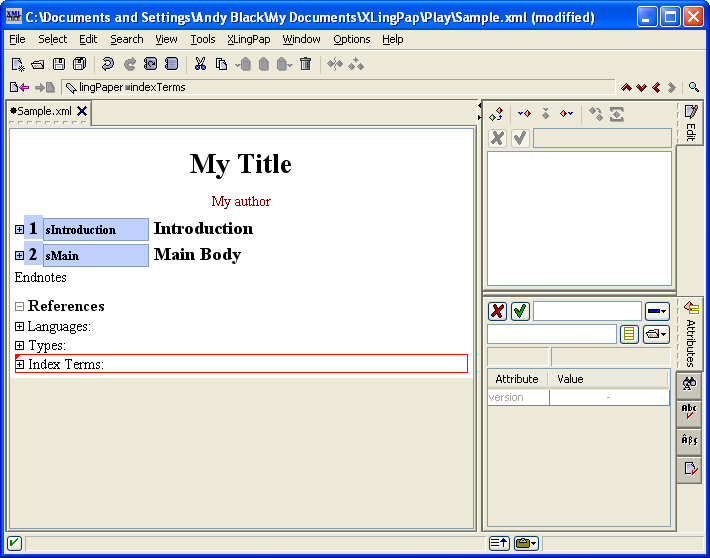
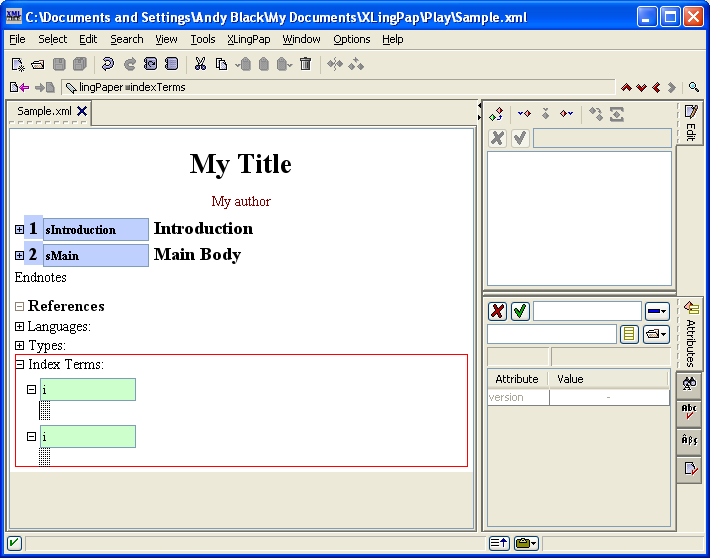
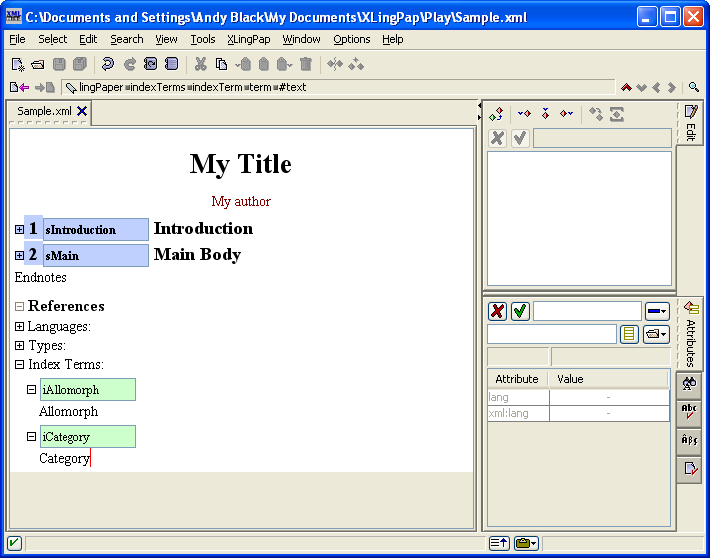
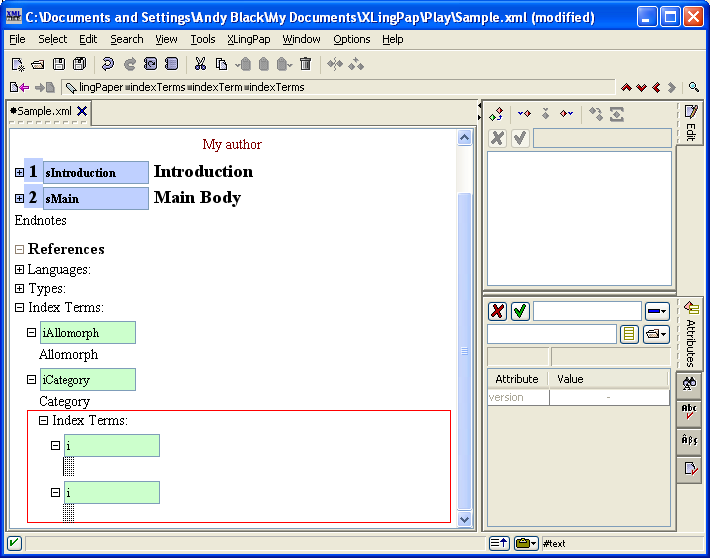
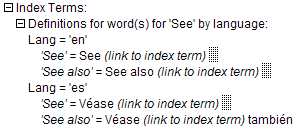
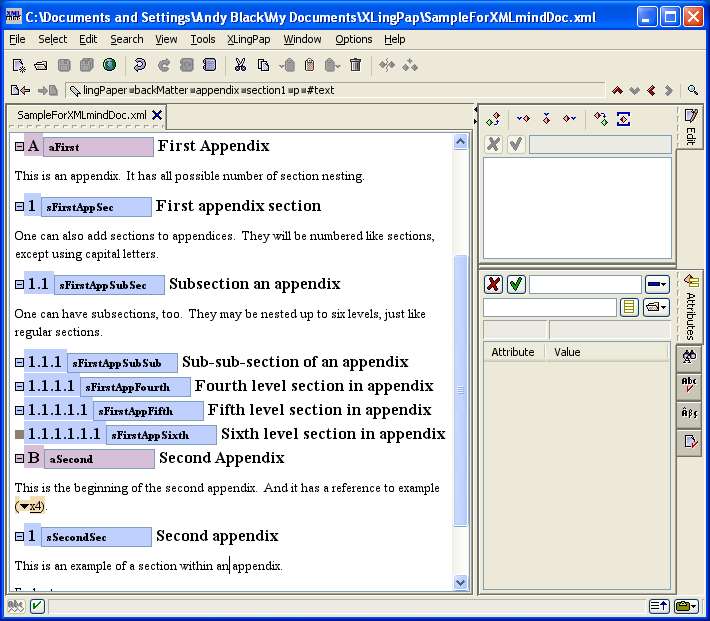
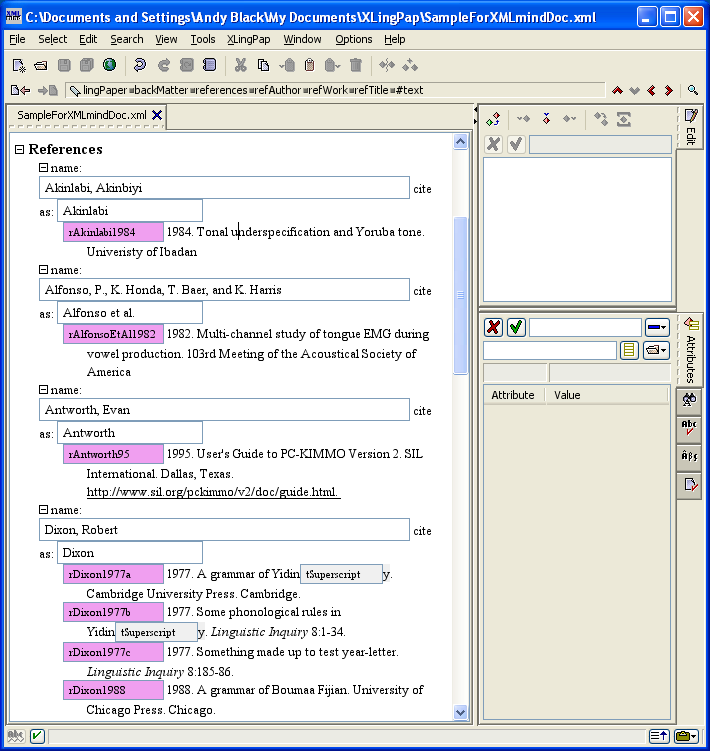
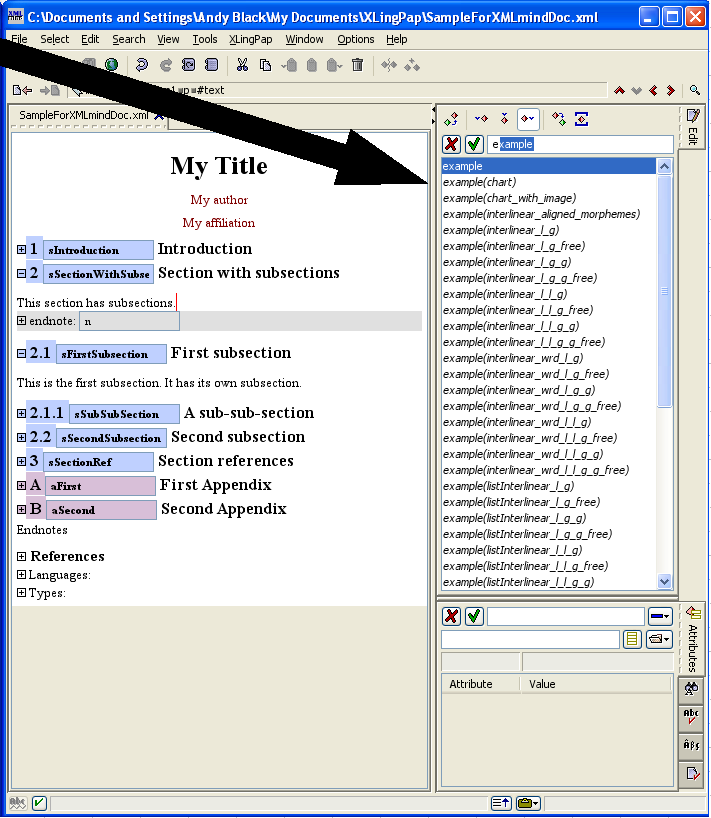
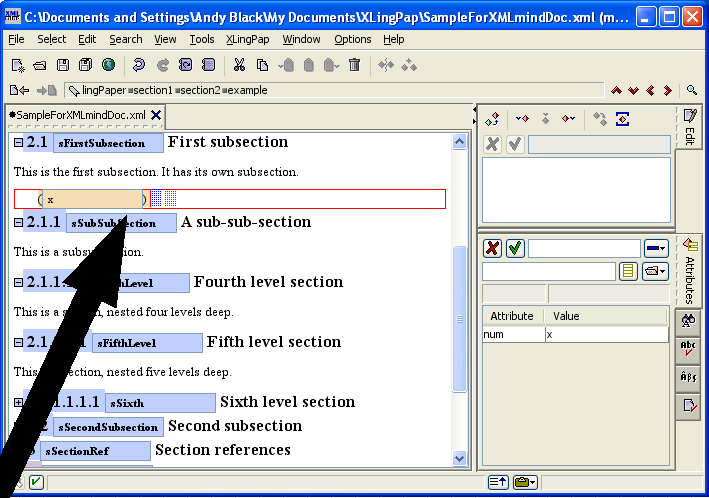
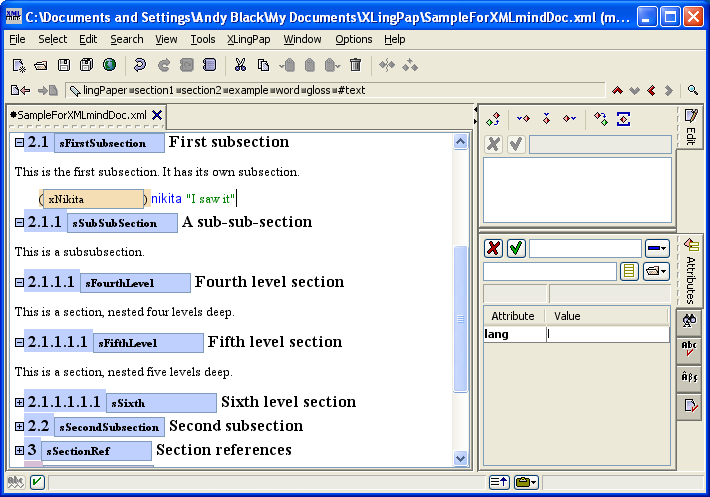
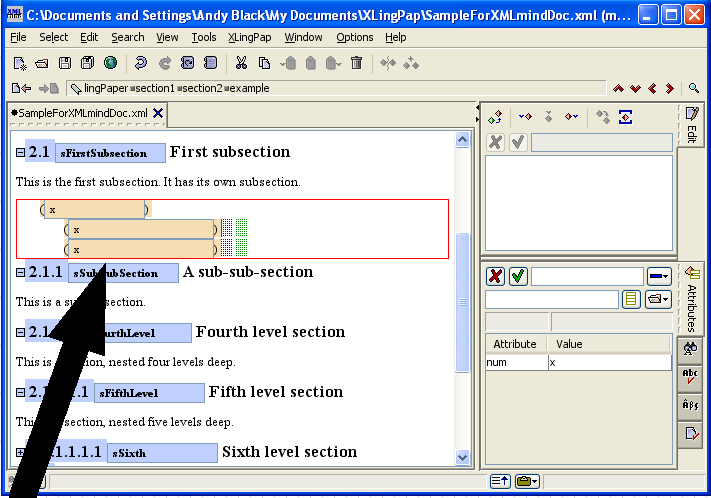
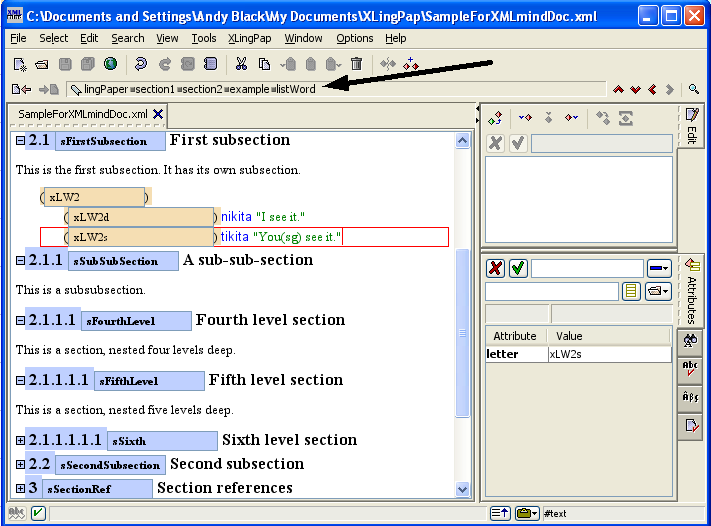
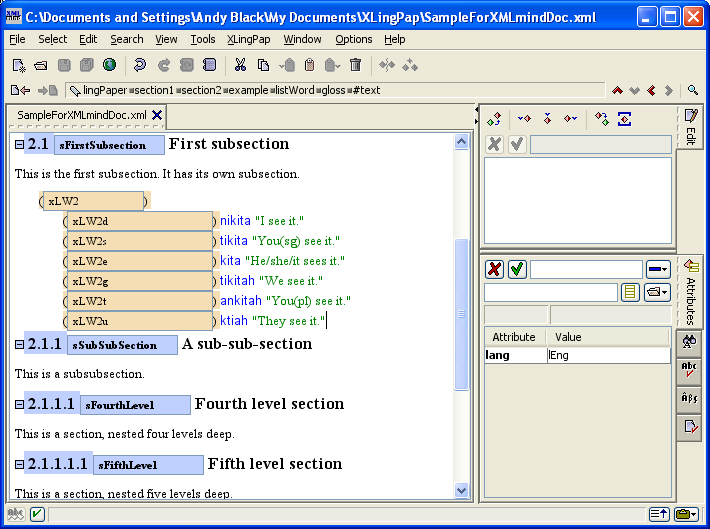
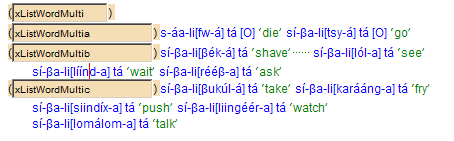
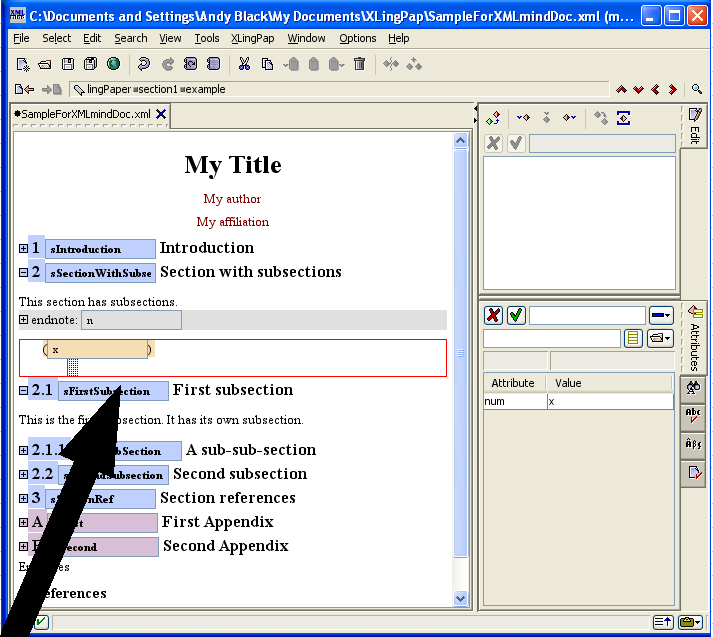
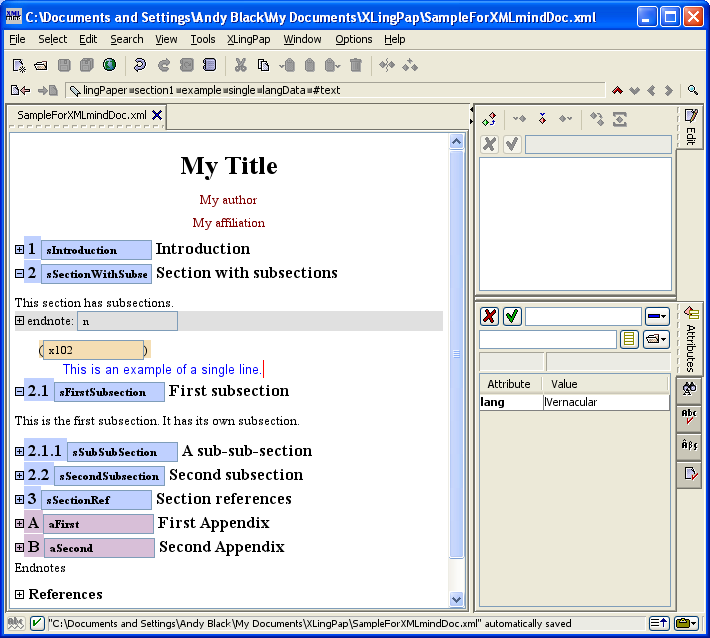
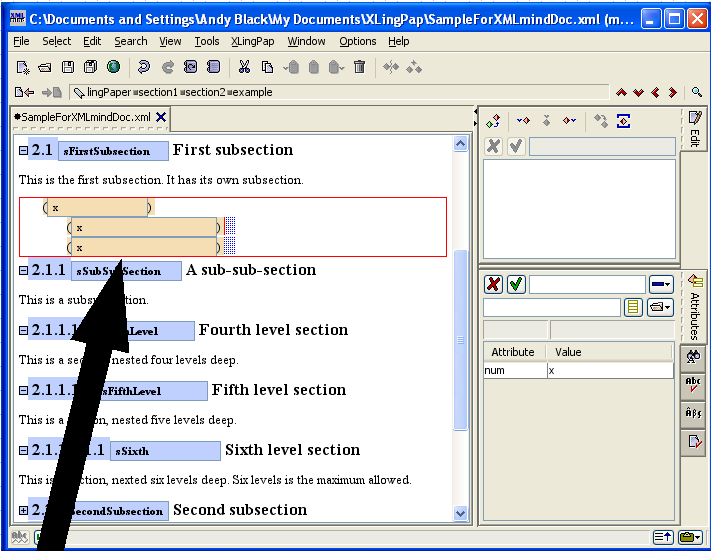
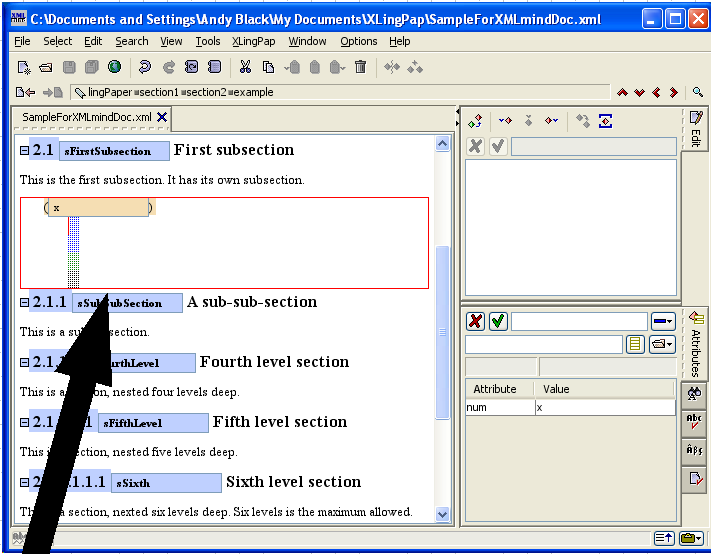
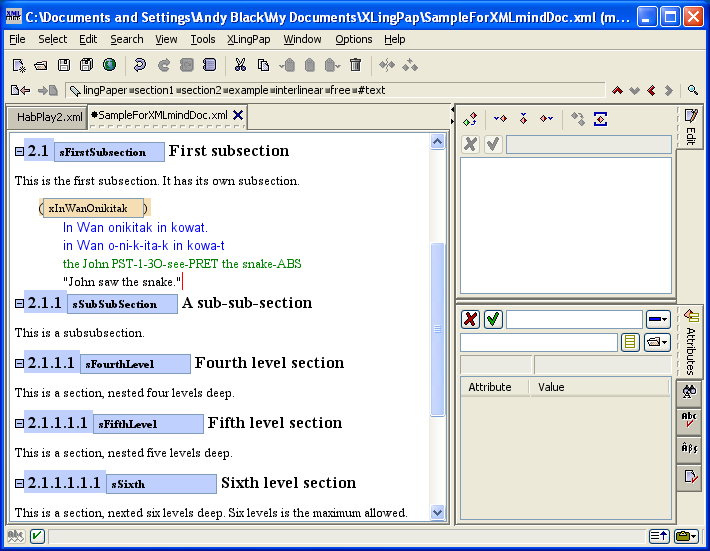
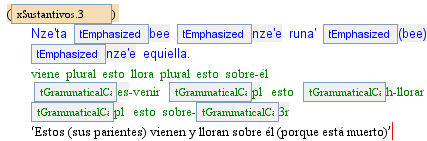

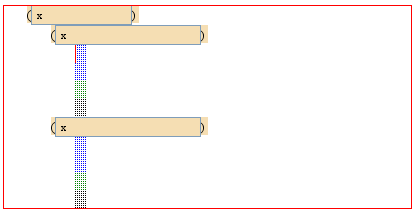
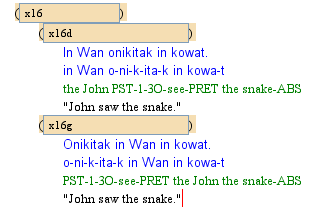
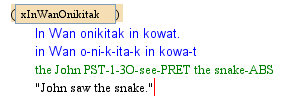
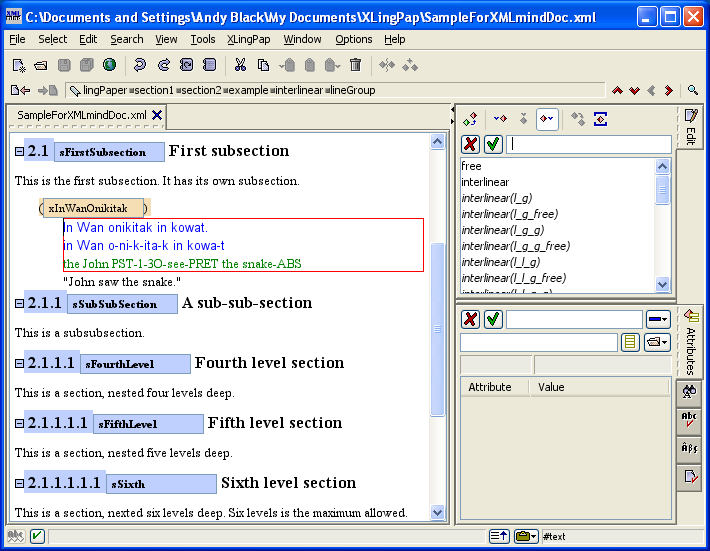
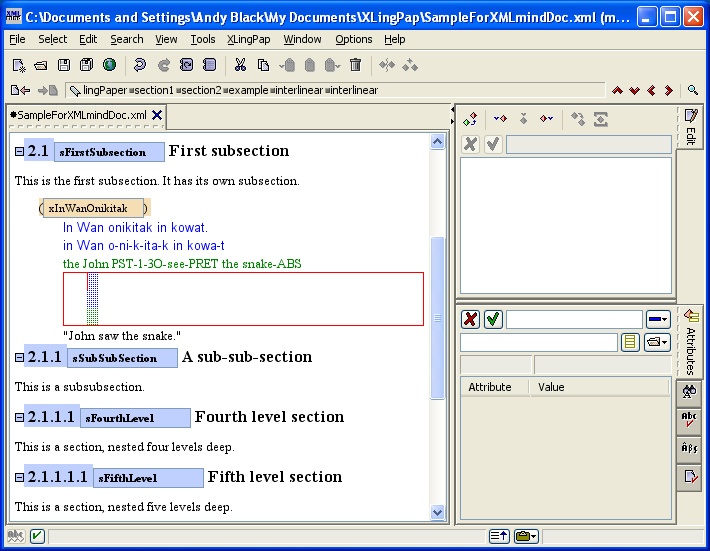
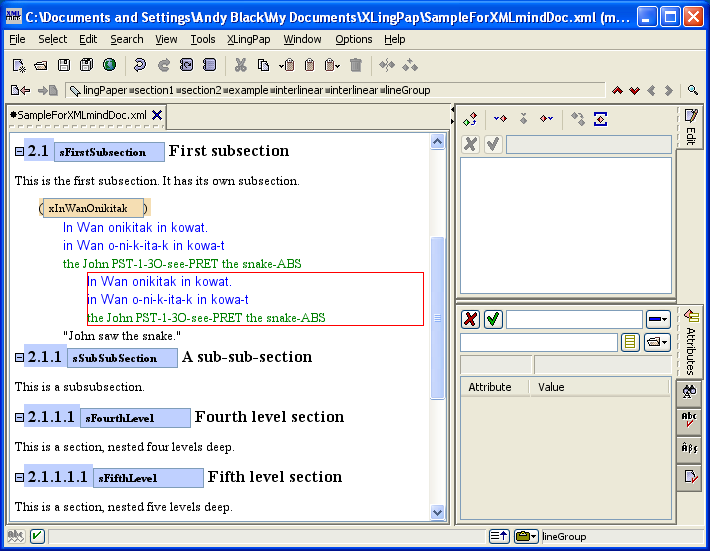
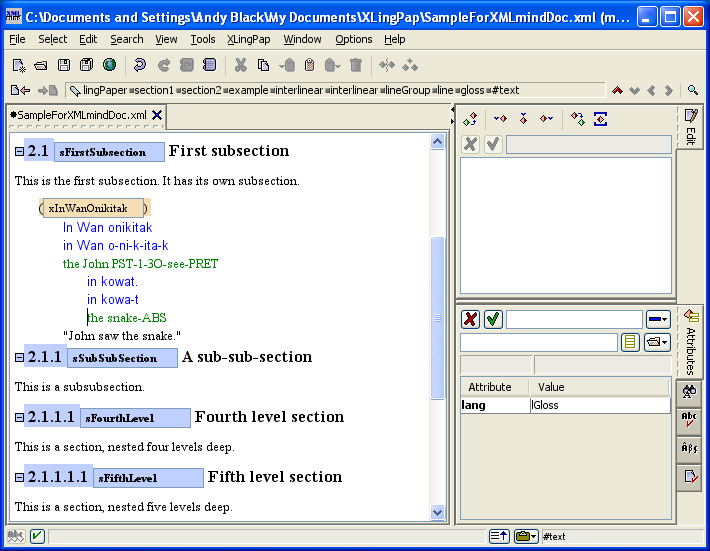
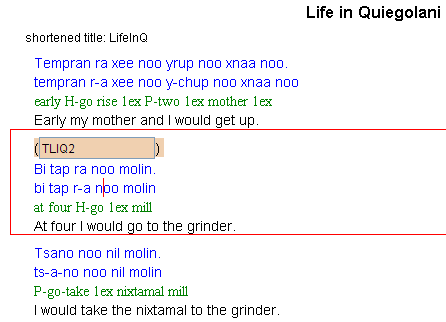
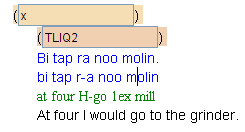
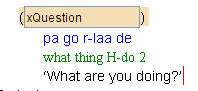
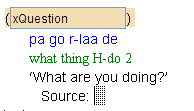
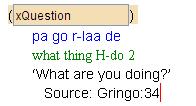
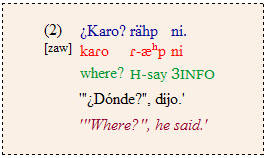

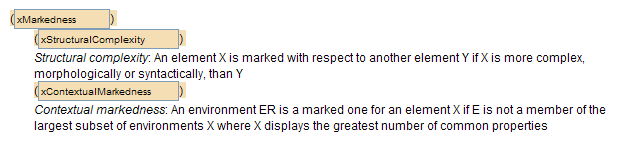
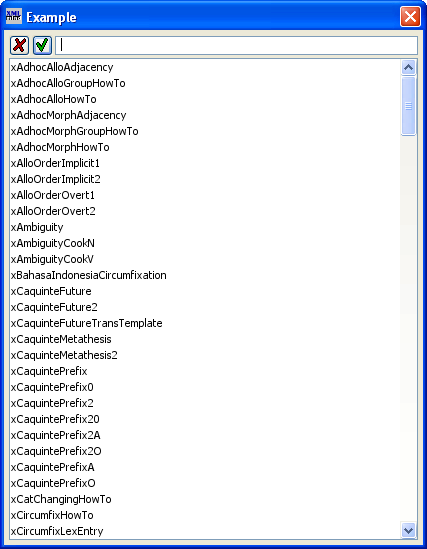
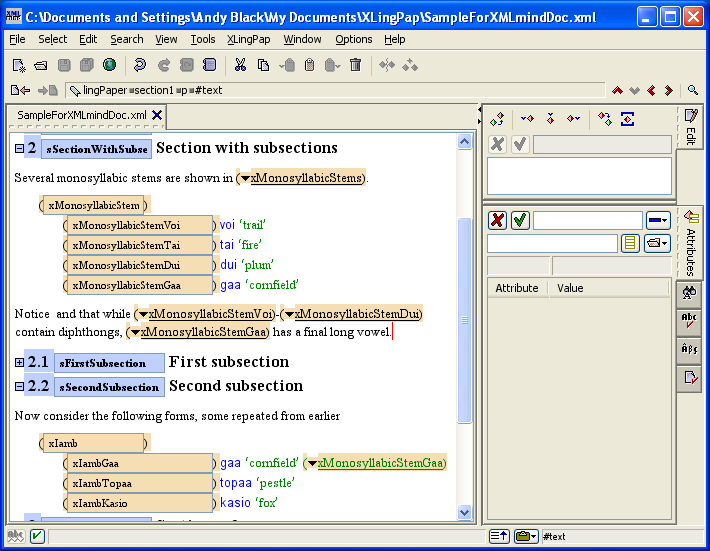
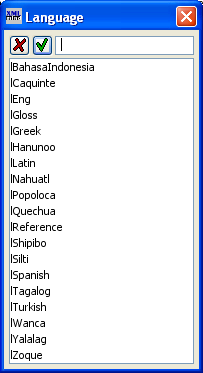

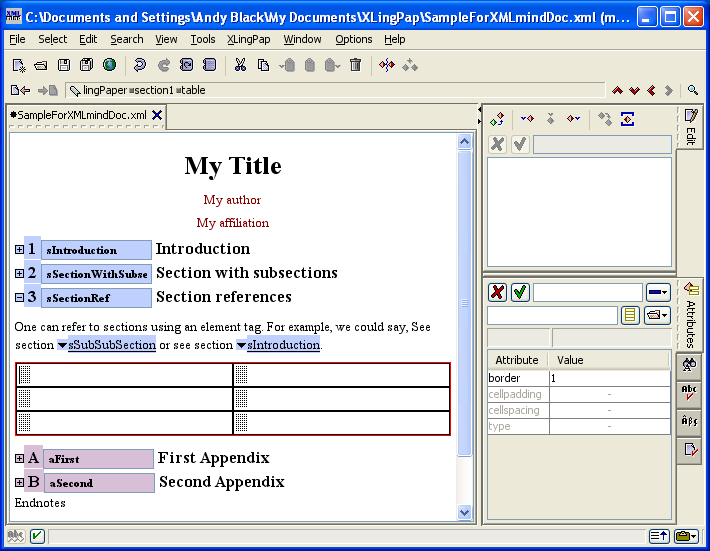
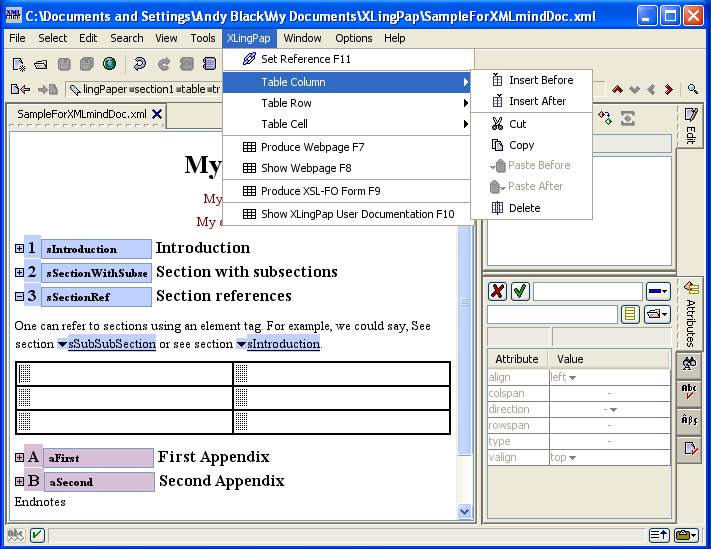
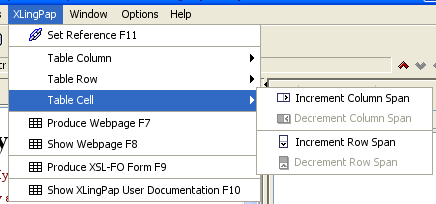
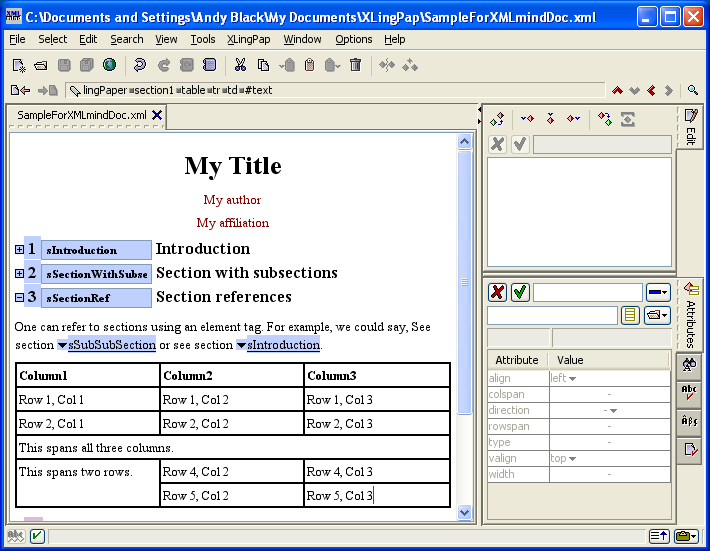
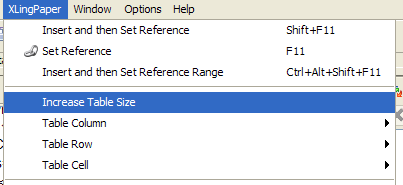
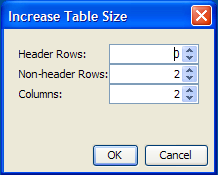

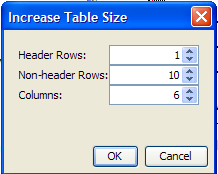
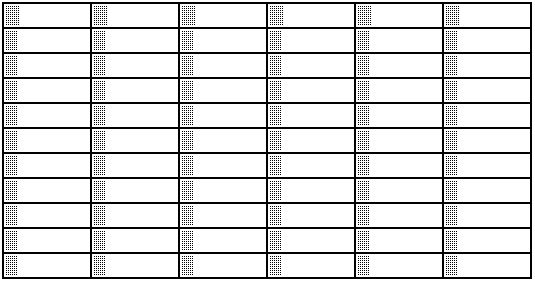

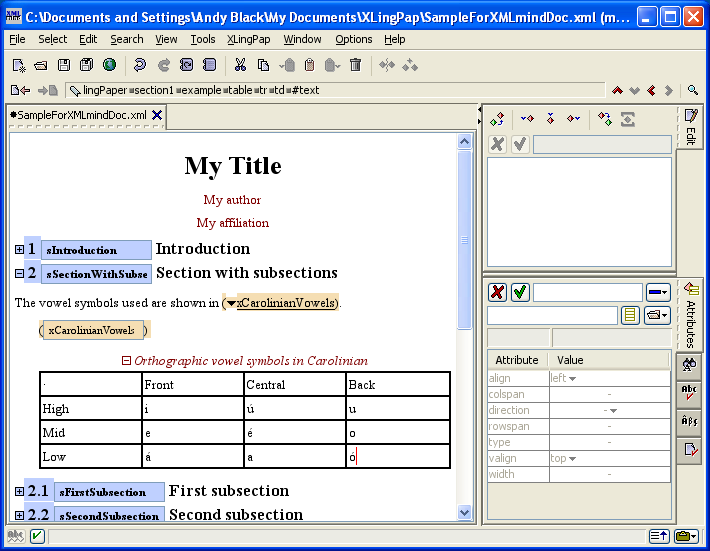
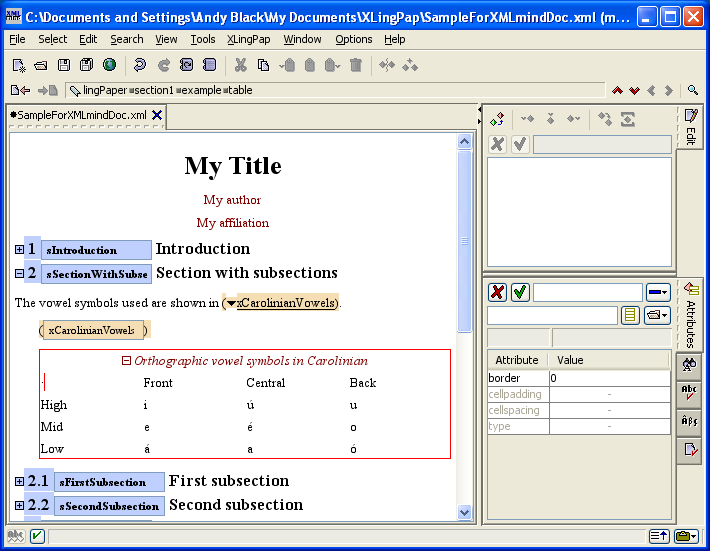
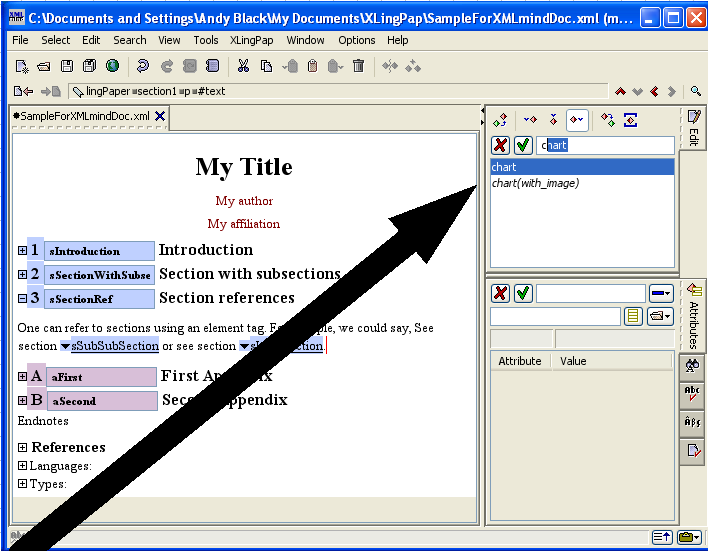
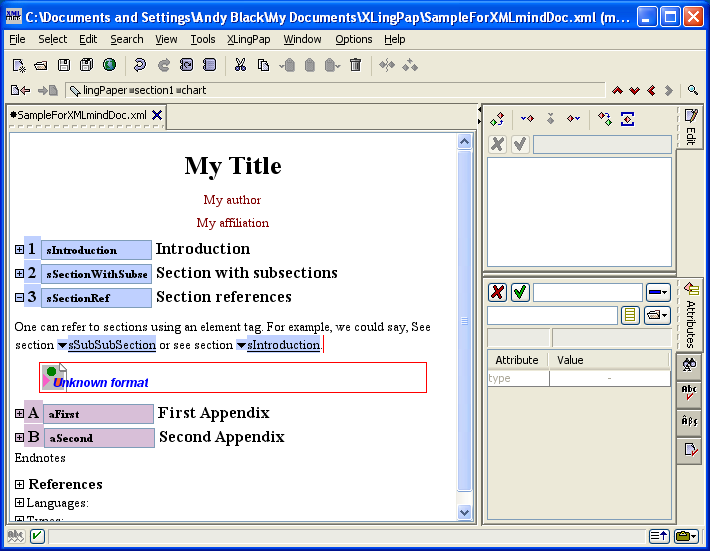
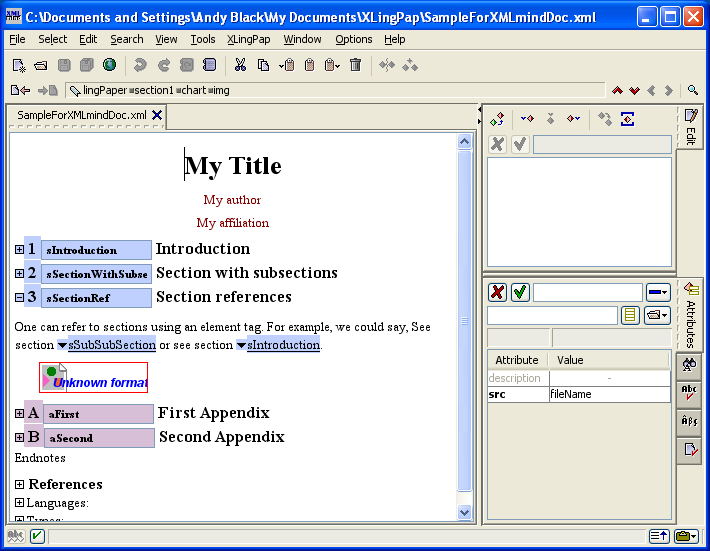
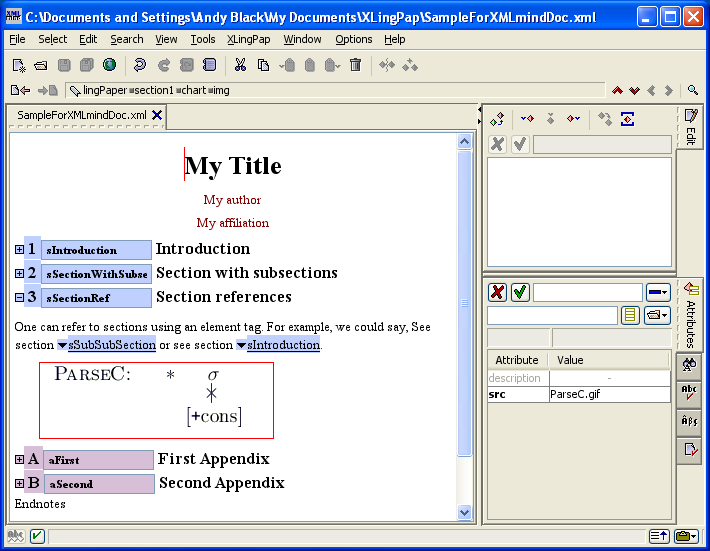

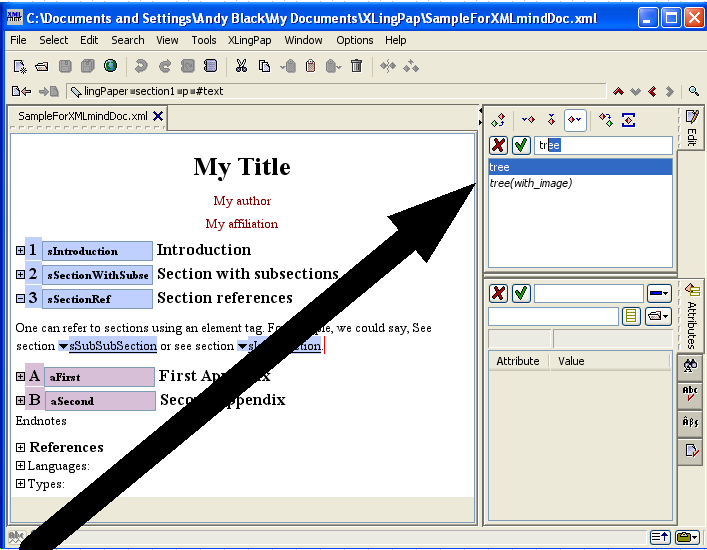
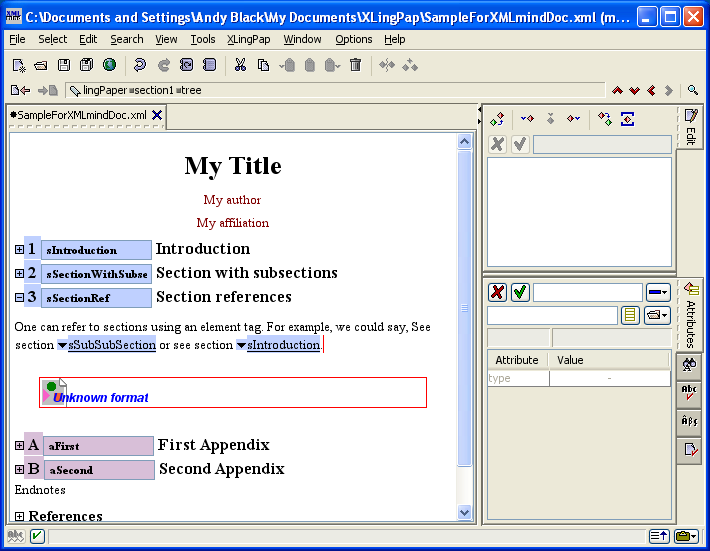
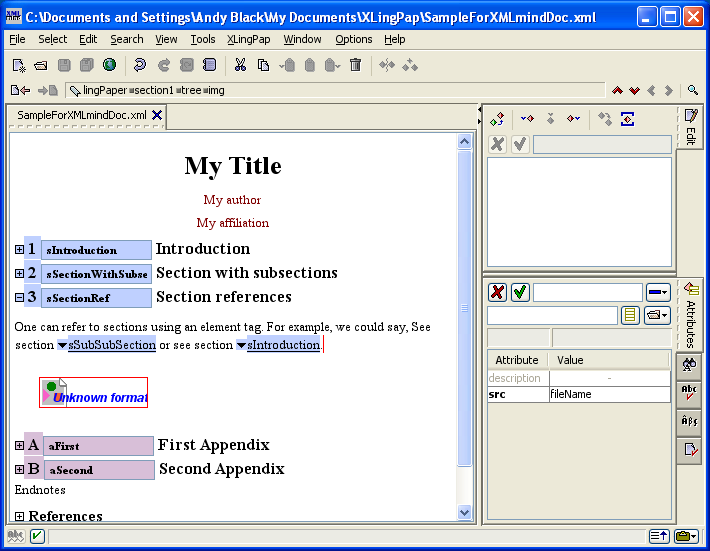
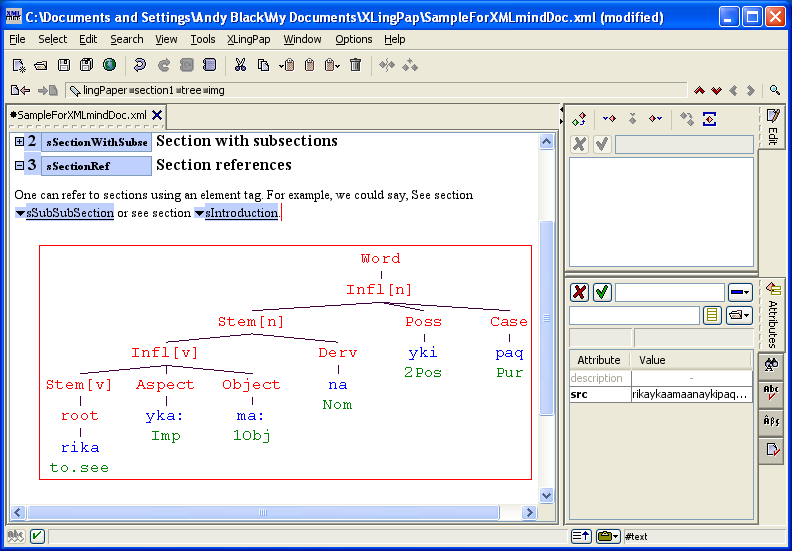
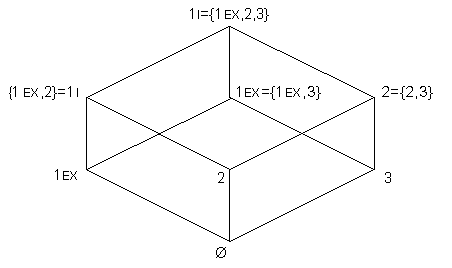


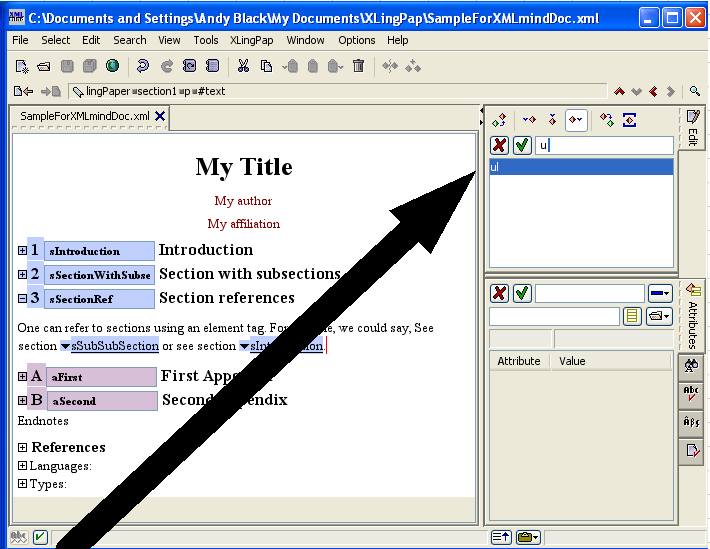
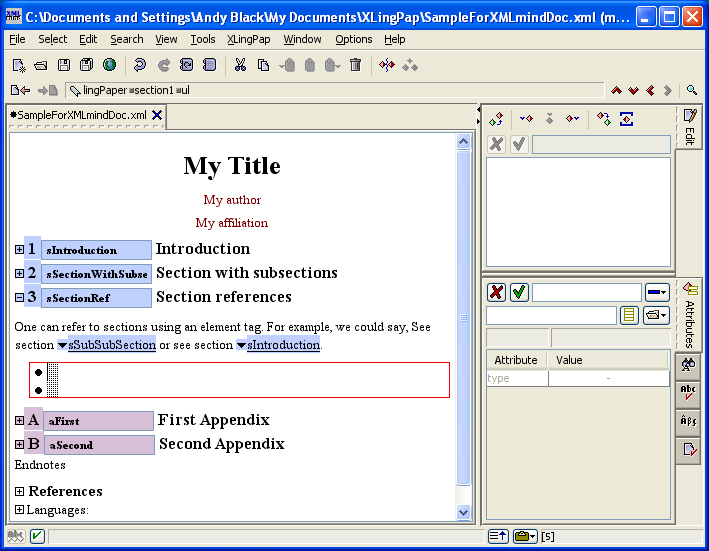

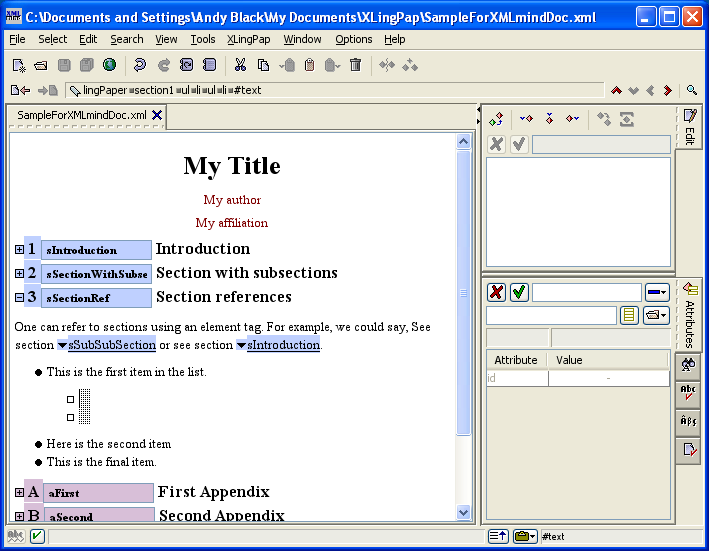
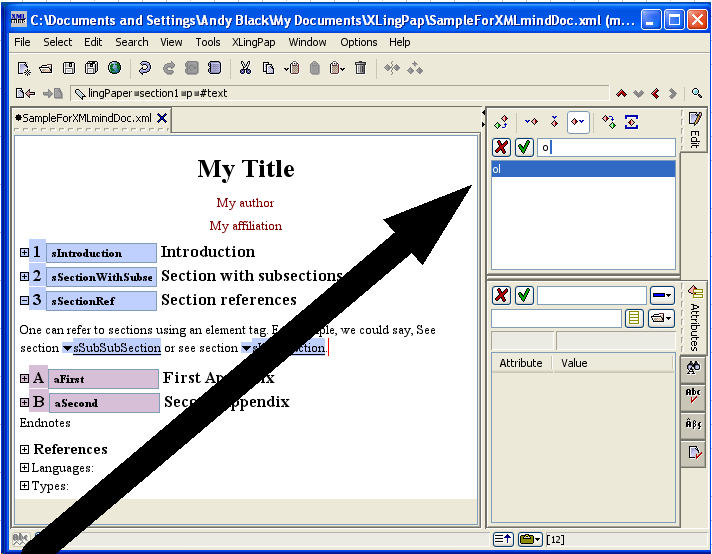

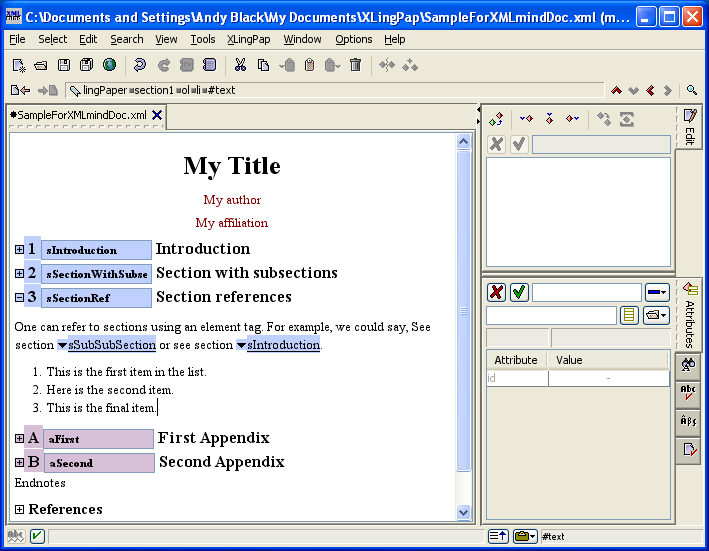
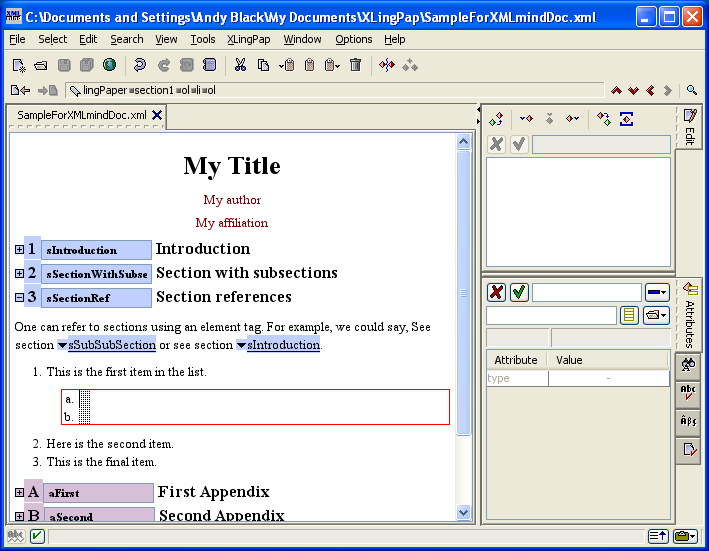

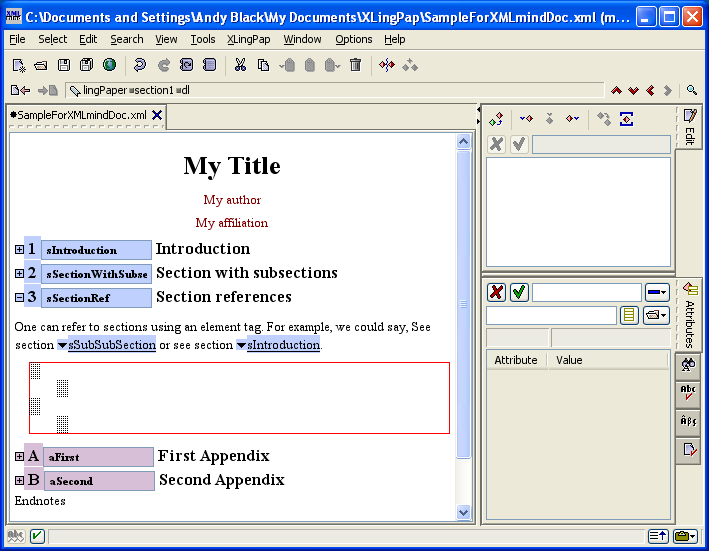
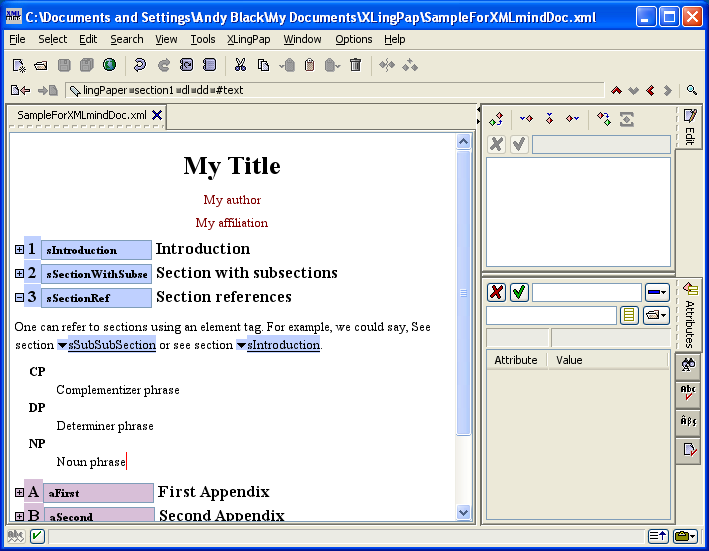
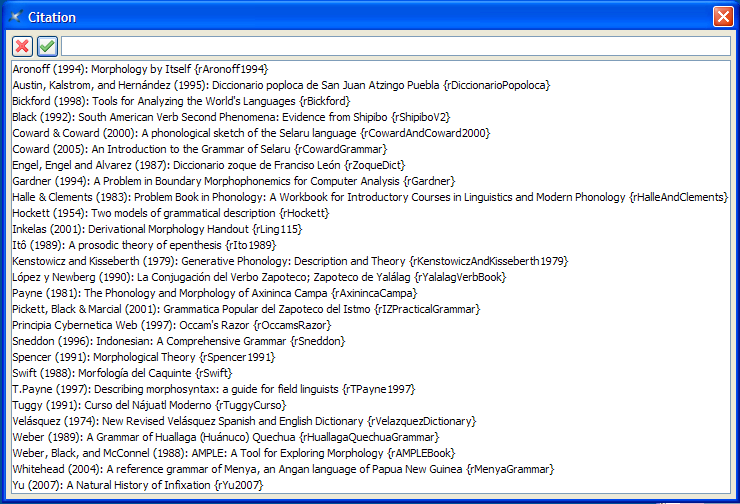
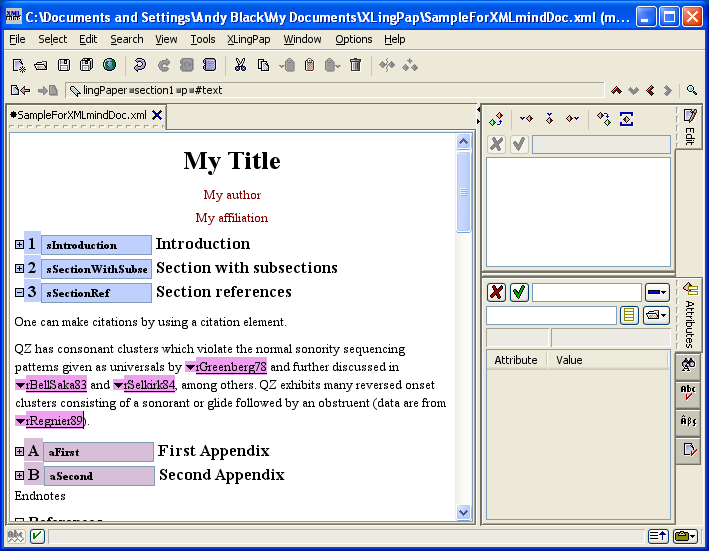
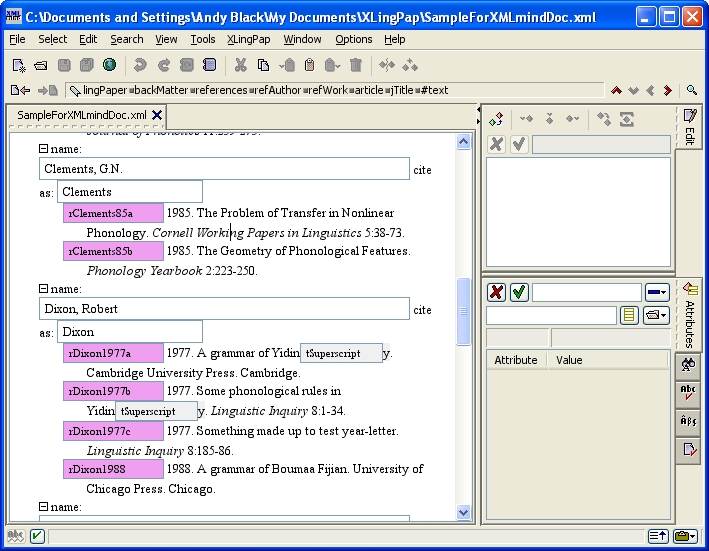
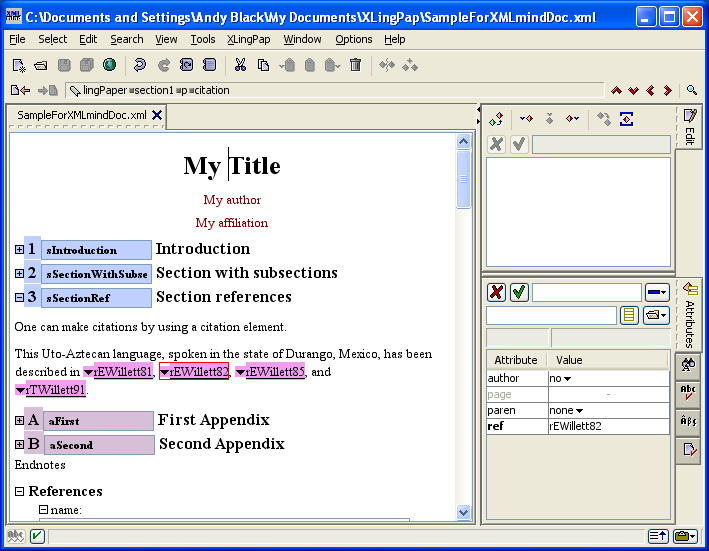
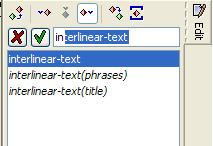
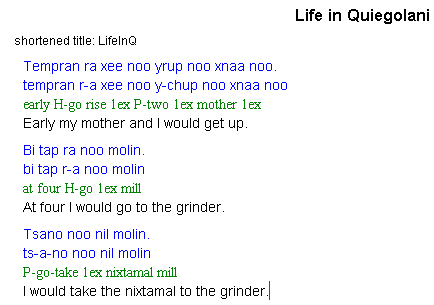
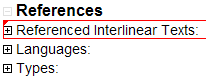

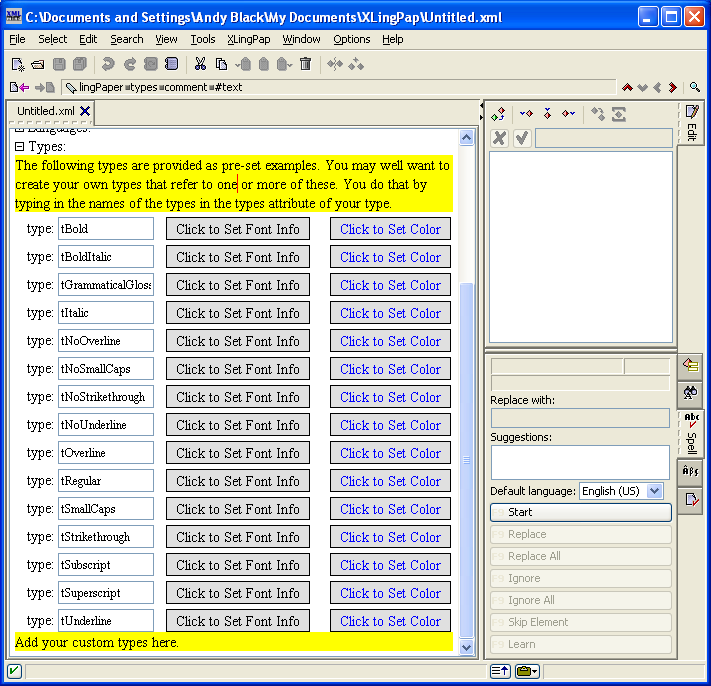
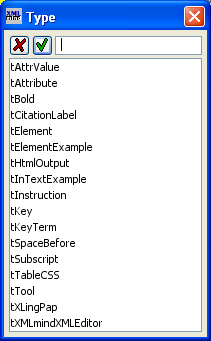
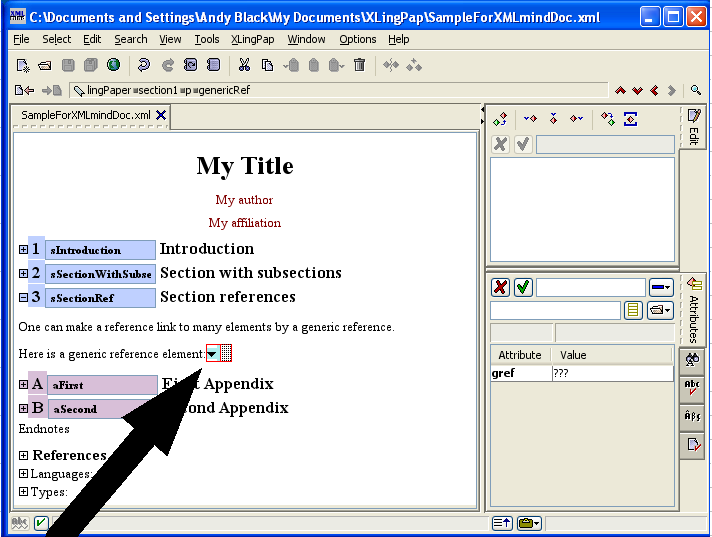
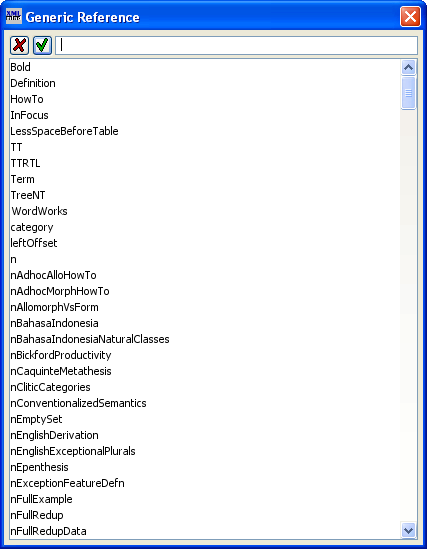
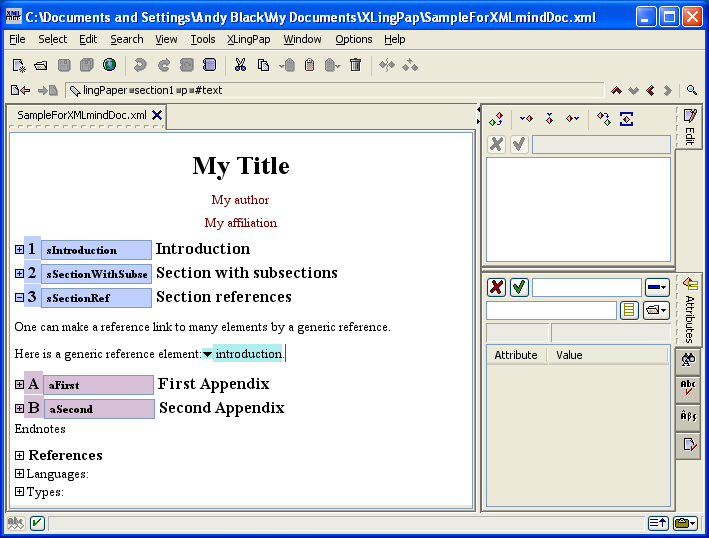


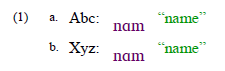
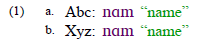
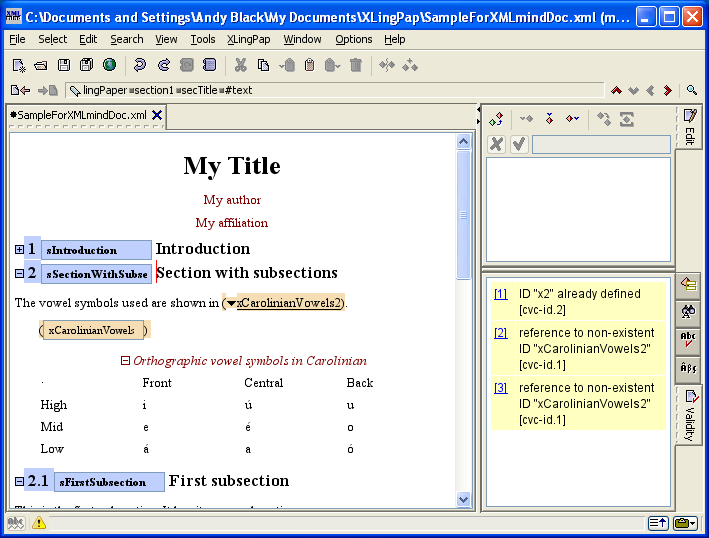
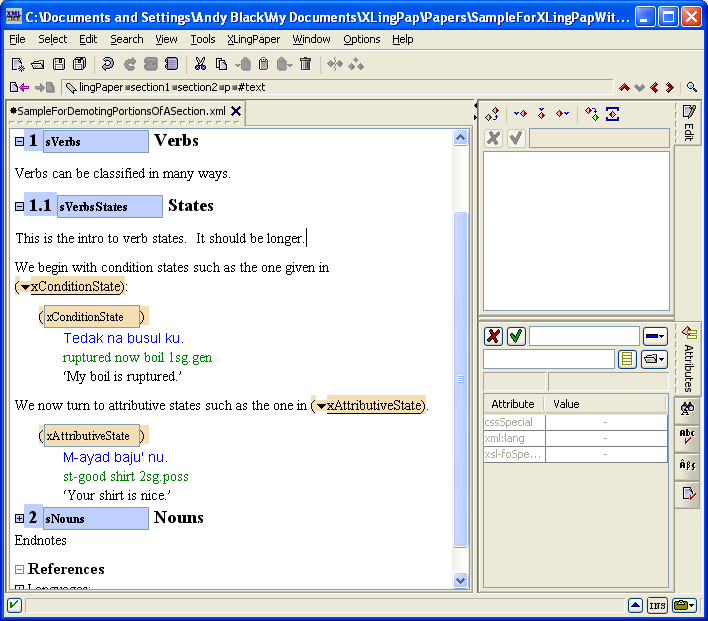
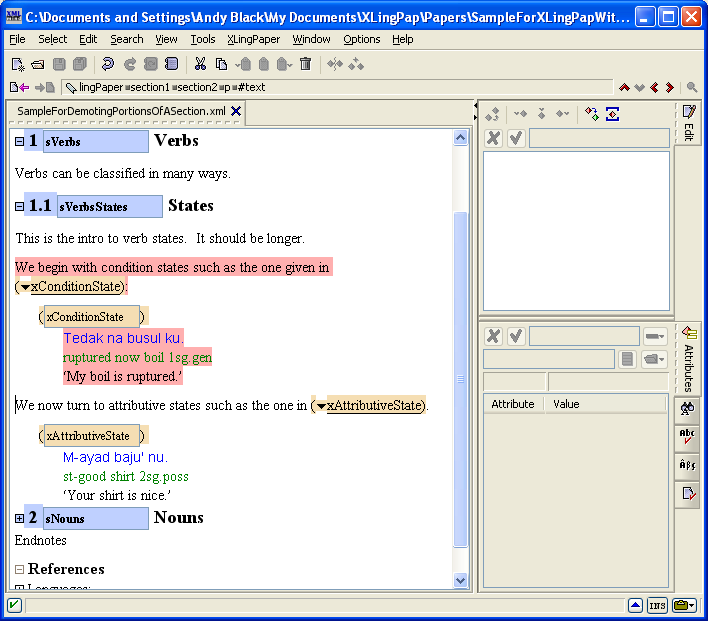
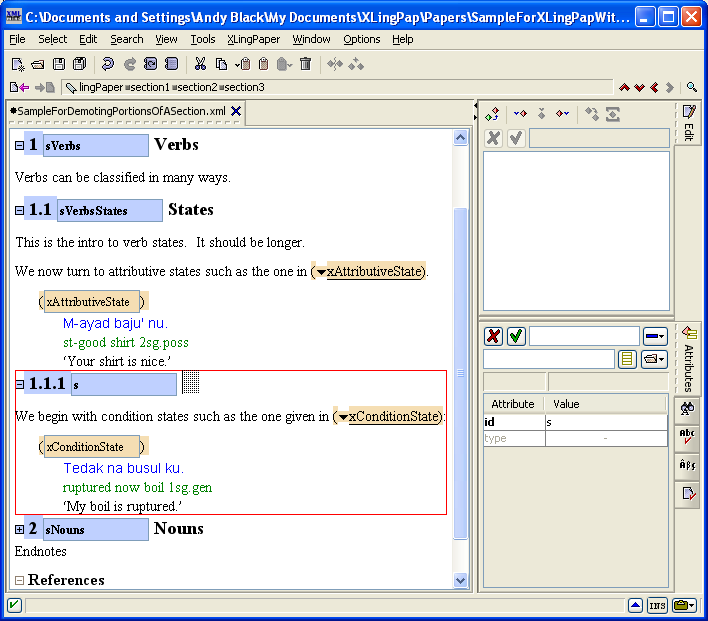
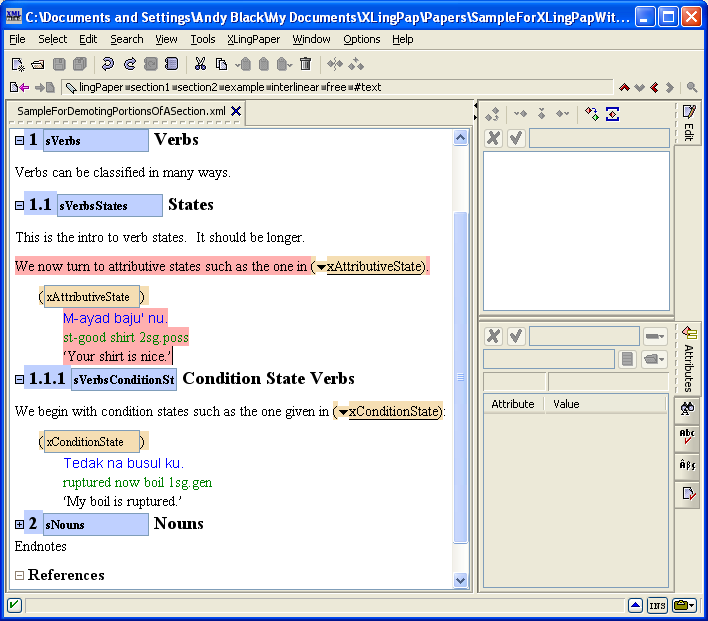

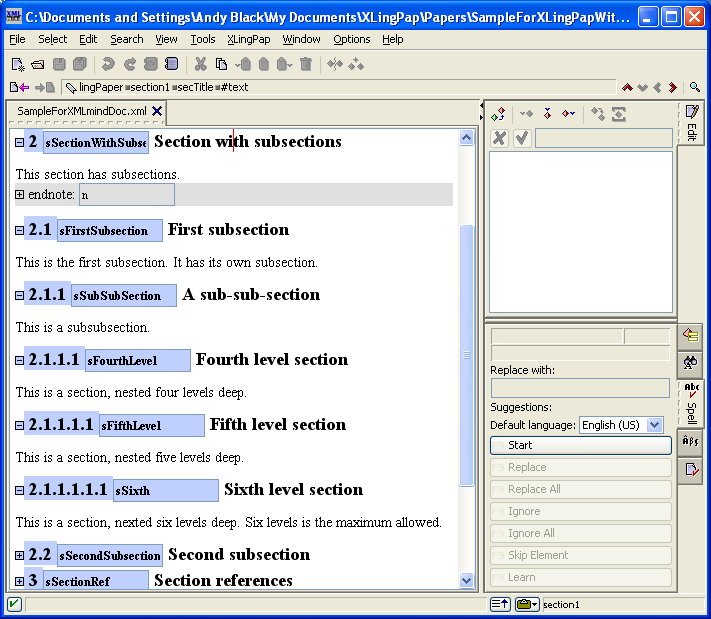
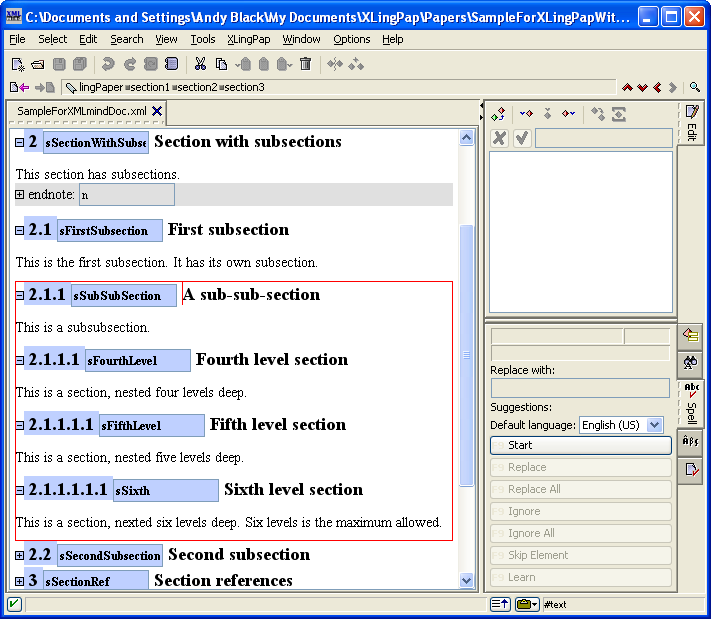
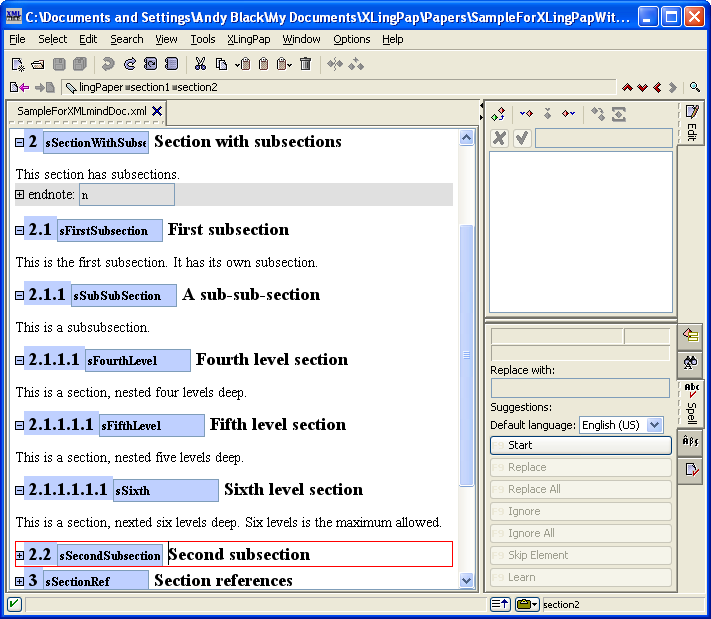

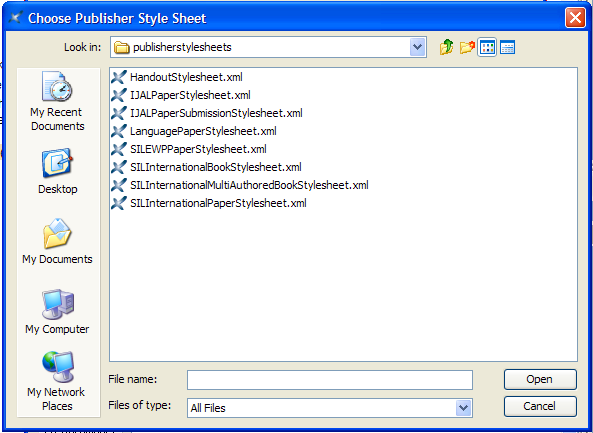

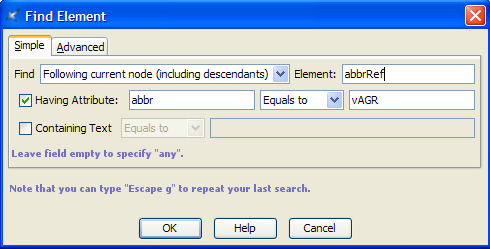
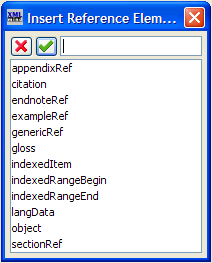
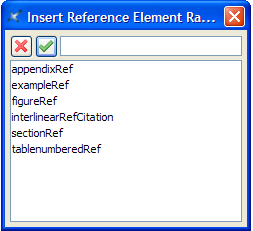


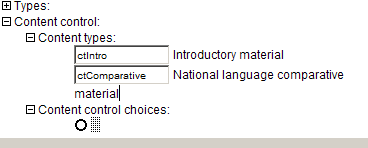
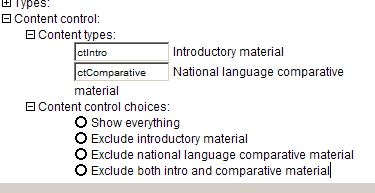
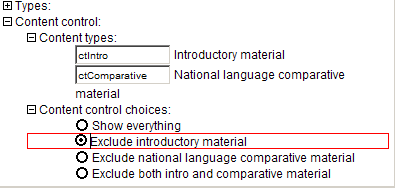


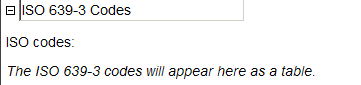
 to see it, though.
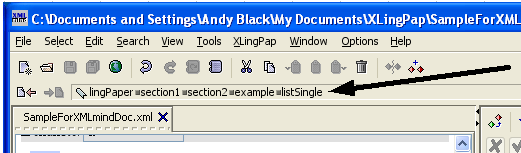
 . In theory, that should not happen unless you edit the file outside of the