Try It!
To try out Audio Project Manager, there are only a couple of steps:
- Sign Up.
- Upload an audio file.
- Click Play and begin working.
In this video, our product owner walks through a demo of using the software to review a passage.
Sign Up
From the Auth0 sign up screen you will notice there are two tabs, one for logging in and one for signing up. The first time you use Audio Project Manager, you will need to sign up and every subsequent time, you can just log in with your credentials. Audio Project Manager allows you to log in with a Paratext Id if you have one. If you plan to synchronize transcriptions or back translations with Paratext eventually, it is best to sign up with Paratext the first time. Audio Project Manager also allows you to use your Google credentials to authenticate. Otherwise you can use any email address and password of your choice.
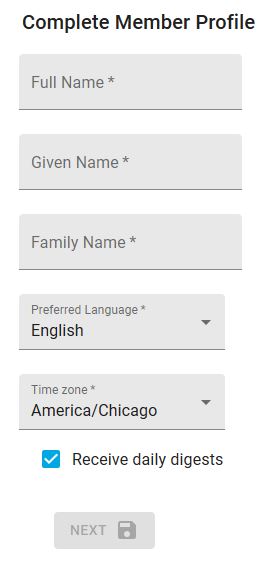
When you sign in the first time, Audio Project Manager will ask you to complete your profile. This includes your name and the language you would like to use for interacting with the program. If you don’t see a language that works for you. Please contact the development team with your request.
Upload Media
When you see the project management screen, it will say Audio Project Manager at the top and have a card on it. Click on the plus (+) on the card and choose “Upload Media”. You should see this dialog:
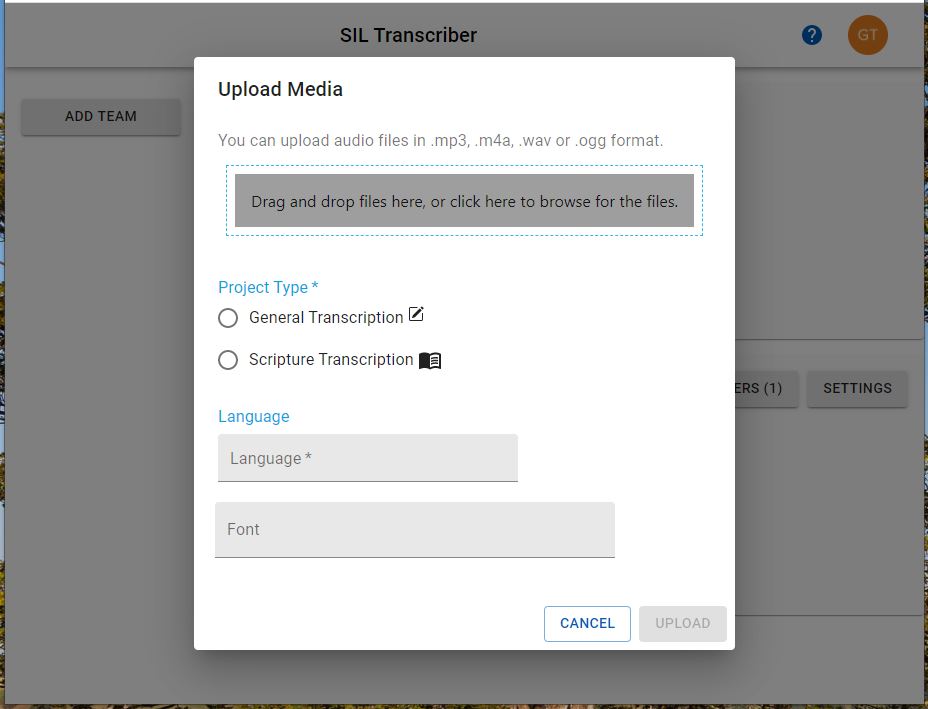
You will need to provide the audio file, select the type of project that you would like. For Scripture projects, you will be asked to choose a book which will be the book in Paratext that should receive the content. Then you will be asked to identify the language of the audio recording.
For Transcription, click Play and begin transcribing
Then when you click the play button, the audio will begin to play and you can type the audio into the text box. Clicking will pause and play the audio. You can also skip back and skip ahead or slow down and speed up the play back with other keys and controls above the box. The transcription you are typing is saved every 30 seconds and when you are done, you can click “Submit” to move the work to the next step. After transcribing the next step is to review the work. This can be done by you or someone else (on a team project). Clicking “Submit” for the Review step will move the work to the next step. At any point you can use the three vertical dots (which displays a menu of more options) at the top of the task list to choose Export. If you are sending the work to Paratext, that will be done with the integration option.
The home button will bring you back to the project card view. Each project card also has the three vertical dots with more options menu that has export on it as well.
Here is a short video introduction
For other Orality Work, click on the work flow step to begin
Workflow steps are the first column on the Project plan. If you are currently seeing the Transcriber, you can click the Audio Project at the top of the screen to move to the overall plan. The plan step will show you how far the work has progressed on each passage. If there are comments that need your attention, a badge will appear on the workflow step.