PrimerPrep Help
Table of Contents
Introduction to PrimerPrep
The PrimerPrep program is designed to help you:
- analyze texts in a language to discover the words and letters used in the language, and how frequently they occur
- specify what to analyze, by selecting which words to analyze, how to count them, and how to break them apart (with affixes)
- provide a suggested teaching order, i.e. the order in which these letters might be introduced in a primer, and show you what words from your texts are available in each lesson
- modify the order of letters in the teaching order, and add sight words
- analyze your text for each lesson and mark untaught residue in red, to draw it to your attention.
Initial steps with PrimerPrep
Note: Sometimes the program takes a little while to start up, or to open a file dialog. This seems to be caused by the graphics engine used. Just be patient. Usually those operations are faster the second time.
At a basic level, the PrimerPrep program is very simple to use. Simply select the Add Text(s) button from the starting screen (1):
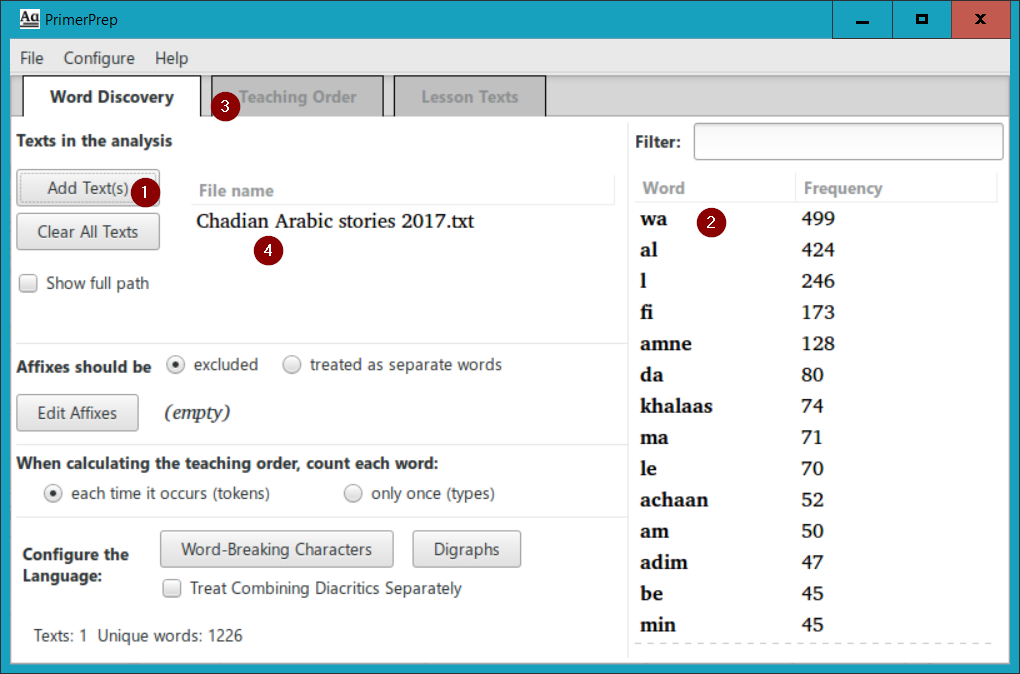
In the dialog box that appears, browse to select a text file in the language you want to analyze, and click Open. PrimerPrep analyzes the words in the file, prepares a list of words and places them in the right pane of the window (2), sorted by decreasing order of frequency. If you do not have any special analysis needs, you can then simply click on the Teaching Order tab (3), and view your results:
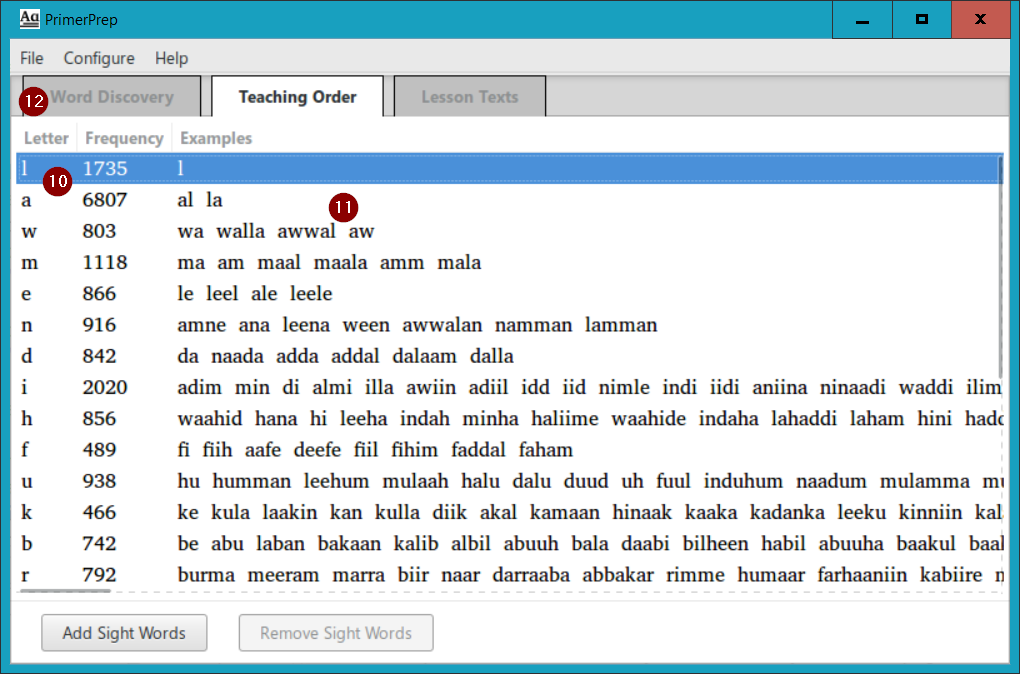
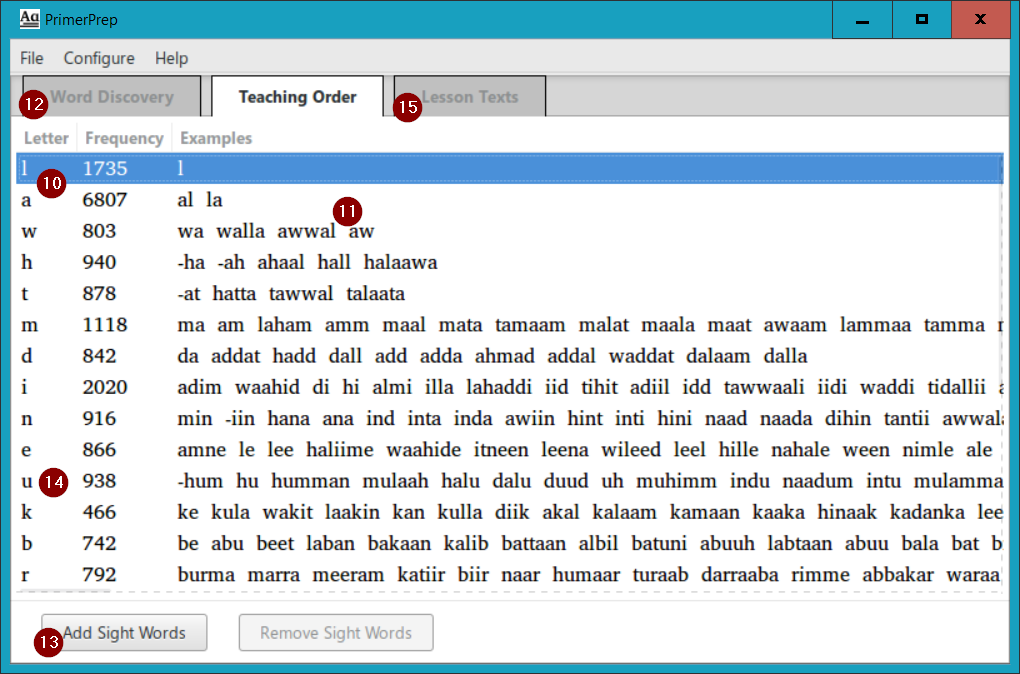
PrimerPrep has calculated the “optimal” teaching order, using the elimination algorithm1, and presents it as a list of letters (10) with their frequencies. (Note that you can easily modify this suggested teaching order; see Modifying the Teaching Order below.) The example words shown (11) are simply the words found in your text file(s) which are available at that point in the teaching order (formed from letters at this level or higher in the teaching order). For example, in the lesson for the letter “w”, the word “awwal” can be used in your texts because all of its constituent letters have been taught by this point. The breadth of example words presented depends on the size and breadth of your example text(s) that you selected to analyze.
Adding more texts to your analysis
To add more breadth to your analysis, you will need to add more texts. To do this, return to the Word Discovery tab by clicking on that tab (12) at the top of the window (you can ignore the warning message it gives for the moment), click again on the Add Text(s) button (1) and select additional texts. The texts currently loaded are shown in the File name list (4).
What kinds of texts should you add? Generally it is best to use very natural texts in the language, like traditional stories. Avoid technical texts or texts that have been translated (like Scripture). If you use multiple texts, they should be in a similar register and dialect (and certainly in the same language!) to get helpful results from the program.
It should be noted here that the program expects the input text files to be in Unicode, specifically in UTF-8 encoding. If you don’t know the encoding of a text file, open the file with Notepad then select Save As… from the File menu. A field at the bottom of the Save As dialog will show you the current encoding. If it is not UTF-8, then select UTF-8 in the drop-down menu of that field, and save the file, either overwriting the previous file or giving it a new name.
It should also be noted that the program tries to intelligently process texts that are marked with standard format markers (SFMs). When PrimerPrep loads a file, if it finds that there are a number of lines in the first several lines that begin with the “\” character (this is how SFMs are marked), then it will present you with a special dialog box which shows you the first part of the file and asks you how you want to handle the SFMs. You can choose to ignore them, treating them like normal text, or “process them”, removing them from the text. In this latter case you can specify certain SFMs to exclude (those SFMs will be treated as comments; you should do this for example with SFMs that could be in a different language), or you can specify certain SFMs which are the ONLY ones for which the data will be loaded.
Word Discovery
The PrimerPrep program automatically breaks the input texts into separate words, using the white space and punctuation as separators2. It also breaks words into separate letters, sometimes treating two or more letters together, as a digraph or multigraph (more about this later). Then, with that data, the program uses those words and letters to calculate the teaching order. But different literacy specialists have different requirements for how those calculations are made, so the program provides some different options that might be helpful for discovering what words should be analyzed, and how they should be analyzed.
Configuring the Language
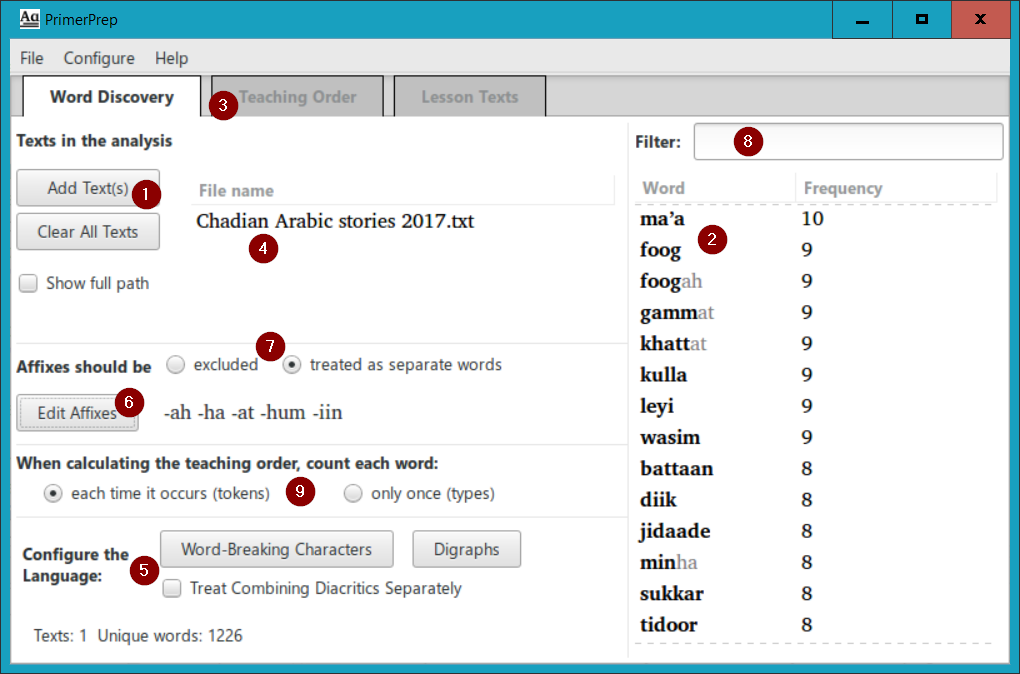
First we will consider ways in which we can configure the language (5), with the two buttons and check box in this section:
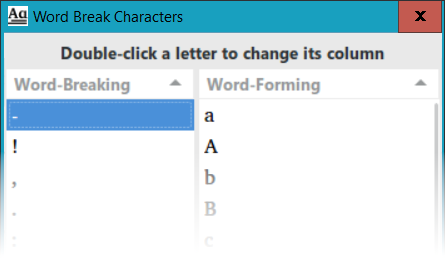
- PrimerPrep program uses the industry-standard Unicode character properties to determine whether characters are word-forming or word-breaking2. To modify this default behavior, click the Word-Breaking Characters button (5). You will see the dialog shown below, with two columns of letters. If you want to change the category of a letter (from word-breaking to word-forming, or vise versa), double-click on it to move it to the other column. For example, you could double-click on the hyphen character “-” to move it to the Word-Forming column, and PrimerPrep would then consider a word with a hyphen in the middle as one contiguous word. Click OK to close the dialog, and if you have made changes, PrimerPrep reminds you that all of the data will be reprocessed. The space character is always considered word-breaking, but does not show up in the list.
- Click the Digraphs button (5) to show the Digraphs dialog. Edit the text in this dialog with the digraphs in your language (two or more characters that are treated as a single letter in the orthography), putting spaces between them to separate them:
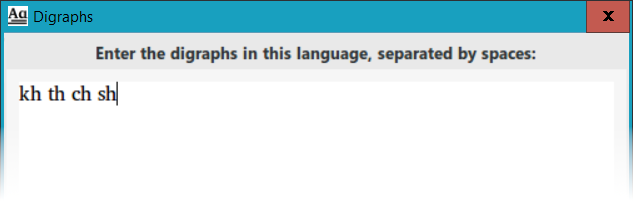
In this example, the digraphs were added to the digraphs list automatically because the Auto-Search for Digraphs option was selected in the Configure menu (as seen below). But “th” and “sh” are not actually digraphs in this language, so we will edit the list and remove them, leaving just the text “kh ch” in the dialog text box. Click OK to close the dialog, and since there have been changes, PrimerPrep reminds you that all of the data will be reprocessed.
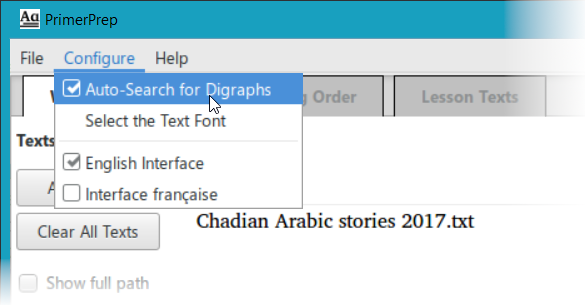
Once you have edited the digraph list in your language, you probably want to disable the Auto-Search for Digraphs option in the Configure menu, so that the addition of other texts does not modify your list. - Click the check box labelled Treat Combining Diacritics Separately (5) if you want combining diacritics to be considered as separate characters in the analaysis. The default is to include a combining diacritic with its preceding base character, e.g. “a” followed by U+0301 Combining Acute Accent ◌́ appears as a single character “á” so PrimerPrep treats it as a single character. But if you are using combining diacritics as tone in the language, you may want to treat those characters separately. Checking this box will do just that, so that combining diacritic characters will appear as separate characters in the teaching order.
Editing Affixes
You can also define affixes, which PrimerPrep will break off from the words in the word list. Define those affixes by clicking on the Edit Affixes button (6). Edit the text in this dialog with the affixes in your language, putting spaces between them to separate them:
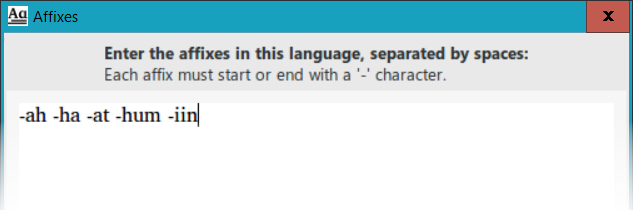
Make sure that each affix starts with a hyphen “-” (for suffixes) or ends with a hyphen (for prefixes). PrimerPrep is very strict on this requirement, and will not let you click OK if you haven’t correctly defined the affixes. If you cannot find the error that prevents you from closing the dialog box, click Cancel and try again. Once you have defined your affixes, PrimerPrep will update the word list and mark the affixes as gray text. (See the screen shot below.)
PrimerPrep just blindly marks the affixes it is given on each word in the list. But sometimes a word looks like it has an affix (starts or ends with the right sequence of letters), but those letters are actually part of the root. In this case, you can edit the affixes of a particular word manually, by double-clicking on the word in the word list. You can use the Filter box just above the word list (8) to quickly find words with a common string, like the affix “-iin”. (Note that this filter would find any word that contained the string “iin”, not just suffixes.)
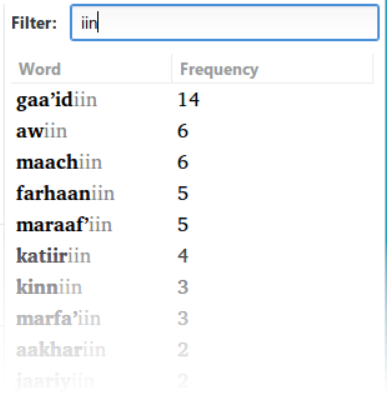
For some of the words in this list the “iin” is actually part of the root, and not a suffix at all. For example, the word “awiin” is a root in the language, i.e. has no affixes. To fix this overgeneralization, double-click on the word “awiin” in the word list:
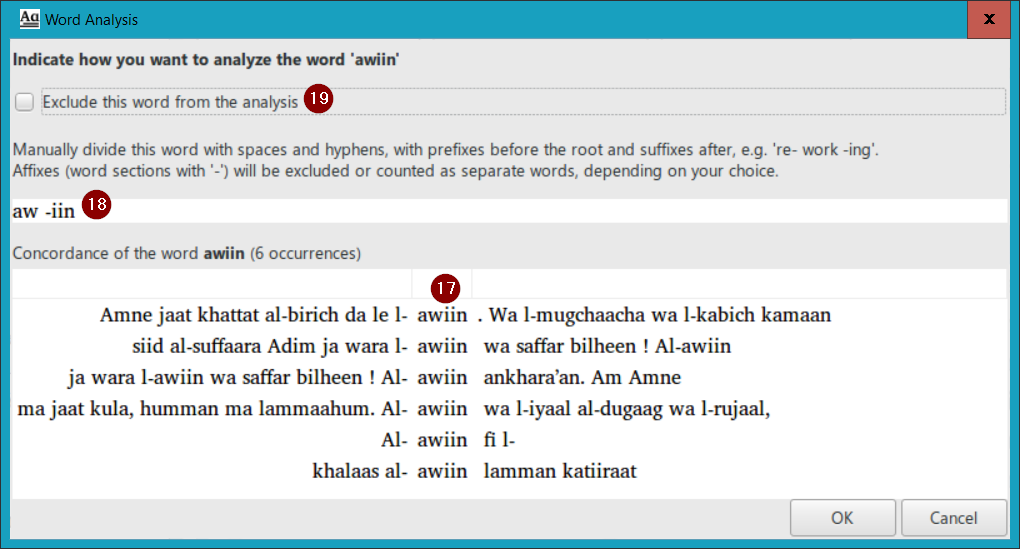
PrimerPrep displays a concordance of the word in context (17). It also shows you the current division of the word (18); you can edit the affix divisions manually in this text box. In this case, we would remove the space and the hyphen to make the text “awiin” with no affix breaks, to indicate that this word conatins only a single root. If this is a word that you want to exclude from the teaching order analysis, simply check the box labelled Exclude this word from the analysis (19). For example, you may want to exclude functors in the language (function words, often grammatical words with little lexical meaning) from the teaching order calculation. Note, however, that excluding words from the calculation does not exclude them from the example words lists (in the teaching order). They are still valid words that you may want to use in your lesson texts, so it is helpful to be reminded of their availability when all of a word’s letters have been introduced.
Note that there is one additional option for affixes. PrimerPrep has the ability to either exclude the affixes from the teaching order calculation or count them as separate words. This is controlled by the two toggle buttons (7). If they are counted as separate words, the affixes themselves will also appear in the example words lists.
Counting Words
The final method for affecting the teaching order calculation is the definition of how to count the words that you have discovered. The two toggle buttons (9) allow you to choose whether a word is counted each time it occurs (i.e. as tokens) or only once (i.e. as types). This choice will have a signifcant impact on the calculation of the teaching order, as you are determining how much weight common words will have: Do you want to count their constituent letters as many times as the word appears, or only once?
Note that if affixes are excluded, they will not show up in the example words in the teaching order. The words will appear in those lists with the affixes chopped off. In the case of aw -iin above, if we did not remove the affix, it would just appear as aw in the example word list. So if you see “strange” words in the example word lists, they are likely words with affixes chopped off, and may indicate the need to further edit the affix breaks of individual words in the word list.
Teaching Order
Once you have used the Word Discovery tab to define which words to use in the analysis, click on the Teaching Order tab (3) to calculate and present the proposed teaching order. Note that now the teaching order includes some affixes, as we separated out affixes during the Word Discovery:
Modifying the Teaching Order
Although the teaching order given is the “optimal” teaching order, according to the elimination algorithm1, you will likely want to make some adjustments. For example, literacy specialists say that you shouldn’t introduce two similar letters right next to each other; so introducing “b” and “d”, or “n” and “u” in adjacent lessons might be confusing to the learner. If PrimerPrep has put them next to each other, you might want to separate them in the teaching order list.
Another reason for adjusting the teaching order might be to make certain “picturable” words available in earlier lessons so that they can be used for your lesson texts. Consider the example words for the letter “u” above (14). There are several words in that list of example words that would be easy to express as images in a primer: mulaah sauce, dalu well bucket, and duud lion. Taking a closer look at the constituent letters of those words, all of them could be introduced if the lesson for “u” were introduced instead right after the letter “d”.
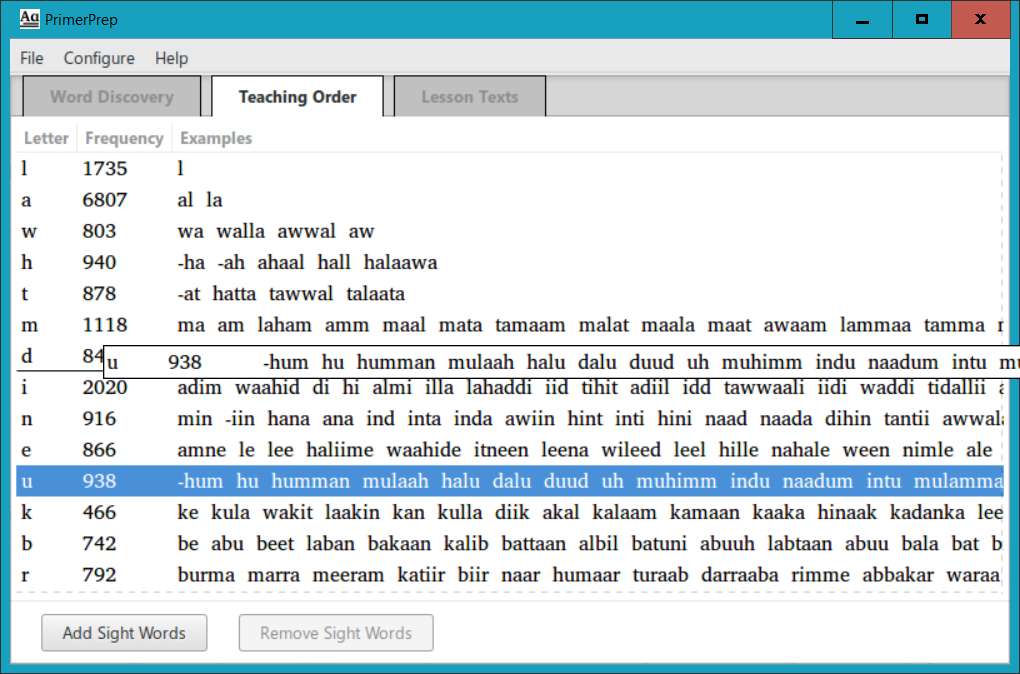
Whatever your reason for wanting to change the teaching order, PrimerPrep makes it easy, using a process that is known in the computer world as drag-and-drop. Put your mouse cursor over the line with the lesson you want to move, click the left mouse button and keep the button pressed, drag the mouse where you want to put that lesson (there is a line which helps you to see where that lesson will be “dropped”), then release the mouse button to “drop” the lesson in the new location. This is what the screen looks like when you have clicked and dragged the lesson for “u” to be right after the lesson for “d”, just before you release the mouse button to move the lesson:
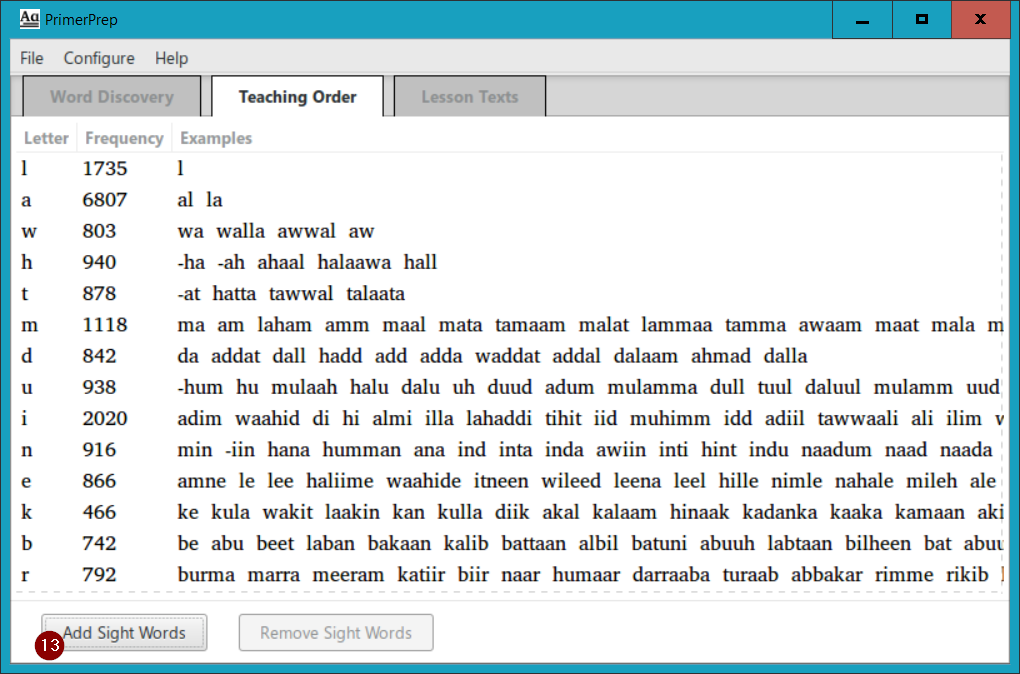
As soon as you release the mouse button, that letter will be moved to the new location in the teaching order, and the list of example words is immediately updated to reflect the new teaching order! If we look at the list of example words for “u” in the updated teaching order (below), the words mulaah, dalu and duud are all there, as we expected. But why is the word humman no longer in the example word list for “u”, as it is above? Because the letter “n”, one of its constituent letters, has not yet been introduced.
So when you drag-and-drop lessons in the teaching order, you are not just dropping that same list of example words into that new location; all of the example words will be recalculated for the new teaching order. You can easily move lessons around to see what different words will be available with different sequences of letters. That might be a helpful way to investigate different possibilities for the order in which you introduce the letters in your primer.
Suggesting Phrases and Considering the Next Letter to Teach
Another way to investigate the teaching order is to double-click on a lesson to show the phrases that are available at a given level in the teaching order and their contexts. For example, double-clicking on the letter “i” opens a dialog which shows all of the text fragments from your loaded texts that can be produced only with the letters down to this point in the teaching order (i.e. that are formed of letters that should be known by the student). The text fragments that are available are shown in the middle column. The left/right columns provide the before/after text context for each text fragment:
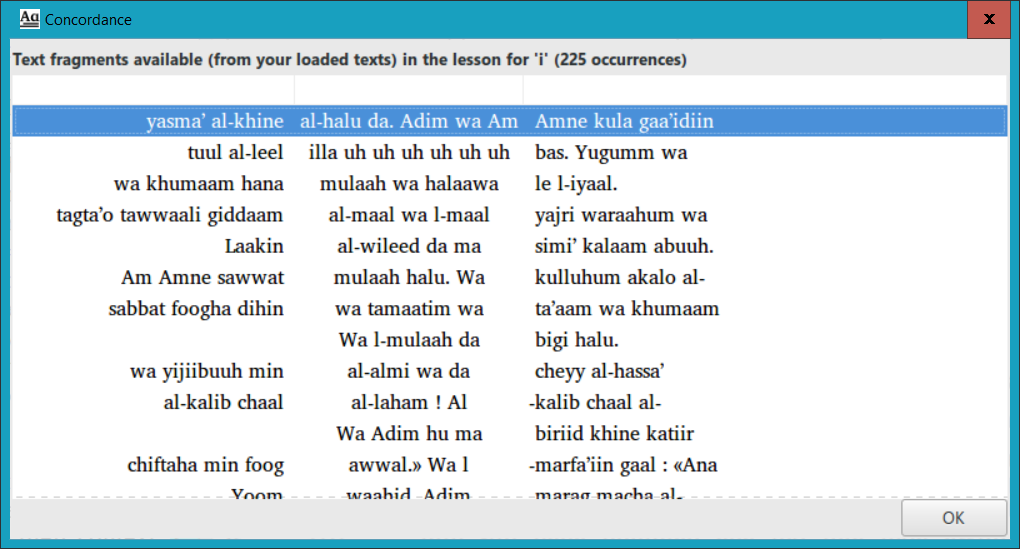
These fragments might inspire some ideas of phrases that could be useful in your primer. In addition, the context of these fragments (the words before and after) might give you some insights into what letters would be productive to place next in the teaching order. For example, the words before the second and third text fragments above are al-leel and hana. Comparing these words with the list of letters that have already been taught, you can see that the first word would be available as part of a fragment if the letter “e” was added, and the second would be available if the letter “h” was added. So if you decided that one of these words was especially productive and useful in your lesson texts, you may want to consider moving one of those letters higher up in the teaching order.
Adding and Removing Sight Word Lessons
No matter what order you introduce the letters, it will be difficult to form interesting texts with just the letters introduced in the first few lessons. For this reason, many literacy specialists use “sight words”3 in their early primer lessons. These are words that students are taught to memorize as a whole, by sight, so that they can recognize them and read them without having to use decoding skills.
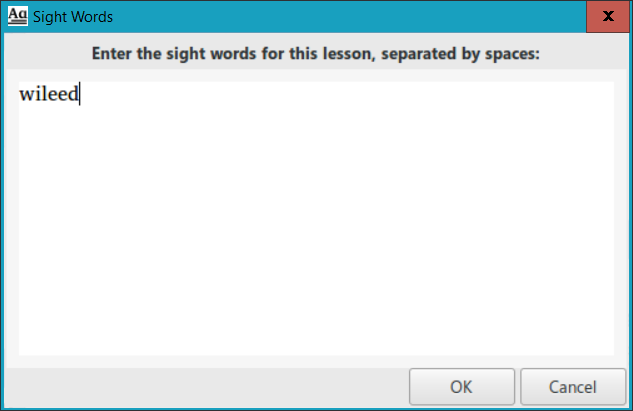
To add a sight word lesson in PrimerPrep, select the location in the teaching order where you want to insert the sight words (in this example we select the lesson for the letter “t”), then click on the Add Sight Words button (13). In the dialog box that appears, enter the sight word(s) that you want to introduce at that point in the primer, then click OK:
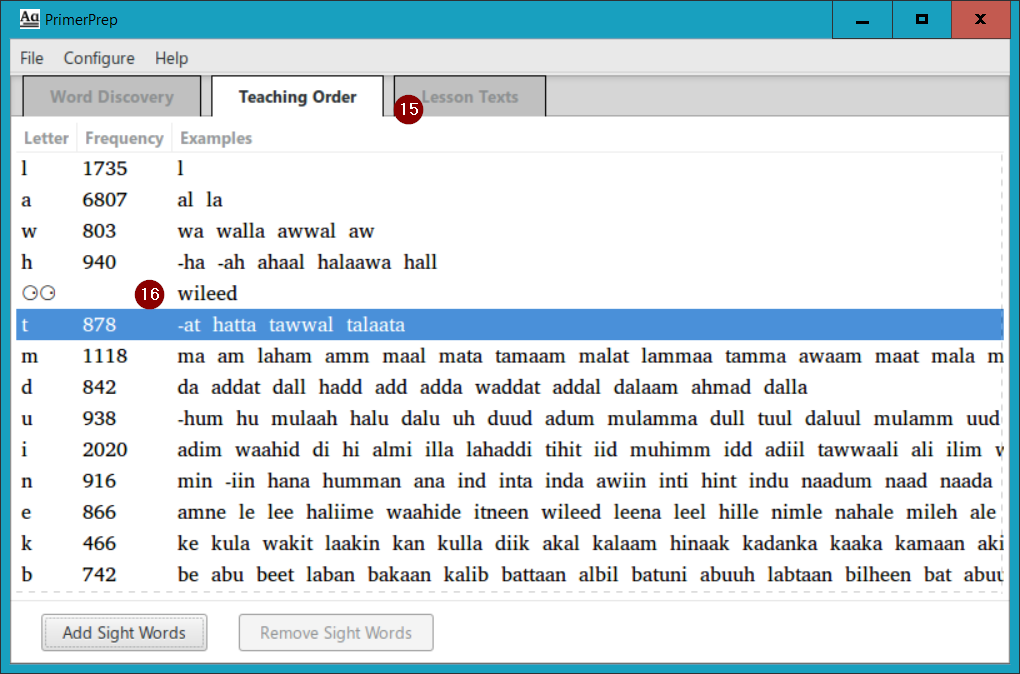
Sight words are added in PrimerPrep as separate lesson lines in the teaching order (marked with two eyes ![]() , to represent sight), but they could obviously be introduced to the student in a lesson of an adjacent letter. (For that matter, even though two letters are on separate lines, they could be introduced in the same primer lesson, depending on your teaching methodology.) So in the example below, we may actually want to introduce wileed boy (16) as a sight word in the lesson that introduces the letter “t”, the lesson immediately following the sight word lesson:
, to represent sight), but they could obviously be introduced to the student in a lesson of an adjacent letter. (For that matter, even though two letters are on separate lines, they could be introduced in the same primer lesson, depending on your teaching methodology.) So in the example below, we may actually want to introduce wileed boy (16) as a sight word in the lesson that introduces the letter “t”, the lesson immediately following the sight word lesson:
The sight word lessons, once created, are handled much like the lessons for letters in the teaching order. You can adjust their positions in the list by using the same drag-and-drop operation. But unlike the letter lessons, if you select a sight word lesson, the Remove Sight Words button at the bottom becomes active, and if you click that button, the sight word lesson will be deleted. There is no undo option, but it is easy enough to add the sight word lesson again.
Lesson Texts
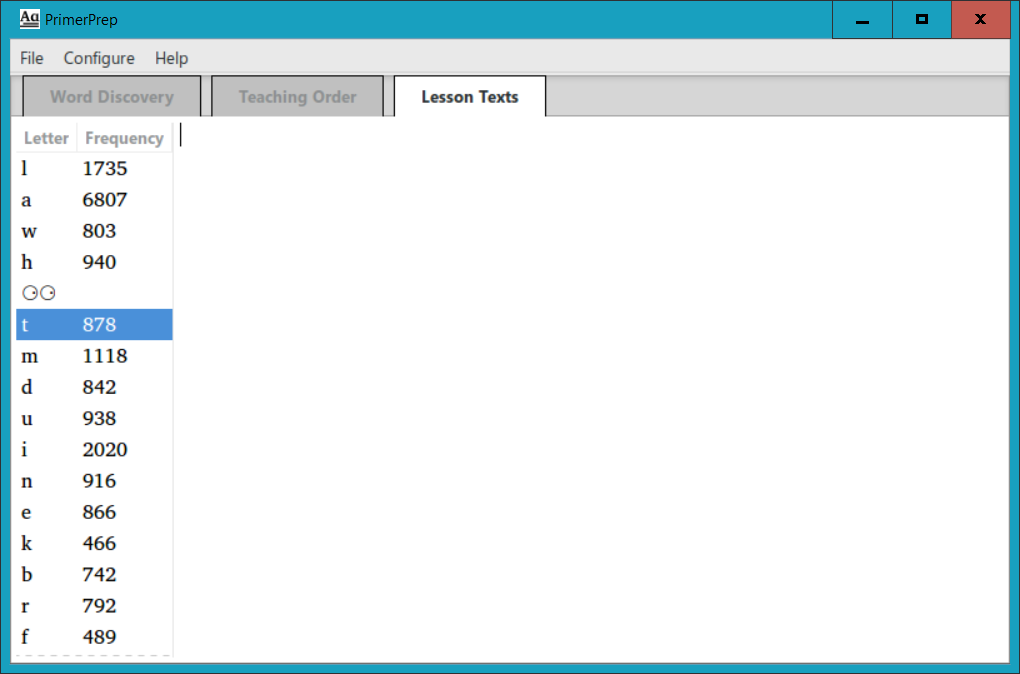
The last major feature of PrimerPrep is the ability to enter and check your lesson texts at each stage in the teaching order. Click on the Lesson Texts tab (15) to see the (currently empty) text for the currently selected lesson. In this case the lesson for the letter “t” was still selected:
Click in the empty text field and type or paste the letters, words and texts that you propose to put in this lesson. For example, you might have syllable practice, word-forming drills, and example texts, something like the following:
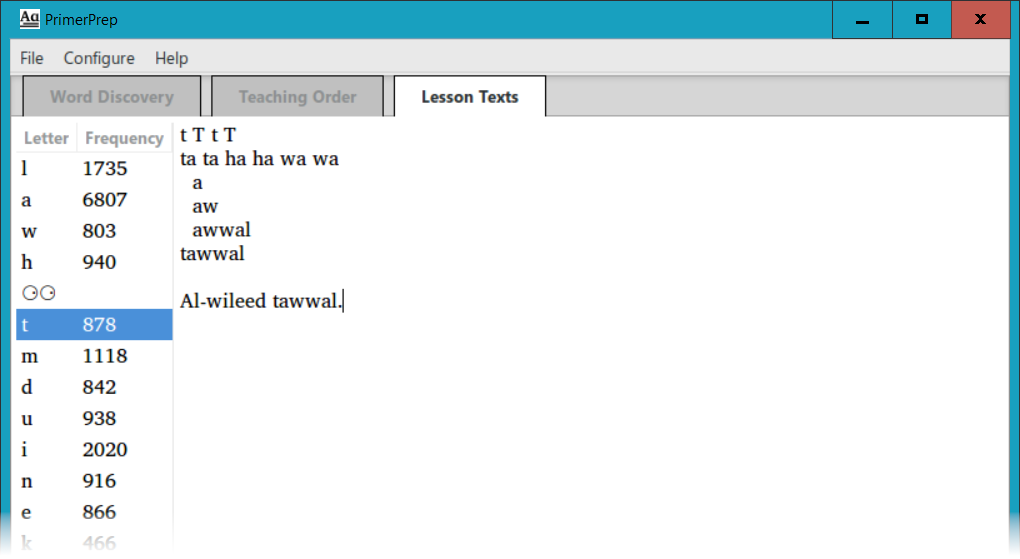
You can see that these exercises all consist of letters that have already been taught, namely l, a, w, h and t. Note, however, that the word wileed has letters that have not yet been taught (i and e) but this is the sight word that we introduced just before (or as part of) this lesson, so it is acceptable content in this lesson.
What happens when you add content that has not yet been taught? It is marked in red as untaught residue, as seen in this example with an extended example text.
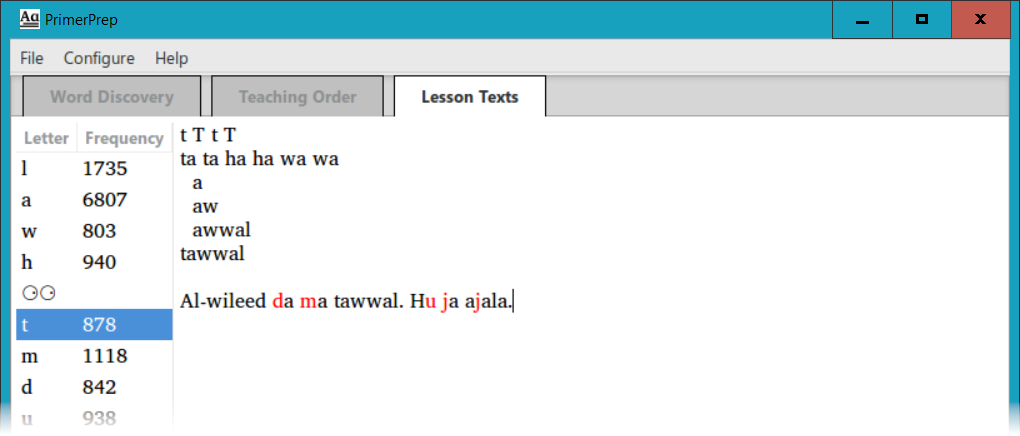
PrimerPrep evaluates all of the letters and sight words in your proposed lesson, to make sure that you are aware of any untaught residue, i.e. letters which the student is not yet expected to know.
Returning to Word Discovery
You may return to the Word Discovery tab at any time by clicking on that tab at the top of the window. But please note that if you make any changes, any specialized teaching order that you have created, and all sight word lessons will be lost. There is a warning to this effect when you click on the Word Discovery tab, to remind you that you could lose some of your work. PrimerPrep attempts to keep your lesson texts for each letter, but if the teaching order changes, you will likely have untaught residue in some of your texts. If you return to the Teaching Order or Lesson Texts tab without making any changes on the Word Discovery tab, you will not lose any of your work.
Also note that there is a Clear All Texts button on the Word Discovery tab. This allows you to start from scratch on your primer analysis.
Menus
Some additional options are available in the program menus.
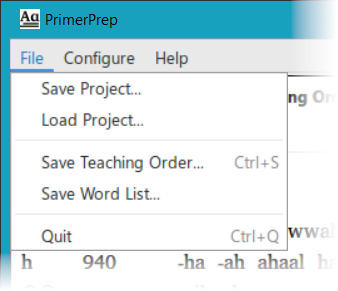
The File menu has options for saving and loading a project, with all of its data, teaching order, sight word lessons and lesson texts. This allows returning to a given point in your primer analysis, without going through the work of reloading texts, defining words and affixes, modifying the teaching order, and entering lesson texts again.
There are options in this menu for saving the teaching order or saving the word list. In both cases, they are saved as plain text files with columns separated by tabs. These can be opened with a text editor like NotePad, or with a spreadsheet program like LibreOffice Calc or Microsoft Excel.
And there is a menu item for quitting the program, with a shortcut Ctrl+Q, or simply closing the program window.
The Configure menu has an option for automatically detecting digraphs (as explained in Configuring the Language above).
There is also an option for selecting the text font. PrimerPrep uses the ‘Charis SIL Compact’ font by default for all of the vernacular language text. This is a very good general-purpose font for Roman script languages, and may very well cover all of your needs. This font should be installed with the PrimerPrep program. If your characters are not appearing correctly it probably means either the ‘Charis SIL Compact’ font is no longer installed (go to http://scripts.sil.org for instructions on downloading and installing this font), or you may have a non-Roman script orthography for your language. In this case use this menu option to select an appropriate font for displaying the language. The PrimerPrep program should be able to handle right-to-left scripts such as Arabic or Hebrew.
This menu also has an option to change the user interface between English and French.
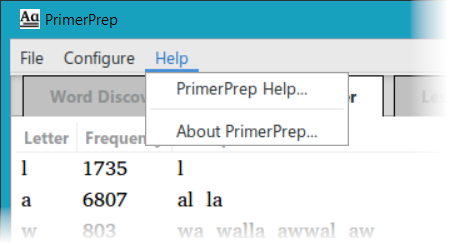
And finally, there is a Help menu which can open this help page, or provide some information about the PrimerPrep program.
Contact Information
If you have questions or comments about this program, you may contact me at <see in-program help>.
1Found in PRIMER: A tool for developing early reading meterials
2PrimerPrep uses the Unicode Character Database to determine whether a letter should be considered word-breaking or word-forming. You can look up a letter by code or by name in the UnicodeData list, the format of which is described in the Unicode File Format. The third “column” (after the code value and the character name) gives the General Category of the character. If the category starts with “L” (letter) or “M” (combining mark), the letter will be considered as word-forming by PrimerPrep.