How to: Create a Strong’s Index
Have you ever wondered about how the community might be able to use all the valuable information currently locked up in your Biblical Terms list? Here is a quick video overview of what is possible and how to create an Index of your Biblical Terms based on Strong’s numbers which could be appended to the end of your publication.
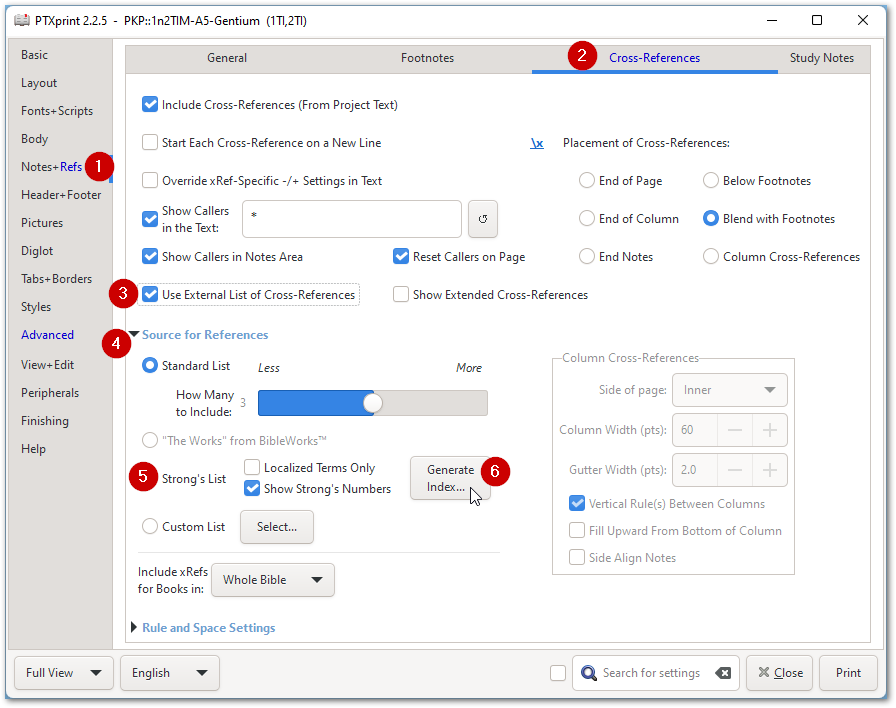
Ensure that you are using the Full View (setting is at bottom left of dialog) and then follow these steps to locate the settings for creating a Strong’s Index which seem to be well hidden deep within PTXprint.
① Select the Notes+Refs page
② select the Cross-References tab (at the top of the page).
③ Enable the option to Use External List of Cross-References
④ Expand the twisty Source for References
⑤ Select the option Strong’s List
⑥ Click the button Generate Index… which will bring up the dialog to control the settings
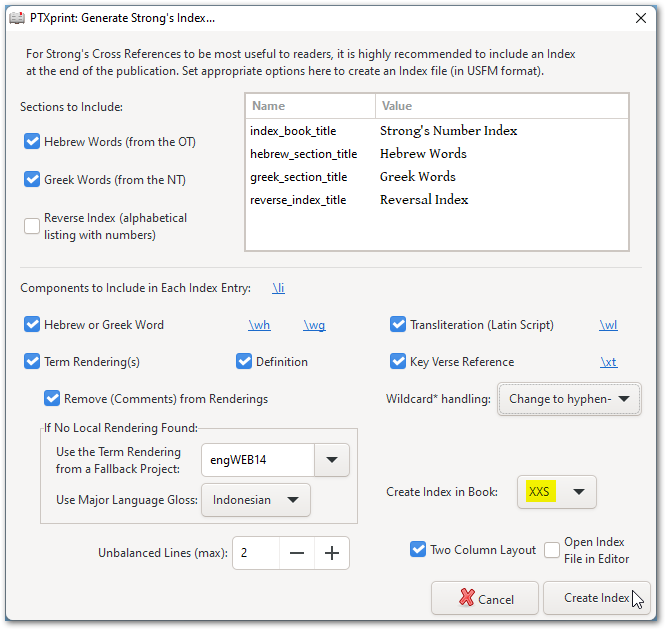
In the dialog that appears, there are many settings which control what information should appear in the index. The top portion allows you to select whether you have 1,2 or 3 sections in the resulting Index. You can select Hebrew and/or Greek (i.e. whether to display OT and/or NT) words; and also create a Reverse Index (an alphabetized listing of Biblical Terms in the target language with a link to the Strong’s numbers).
The bottom portion of the same dialog focusses on which components each entry should have. It is recommended to first include everything, and then later remove components that you definitely do not need.
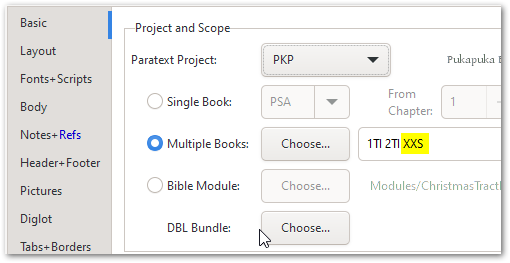
There are also some options to control layout, and assign the index to a book code (XXA…XXG, or highly recommended, XXS, where S stands for Strong’s).
When you click on the Create Index button, the dialog disappears and appears to have done vey little. However, you should notice a status message on the main dialog to confirm that a new book XXS containing the Strongs Index has been generated.
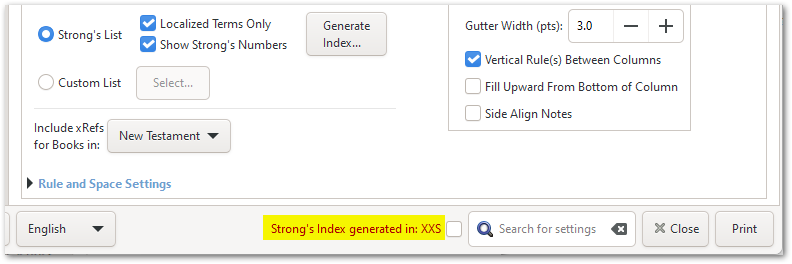
And if you select the Basic tab, you will see that this new book XXS has automatically been added to the list of books to be printed.
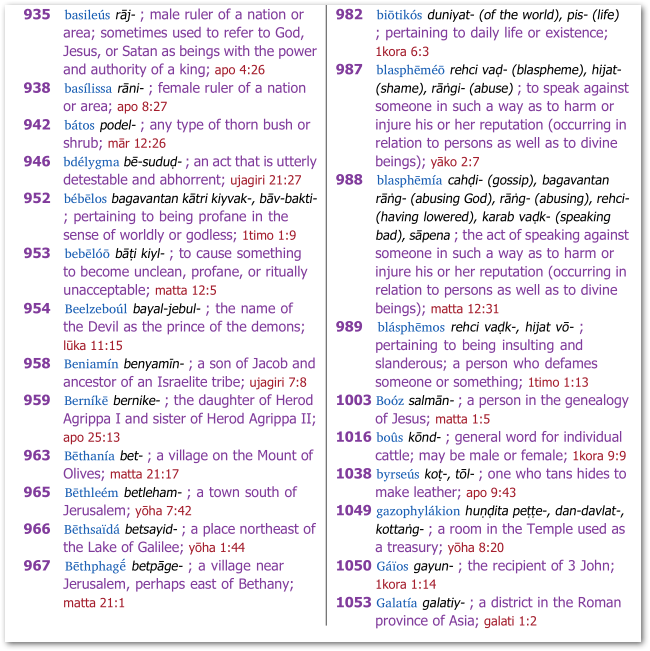
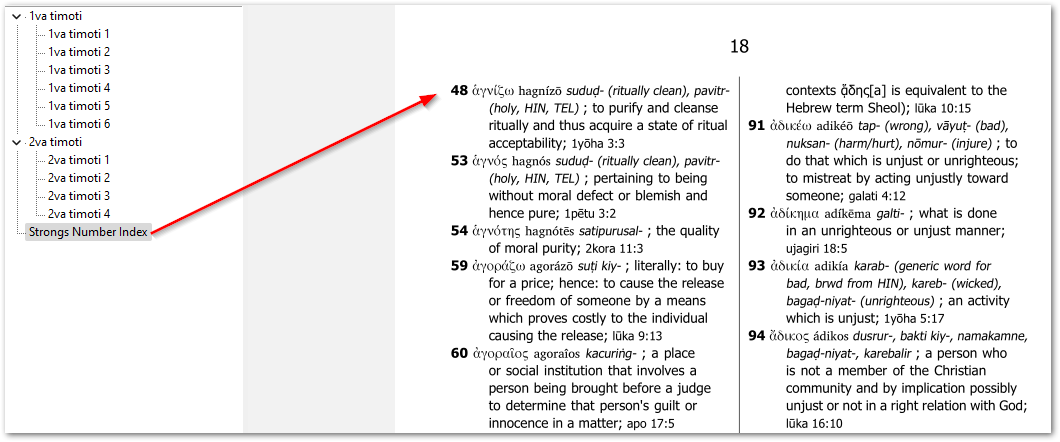
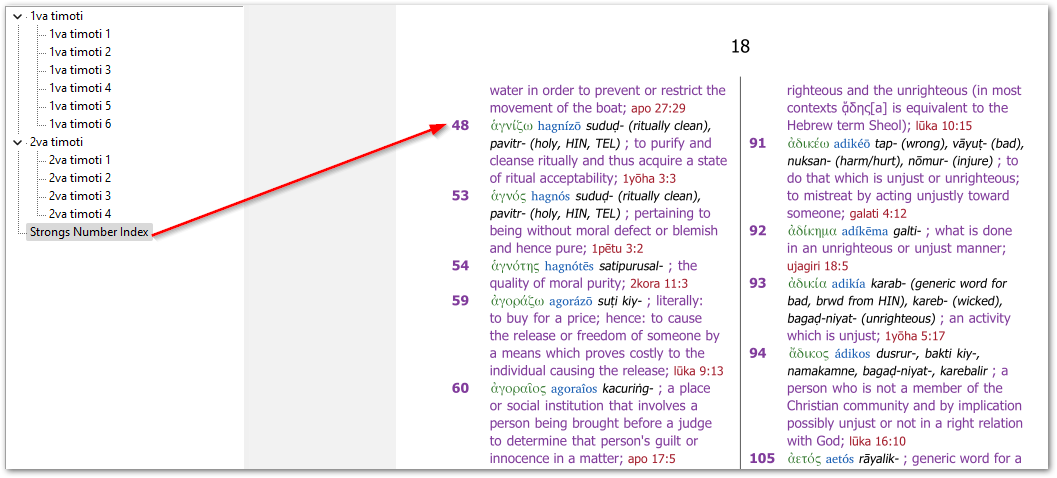
Click the Print button (as usual) to create a PDF of the specified books, and you should discover a new book at the end of your publication containing the Strongs Index generated from your project’s Biblical Terms list (along with other helpful information such as the definition):
In order to change the size or color of any of the elements of each entry, visit the Styles page, and locate the Strong’s section of markers near the end of the list on the left. There
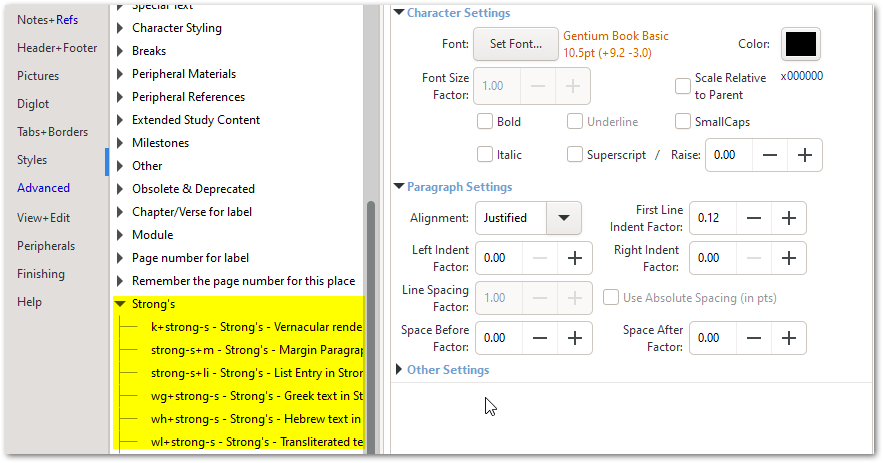
Note that there are shortcuts to the above styles available directly from the Generate Index dialog. Clicking on any of these links (highligted below) will take you to the appropriate style (as seen above) in the Style editor. Note that editing these context-specific styles will only affect the markers’ behavior within the Strong’s index, and not elsewhere within the publication.

Optional: There is an advanced hack to get the indentation after each bold number to align regardless of how many digits the number has. Copy this 2-line TeX snippet into your ptxprint-mods.tex file (accessible through the Advanced page):
\sethook{start}{bd}{\setbox0=\hbox{9999}\hbox to \wd0\bgroup}
\sethook{end}{bd}{\hfil\egroup}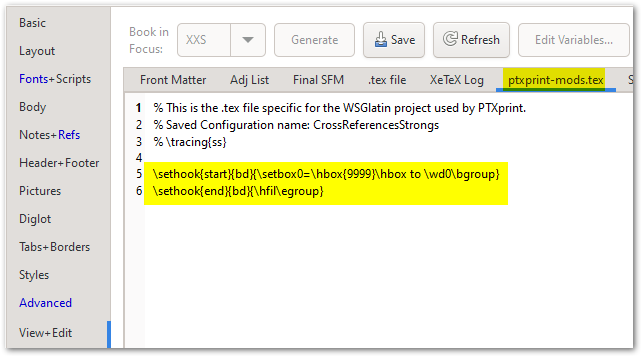
Having changed the sizes and colors as needed, when you hit Print again, you should see the updated Strong’s index reflecting your changes. When publishing digitally, adding color doesn’t cost you anything, but makes the different components stand out visually, and hopefully makes the entire index more appealing and useful to the reader.
If you want to restrict the number of terms shown in the Strong’s index to only include those that have Biblical Term renderings within your project, then select the option Localized Terms Only (as shown below), and then (re-)Generate the Index (as explained above).
