How To: Study Bible Layout
Although it is easy to get started with Study Bible layout by just clicking a few options, it gets rather complicated if you want to refine the layout to meet your requirements. Here are some basic instructions on how to get the results you need for a study Bible layout.
Note that PTXprint only accepts a merged Study Bible project where the text and additional content (\ef, \ex, \esb, \iex, etc.) have been merged into a single project ready for typesetting. This can be created in Paratext by merging the the Study Bible Additions project with the Base Text project into a new Study Bible Publication project. For further instructions, search Paratext’s help for “merge” and then select the topic: “How do I merge Study Bible Additions to a Study Bible Publication project?”
- All the usual settings (such as page size, number of columns, font size, etc.) still apply, but there are a few additional features which need to be enabled:
- Extended footnotes – see the Study Notes tab on the Notes+Refs settings page:
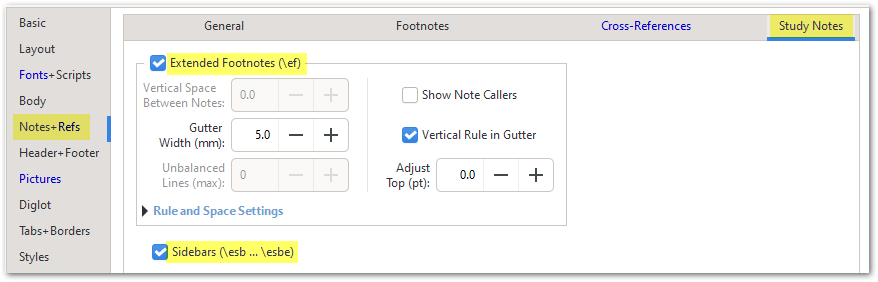
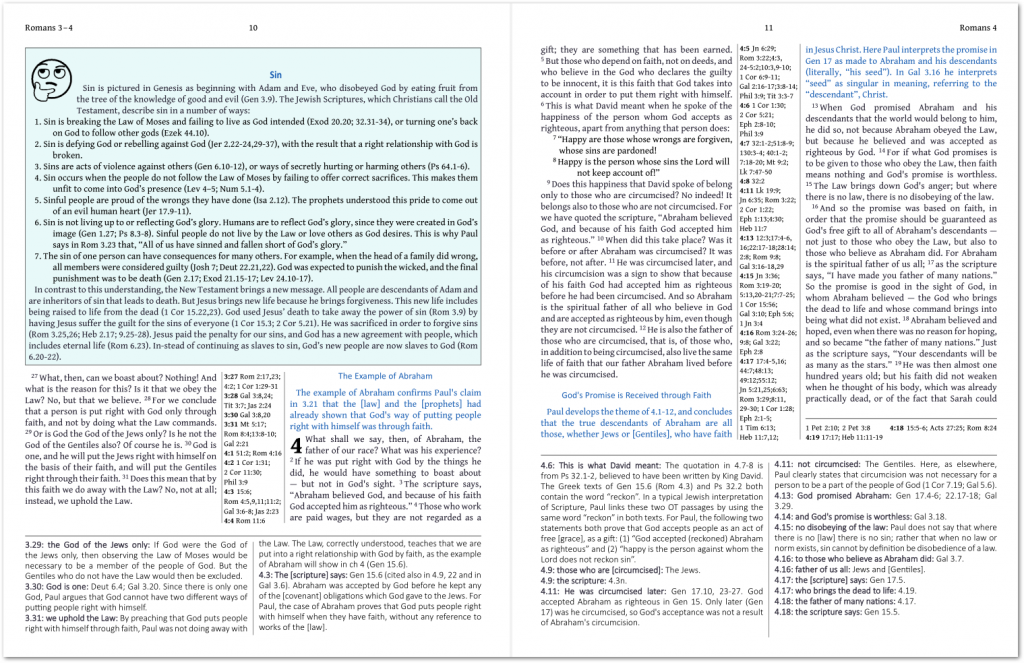
- Sidebars – as shown above
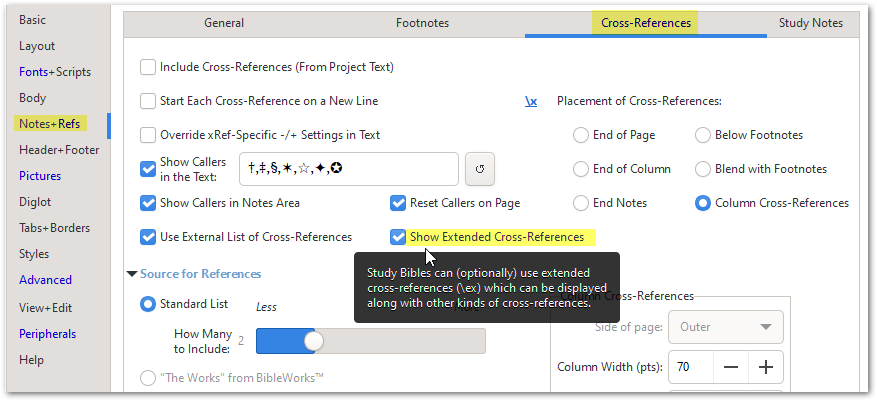
- Extended cross-references – these get merged in with normal cross-references and can be displayed in one of several locations. See the Cross-references tab on the Notes+Refs settings page.
- Once you have enabled the options for one or more of the above-mentioned settings, you should immediately see the new content in the PDF output when you hit Print. However, to get the exact look that you require, you will need to do some serious work in the Styles editor. You will need to create some new styles and then make the appropriate settings there.
- For example, you may wish to change the the font of the \ef style so that the notes appears in a different font to the main scripture text.
- You might want to create a couple of new styles so that the \fr reference and the \fq text appear in bold as shown here:

But as these are extended footnotes (not just ordinary footnotes), we have to Add a new character style (\fr+ef … \fr+ef*) with these parameters. Click on the Add button at the top right of the Styles editor and fill in the details as shown.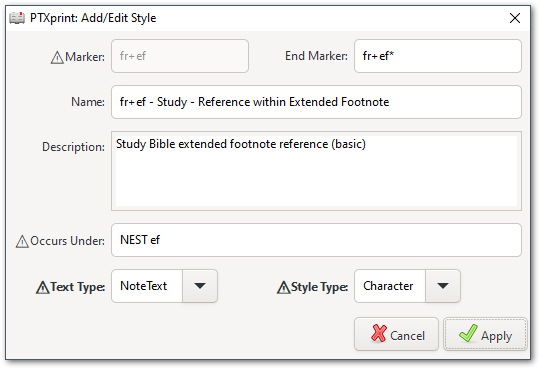
Once the style has been added, you can change the font, and other properties (bold, etc.)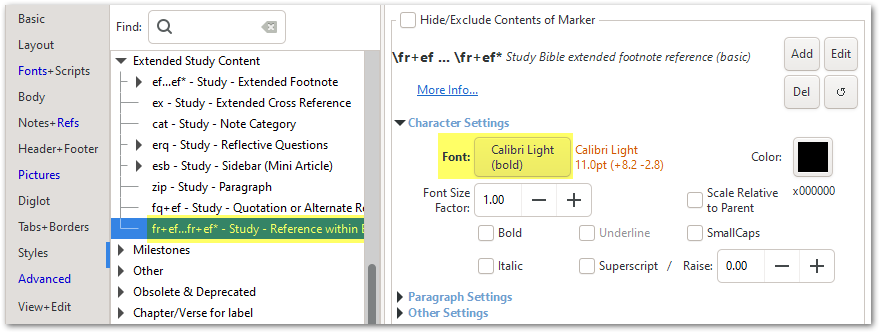
- Similarly you might want to add another marker for the fq+ef character style (this means sets the styling for \fq markers within \ef footnotes).
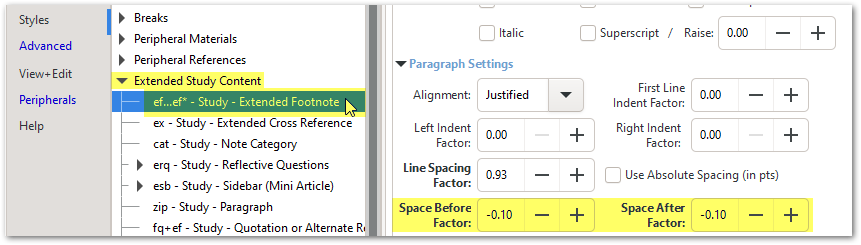
- Note that if there is an unwanted vertical gap between \ef notes, you can close it up by modifying the Space Before/After of that main style:
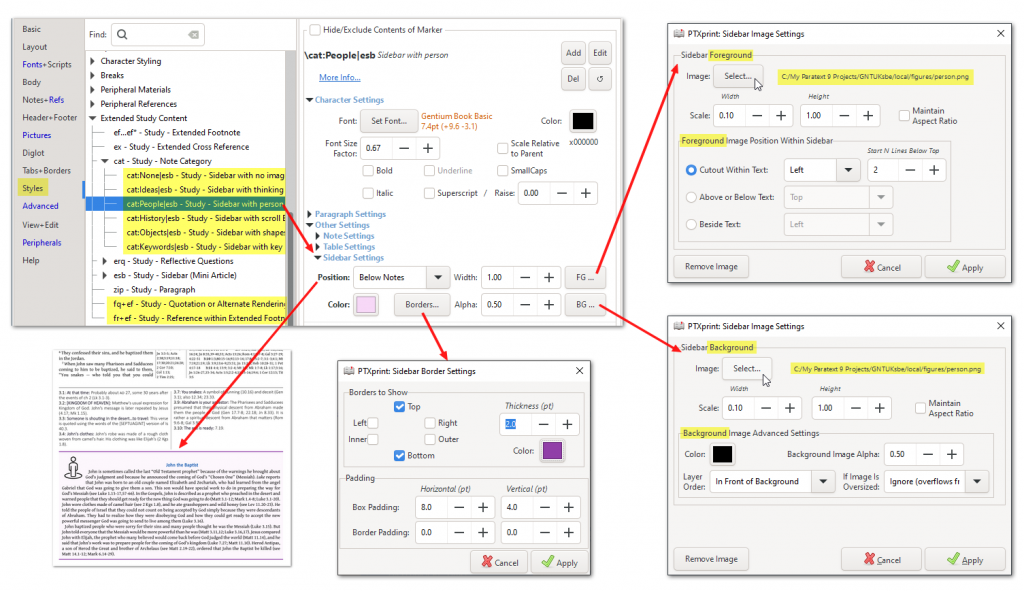
- If your project uses sidebars (with \esb … \esbe markers) you will need to add one or more styles to format the sidebars. Adding a style for each of the \esb sidebar categories as shown below. The marker needs to start with cat: and end with |esb with the category name (e.g. People) in the middle. Notice that the name needs to contain two hyphens, and that these markers need to set Text type to Other, and Style Type to Paragraph.
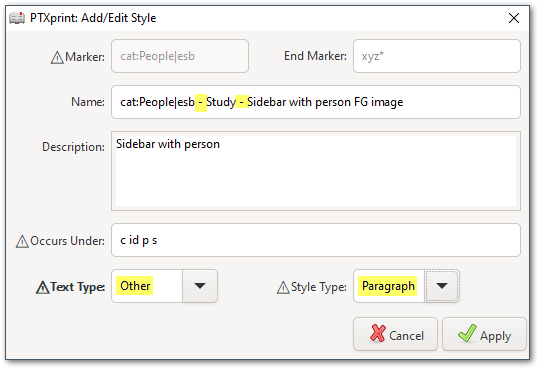
Click Apply, and repeat the process – to Add as many of these as you have Categories. - Then select each one in turn to set the appropriate colors, borders, images and so on:
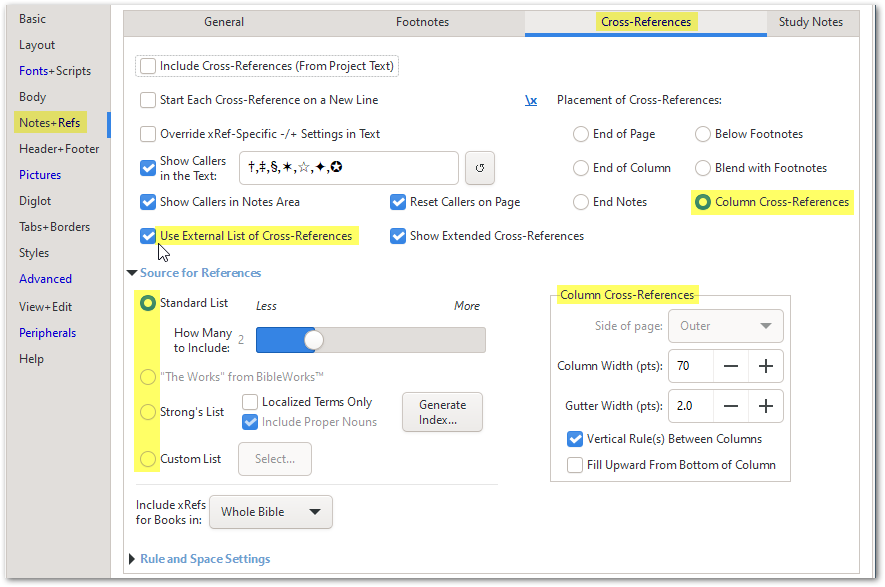
- Optional: In order to add a column of cross-references, select the following settings on the Cross-References tab of the Notes+Refs page, and choose an appropriate list.
Although this process is rather tedious and detail-oriented, it is a one-off setup task. Our hope is that future versions of PTXprint will automate several of these steps for you to make it even easier to get started.
Documentation regarding markers used for Extended Study Content is available here.
Known limitations:
- Extended footnotes (using the \ef marker) cannot stretch across 2 pages. If your project uses unreasonably long extended footnotes, you might want to consider turning them into \esb … \esbe sidebars, which can use as much space as they need, up to a full page.
- The panel of the extended footnotes at the end of the page may not always be balanced
- Filtering based on categories is not yet enabled.
- An archive of a Study Bible project doesn’t yet contain the images used in sidebar formatting.