Interface Overview
You can think of the launched Labeler window as an enhanced version of the familiar Biblical Terms tool. It is divided into three resizable panes, like this:
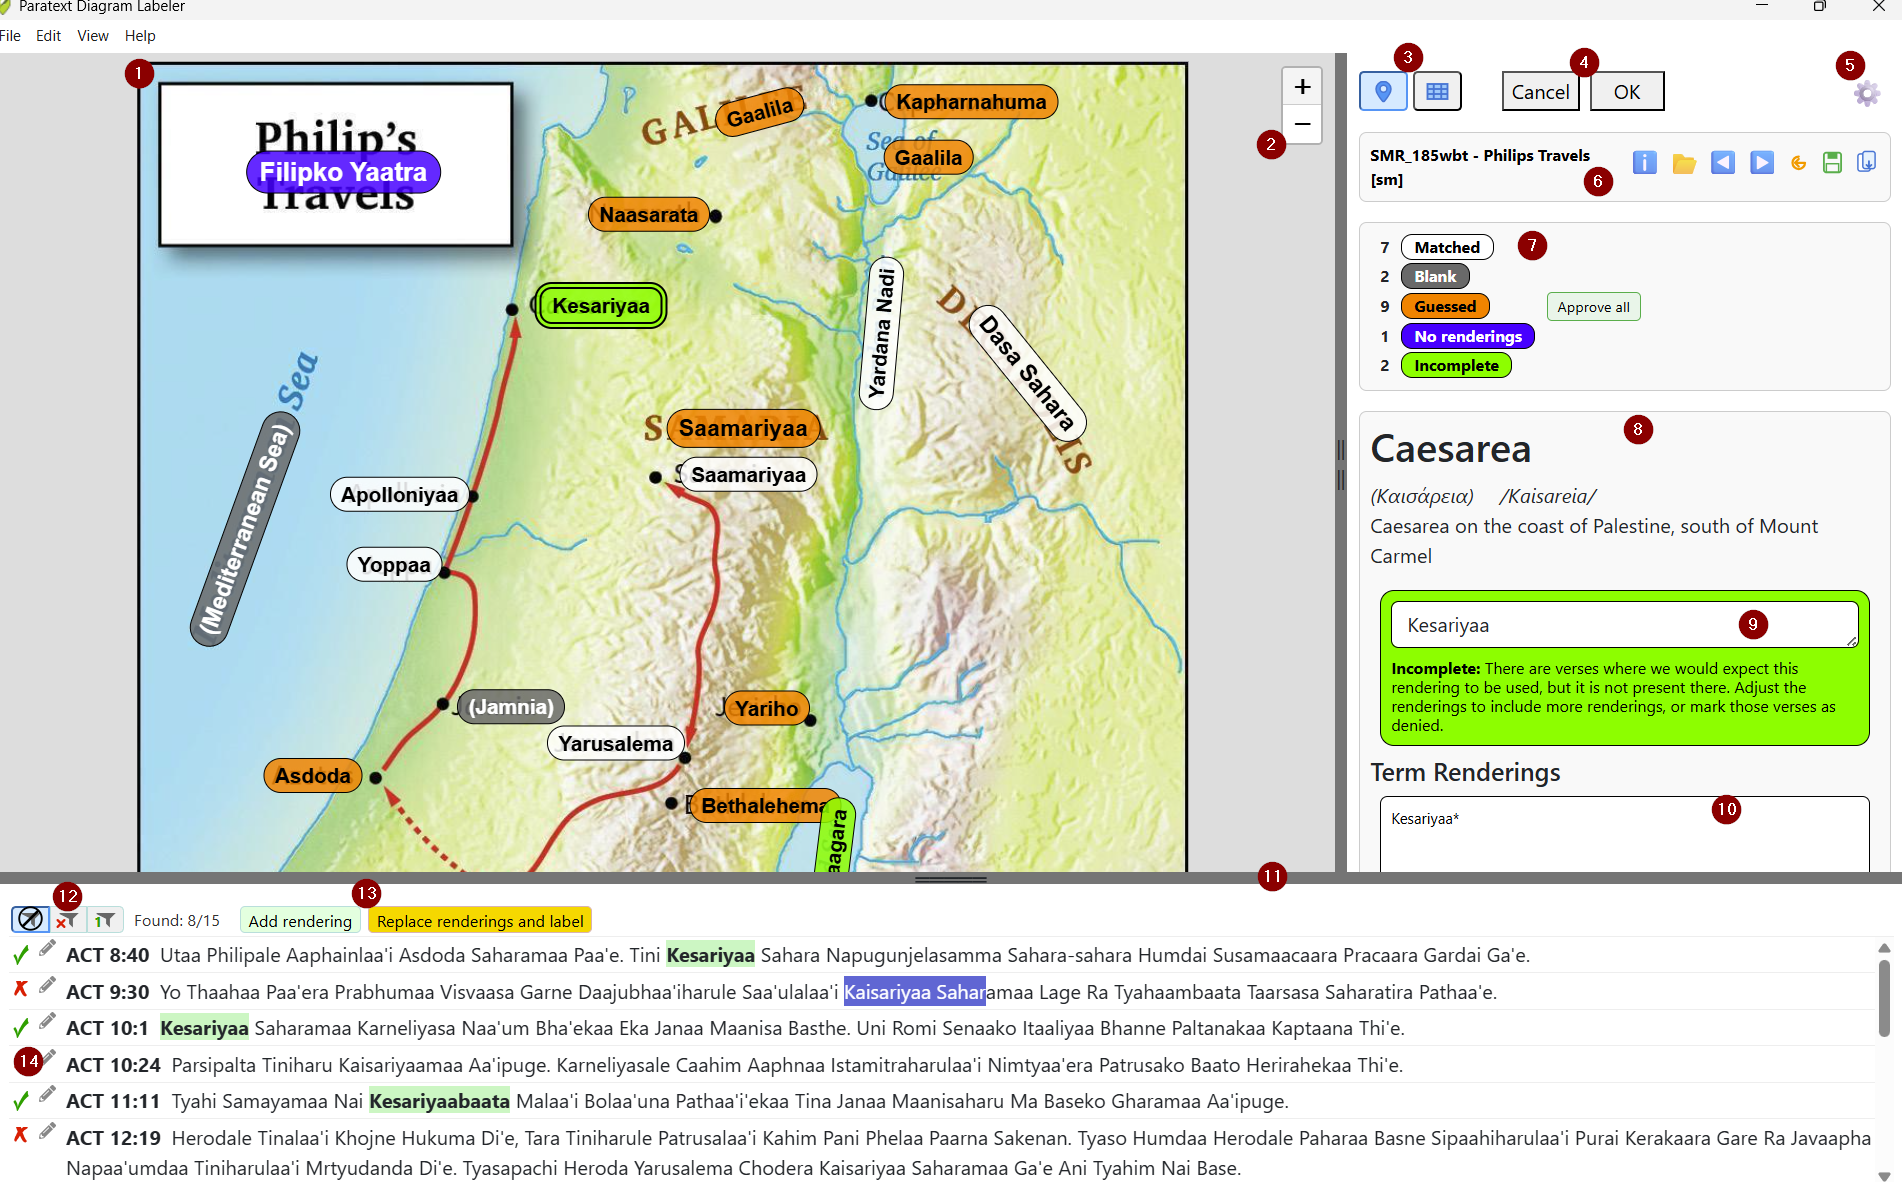
The main pane 1 is typically used in “map view” to show the labels overlaid on an image. Each of the labels is color-coded to indicate the kind of attention that the label may need. Please see the Label Status topic below for details. The zoom buttons 2 enable zooming in and out on the diagram.
In the details pane on the right, the view buttons 3 enable you to select between “map view” and “table view” to be shown in the main pane.
The OK and Cancel buttons 4 will return you to the pre-launch screen, with or without updating the USFM representation there.
The Settings cog 5 provides access to various app settings:
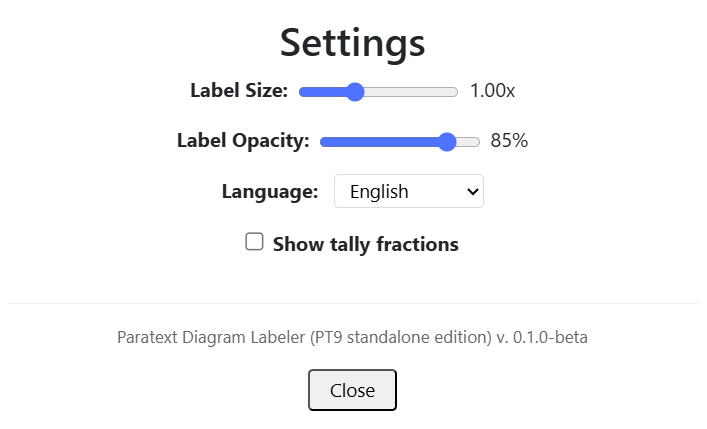 | Label Size: Scale the labels to balance readability with space efficiency on your screen. Label Opacity: Reduce opacity to see the underlying sample of style that will be applied in Map Creator / InDesign. Language: Select a language for the user interface. (Note that the strings in other languages are currently just A.I.-translated, not yet human-checked.) Show tally fractions: Check this box to display the fraction of found renderings directly on the labels. Template File Paths: Add the paths to whatever folders contain the IDML or MAPX files you want to be able to use for exporting pre-filled documents. |
The template group 6 displays the name of the current diagram template, and provides buttons for the following template actions:
- Template Info: Display information about the current diagram, including a link to usage and attribution rules.
- Browse for Template: Open the Template Brower to find a different diagram to work on.
- Forward / Back: If you’ve selected to work with a filtered group of diagrams, these button cycle between them.
- Reset and Save: If you’ve made unsaved changes to the current map, these buttons allow you to either undo them or save them to an .idml.txt data merge file.
- Export: Use this to export your current labels directly into a pre-filled IDML or MAPX map file, or export them to a Map Creator data merge file. Data merge files, including the .IDML.TXT merge file automatically created when you save your labels, are stored in your project’s
shared\labelerfolder, so that they will be included in Paratext’s send/receive. If exporting to a pre-filled IDML or MAPX file, it is recommended that you save such files under your project’slocal\figuresfolder, so that their larger size does not bog down the Send/Receive process for all users.
The tally box 7 displays the count of each status of label in the diagram.
The label group 8 displays:
- information about the currently selected label, including the major-language gloss, the source-language Biblical term, and some contextual information to aid in translation.
- an expandable vernacular label box 9 in which you can provide or edit the vernacular text for that label, and see a detailed explanation of that label’s status, in some cases with quick action buttons.
- the term renderings box 10, in which you can edit your term renderings. (Note: Term rendering history tracking is not yet implemented.)
The bottom pane 11 displays the available Scripture verses where the term is expected to appear if the translation team has used the term consistently.
Three filter buttons 12 control which verses are displayed:
- Show all verses: Shows all available verses.
- Show only verses without matching renderings: Allows you to focus on just the missing renderings.
- Show unique forms: Displays just the first occurrence of each inflected form of the rendering.
If any text in the bottom pane is selected, two additional buttons 13 become available:
- Add rendering: Adds the selected text to the term renderings box as a new rendering.
- Replace renderings and label: Replaces the contents of both the terms rendering box and the vernacular label box with the selected text.
There are two buttons at the left edge of each verse in the bottom pane 14:
- Found status:
- A green checkmark indicates the term has been found.
- A red X indicates that the term is missing from this verse. If it’s OK that it’s missing, click the red X to deny that it’s a problem.
- A green checkmark with a small red X indicates that you’ve examined the verse and denied that the missing rendering is the problem.
- Edit verse: Click the pencil icon to edit the verse in Paratext. (On Windows, Paratext should scroll to the selected verse.)
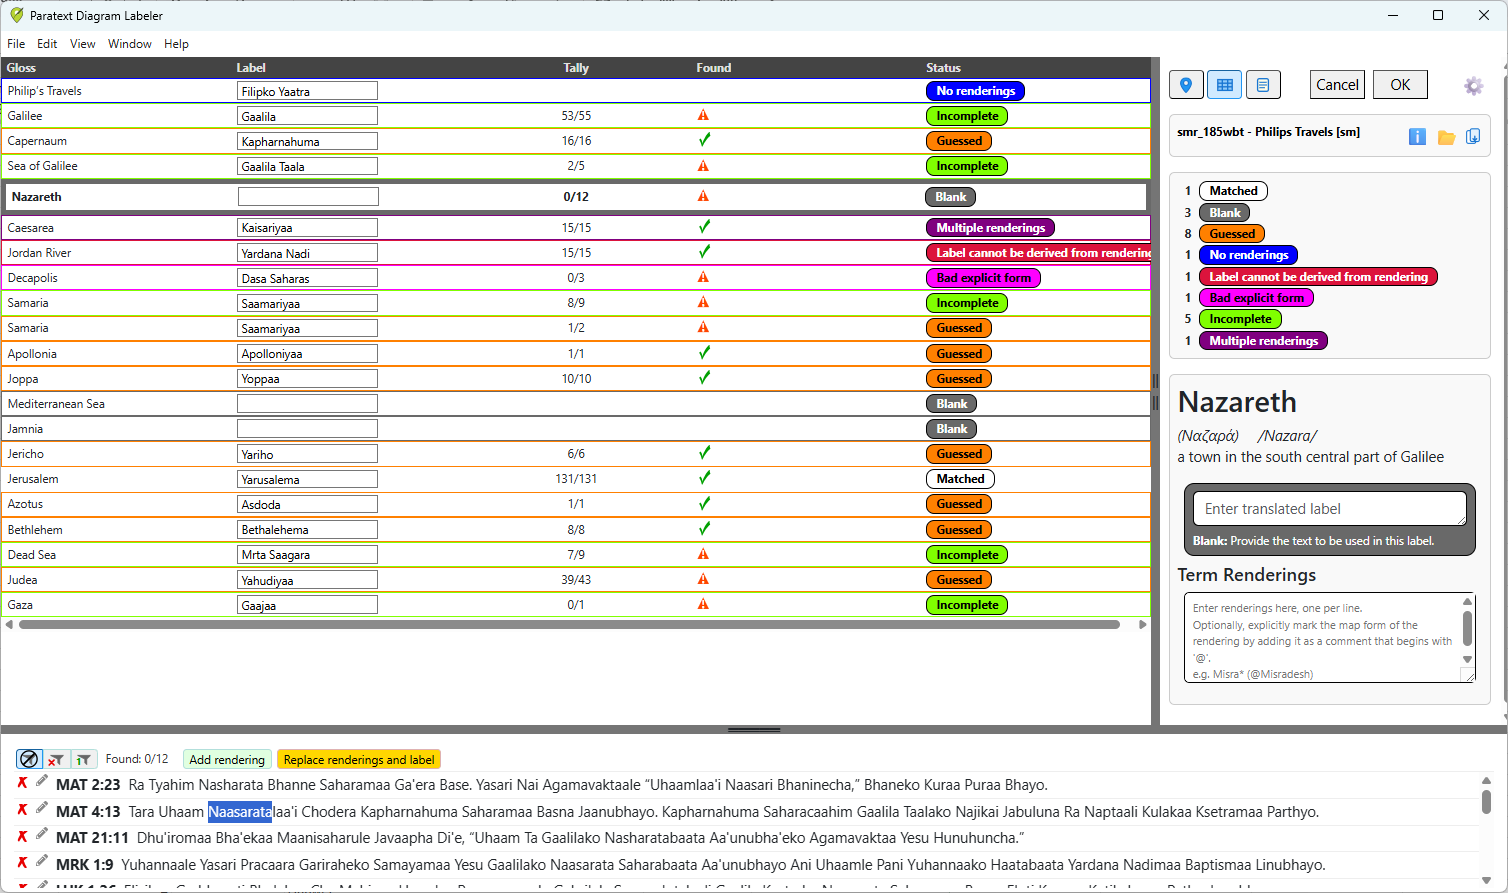
Table View
Table View is just like Map View, but with labels provided in a table instead of being positioned on an image: