Q: What is the difference between PTXprint and Publishing Assistant?
A: Publishing Assistant and PTXprint both provide typesetting features for developing scripture publications. They can produce similar publications, but have different user experiences and associated costs.
While Publishing Assistant itself is free, a typesetter must maintain an Adobe Creative Cloud subscription. Most users will also require some formal orientation in order to learn and use the InDesign and PA typesetting process effectively. A user will observe the automated typesetting process as it occurs, and can pause the process in order to directly interact with elements on the page, if necessary. Working through InDesign results in an initial typesetting process that is slower than producing a similar layout with PTXprint, although the final production quality potential remains very high.
PTXprint is a stand-alone tool that does not depend on any other commercial software. Although the user cannot visually interact with the typesetting process, the PTXprint interface provides simple to use options for adjusting the final layout, such as the size and position of illustrations, or the length of paragraph texts. Although PTXprint can be used quite effectively by dedicated scripture typesetters, it was developed primarily with mother-tongue translators in mind. It allows translators to trial different layouts, fonts and sizes and get immediate feedback which will eventually feed into the formal publication process. Practically no training is needed to get started, and nearly anyone on the team should be able to produce high quality PDFs in minutes.
Learn more about PTXprint and PubAssist: Read more…
Not sure which fits your project? Try our 2-minute decision guide →
Q: What's in the newest version?
A: If has been a while since you last updated PTXprint, it will definitely be worth your time to check out what’s changed on the
release notes page. Several of the topics mentioned on the page have links to step by step How To Use pages.
Q: Where is the training material for PTXprint located?
A: You can watch a presentation on what is possible in this
overview slideshow, and if you need ideas on how to achieve some of the more complicated layouts, this
follow-up presentation should help. Both of these are also accessible on the EMDC website:
Overview and
Details. Note that the
What’s new page has links to short How to… pages for some of the more complicated tasks.
Q: Does Paratext need to be running for PTXprint to be used?
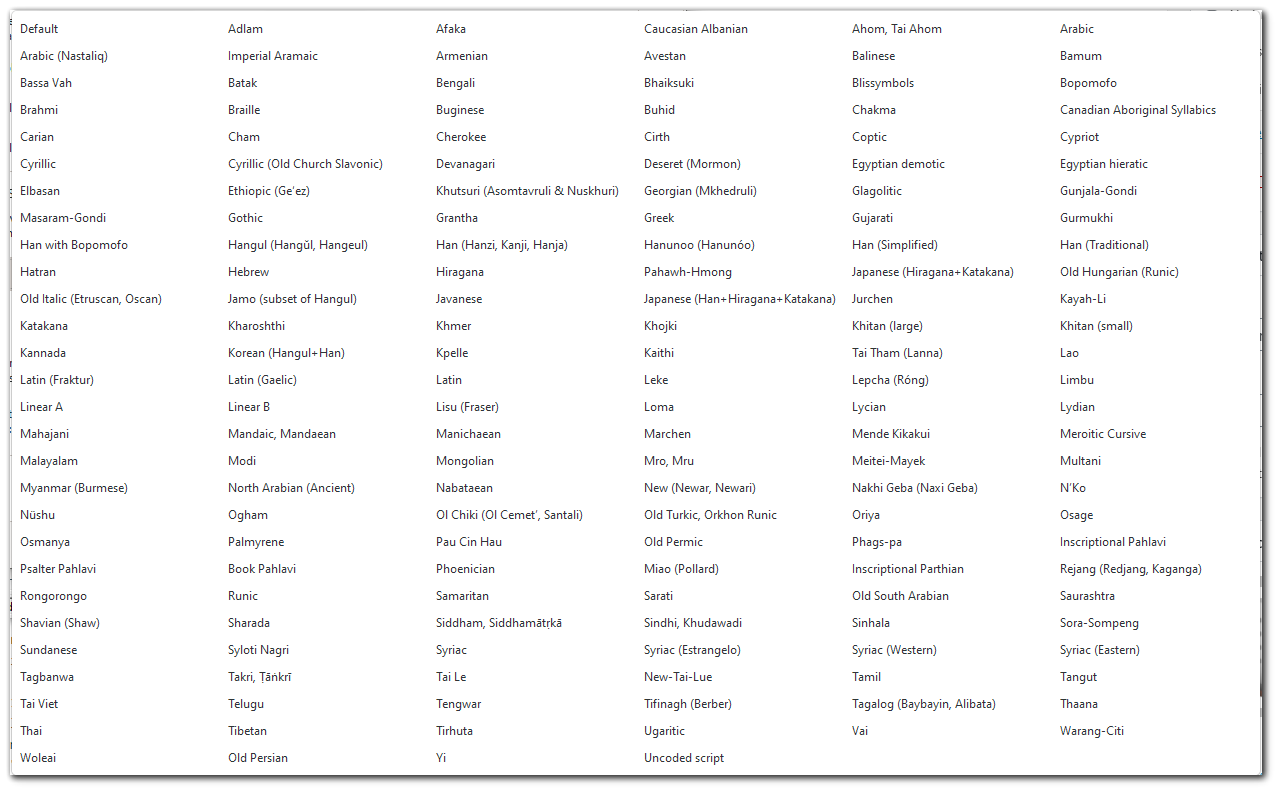
A: No, it makes no difference whether Paratext is open or not. PTXprint is Paratext-aware, but not dependent on it. It accesses the USFM and settings files independently to produce the PDF output. It is assumed that the integrity of the data has been checked in Paratext (preferably version 8 or 9), but PTXprint will work even without Paratext installed. Q: Which scripts does PTXprint support?
A: In theory, all the known writing systems encoded in Unicode are supported. This includes the following scripts (click to zoom):
Using PTXprint
Q: How do I incorporate the key terms as footnotes? We would like to do comprehension checking while we’re also checking the study aids.
A: Provided that you have used Paratext’s standard glossary markup, just select the option “Show All Glossary Entries as Footnotes” located on the Notes+Refs tab.
Q: How do I get the header to display the book and reference range in another language or script?
A: You can use the
\h1 code for the 2nd language/script book name and then modify the header settings. It is a little bit more complicated than just clicking a few options, but the process has been documented in more detail in
this GitHub issue.
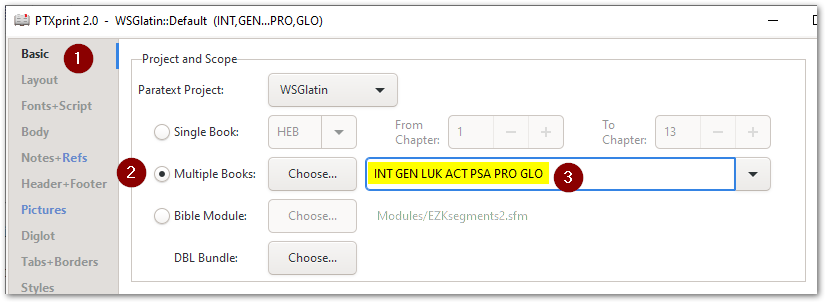
Q: How do I get the books to print in a different order?
A: You can use modify the order of books by typing them into the option shown here:
Q: Why is there a large blank space at the bottom of some pages?
A: PTXprint avoids widows (one line of a paragraph left alone at the end of a column) and orphans (a single line at the start of a column from the final paragraph of the previous column) and by default will always balance text in 2-column layouts. Doing so, it must obey these rules:
- A picture must appear on the same page as its anchor verse
- Footnotes and Cross-references must appear at the bottom of the same page as their anchor word or phrase
- All the lines of headings (including any parallel passage references) must be kept together with at least 2 lines of the following text
PTXprint ensures all the conditions above are met at all times; in doing so it is occasionally unable to fill the page completely with the text. This requires us to manually intervene.
For a quick draft layout, the fastest way to accomplish this is to allow for Unbalanced lines: (1) Go to the Layout page, near the top right corner is the option to allow Unbalanced lines. (2) set the number of “Unbalanced Lines (max)” to something like 5.
For a more professional typesetting finish, we will soon be releasing our more detailed tutorial on “How to Fill the Page”.
Q: Why can't I change the font size or the line spacing for the main paragraph \p marker? I can see it, but it is disabled and grayed out, so I can't change it.
A: This is because the \p marker is special and foundational for all the other markers. The place to change (underlying) Base Font Size and Base Line Spacing is on the Layout page as shown here (below). All other markers’ font sizes will update accordingly, relative to the Base Font Size, so there is no need to update them manually.

Handling Illustrations
Q: Why don’t I get any pictures? I have checked the option to include Pictures, but I don't see any pictures in my PDF.
A: There are many reasons that this could happen, but the most common reason is that “Include Pictures” has not been checked. If after checking (enabling) that option and still nothing appears in the table for the Picture List (or PicList for short), then click on the Generate… button to create the list of illustrations to be used (as seen in the screenshot of the next FAQ). The list is generated from \fig … \fig* markup in your Paratext USFM scripture files. If you haven’t specified any illustrations in Paratext, then you won’t see any pictures listed here either. (You can add images here one at a time, but it isn’t recommended.)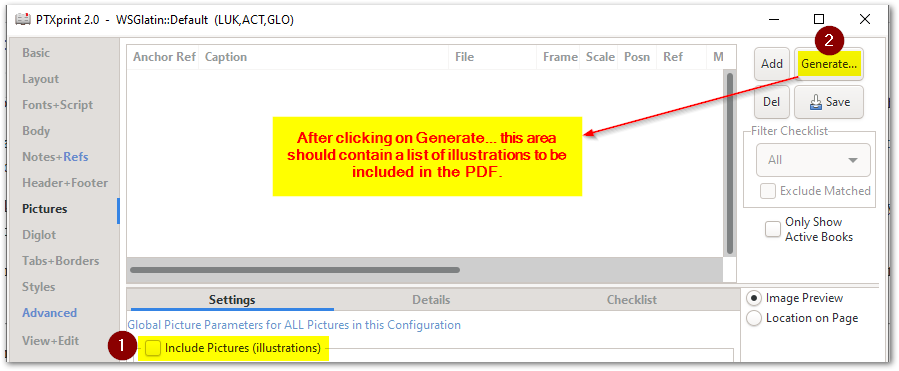
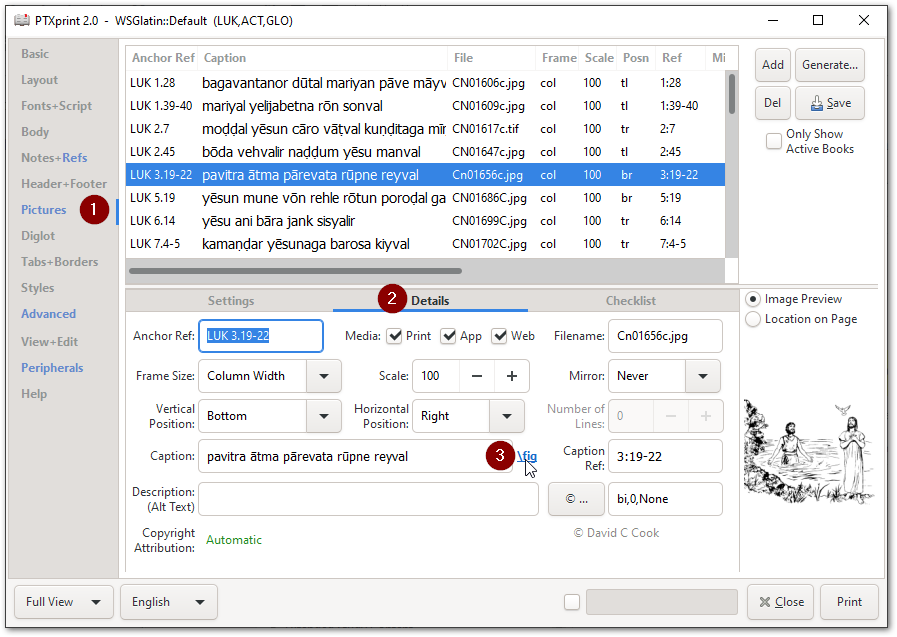
Q: How can I make the captions for my illustrations look different to the main text?
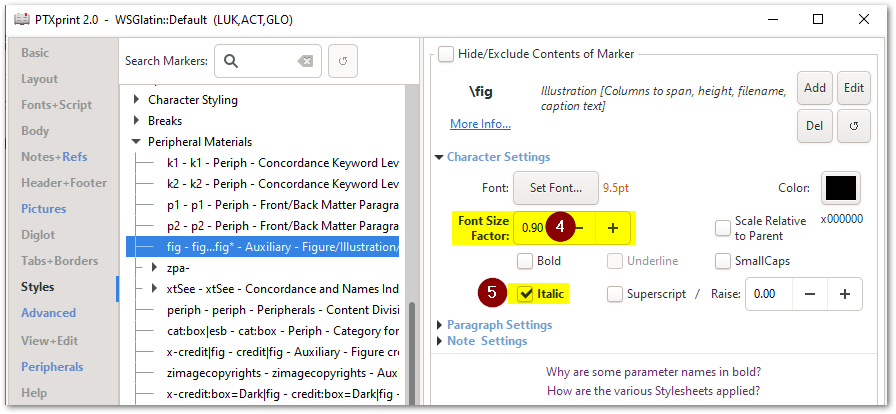
A: These kinds of changes are easily made by adjusting at style settings for the caption. The easiest way to get to the appropriate style is to start on the Pictures page, and click on the \fig link at the end of the Caption box:
This should take you right to the \fig marker settings on the Styles tab where you can make the appropriate changes as shown below:
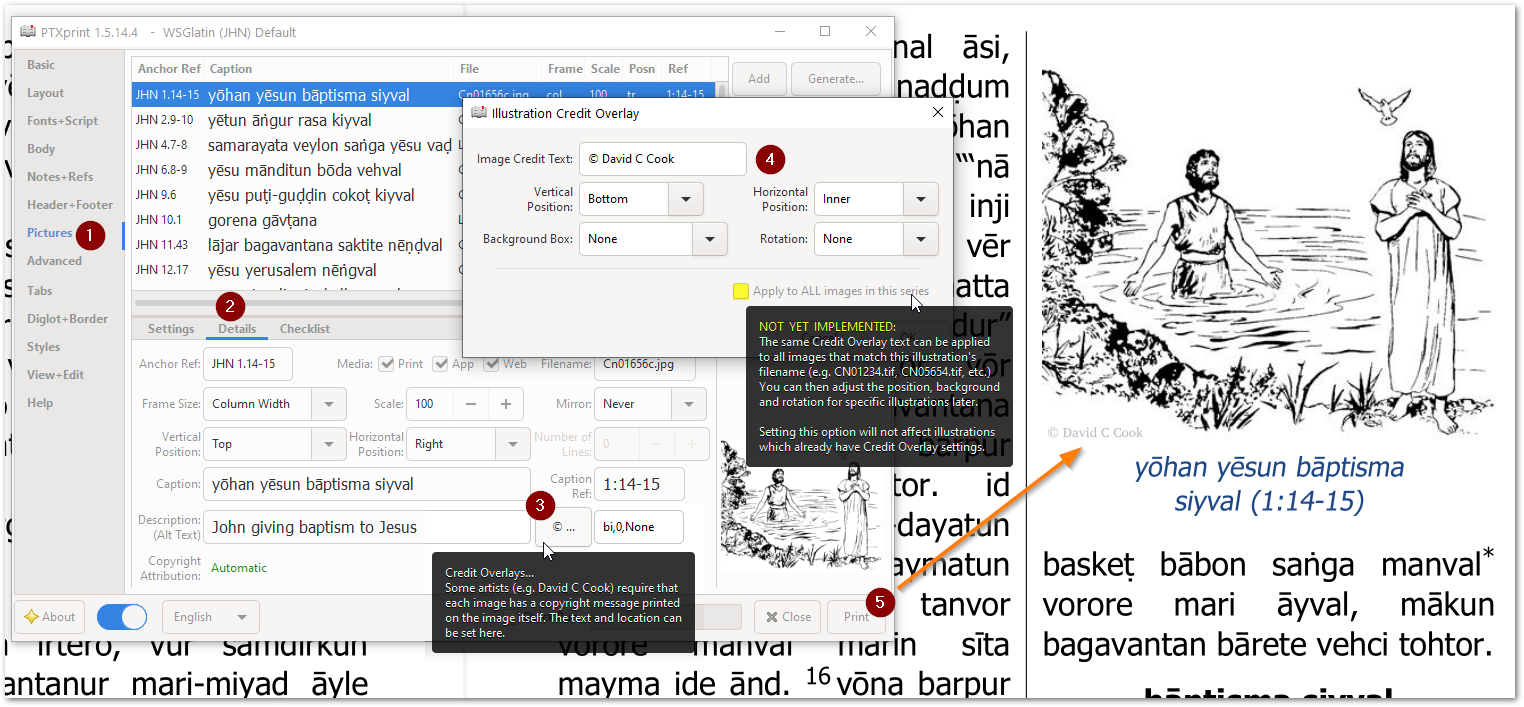
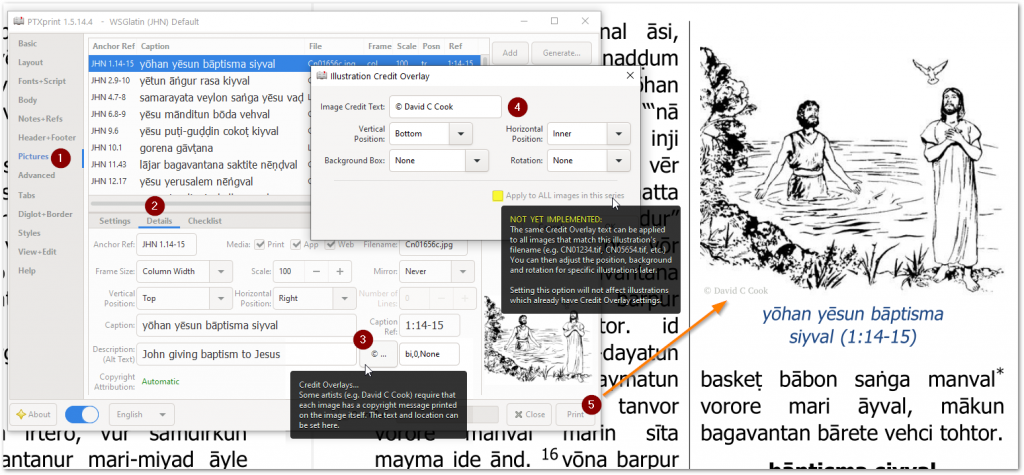
Q: How can I put credit overlays on my illustrations to comply with copyright and usage requirements?
A: There is a button on the Pictures tab, under the Details section. Use that as described in the image below:
For more in-depth and technical information, please refer to the PTX2PDF FAQ page on GitHub.